What is GatsbyJS
Gatsby is a free, open-source framework based on React that helps developers build high-performance applications and websites.
In practice, developers create templates for fixed pages or pages managed by content management tools such as WordPress or Contentful, and after running a build process the content is applied to the templates and the pages are generated.
The main advantages we identified in the websites we develop using GatsbyJS are:
excellent initial performance, using Gatsby Image, all images are already optimized, generating various sizes encoded in JPEG and WEBP. high indexability, since “index.html” pages are generated for all the site’s URLs with content ready for indexing. progressive loading of subsequent pages, after loading any “index.html” of the site, the other pages are generated dynamically through javascript, creating an incomparable perception of performance. high security, unlike WordPress sites that are continuous targets of hacker attacks, static sites are naturally immune to this type of vulnerability. very low operational cost, because it allows the use of a combination of Amazon Web Services with no fixed monthly cost. flexibility in data sources, being able to use a local WordPress to manage the content, Contentful, or even markdown files in git repositories.
How to Create a Basic Website in Gatsby
Creating a website using GatsbyJS is very simple; just install gatsby-cli, Gatsby’s build tool, using npm, as shown below:
npm install -g gatsby-cli
Next, you can create the project using:
gatsby new gatsby-site
This command will create a clone of a gatsby project from the model provided at https://github.com/gatsbyjs/gatsby-starter-default.git, then run the following:
cd gatsby-site gatsby develop
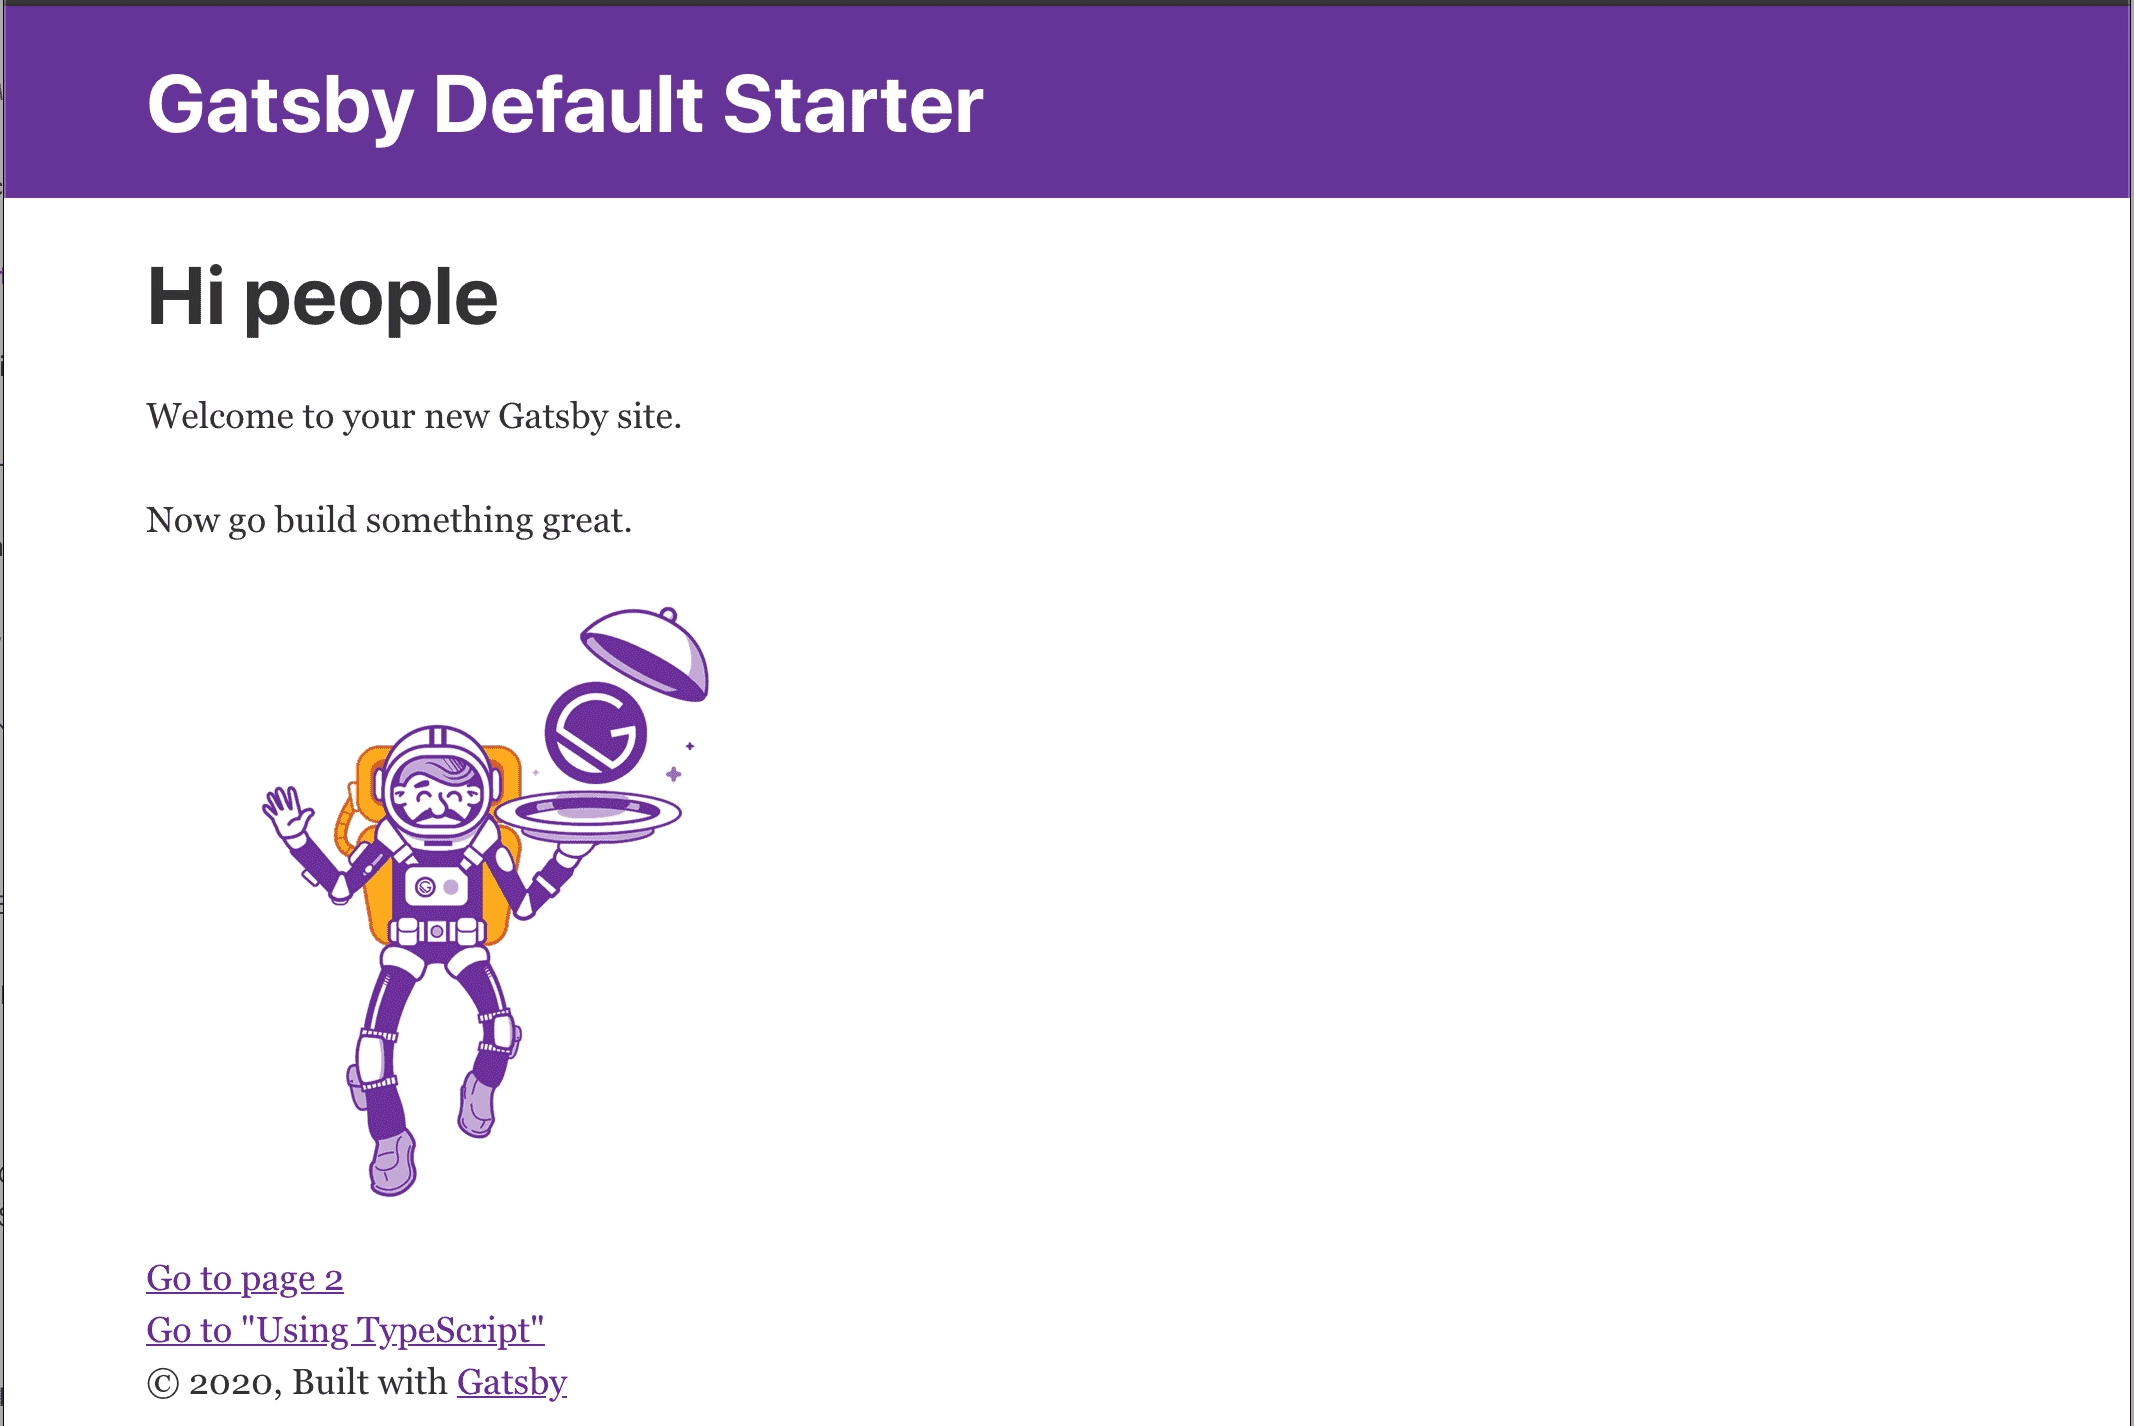
After running gatsby develop, the gatsby build engine in development mode will be activated, and you will already be able to view a basic gatsby site by accessing the URL http://localhost:8000; you will see an image like the one below:
To deploy this project on AWS, you need to meet the following requirements:
Have an AWS (Amazon Web Services) account Configure a domain using Amazon Route53 Create a free https certificate using AWS Certificate Manager After completing these steps, you can create the CloudDog solution for gatsby, which will provision all the infrastructure needed to run the site.
Basic GatsbyJS Architecture
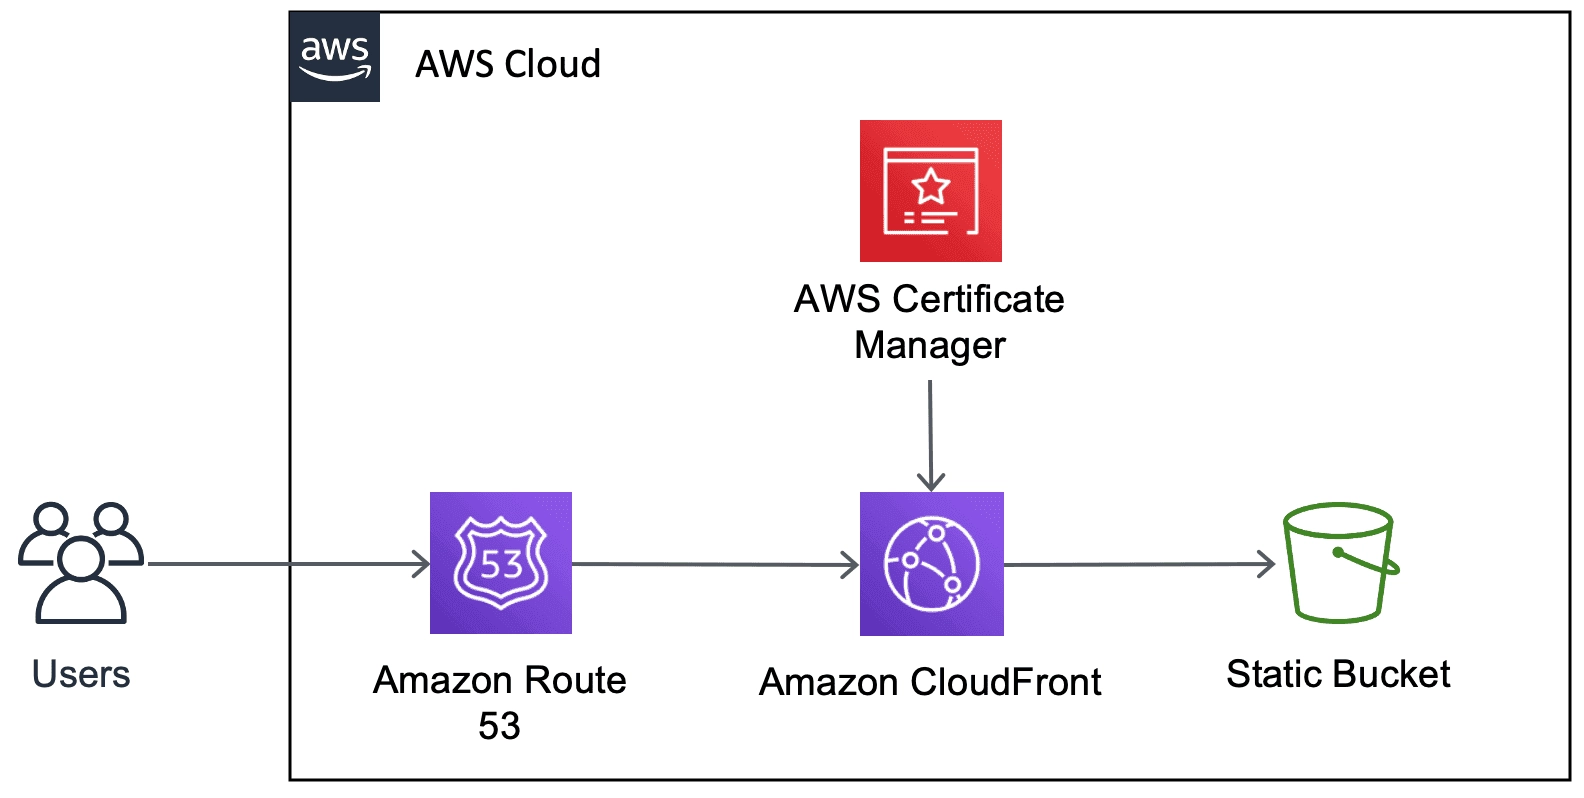
When creating an instance of the CloudDog solution, you will be creating a CloudFormation Stack with the following resources:
An Amazon CloudFront distribution configured to resolve the /index.html of all the site’s URLs, using the HTTPS Certificate. Creation of a bucket for the static content with a policy to allow reading only by the Amazon CloudFront distribution. It will create the hostname record in Route53 to point to the Amazon CloudFront distribution. Creation of a Role and Lambda Edge used in the Distribution configuration. In the end, the architecture diagram looks like the drawing below:
Provision the Solution with a CloudFormation Stack
To provision the solution with a CloudFormation Stack, you have 2 options:
Option 1: provision by clicking the quick link
You can start creating the solution by accessing the quick link Create Gatsby Website, which will direct you to the creation page; the information must be filled in similarly to Option 2, below, with the difference being that all the information will be available on the same screen.
Option 2: provision the stack step by step
To provision the stack, you must first make sure you are logged in to the AWS account and with the us-east-1 (North Virginia) region selected. Then search for the CloudFormation service in the Services menu and select the option to create the stack using a template from the Amazon S3 URL, with the path https://s3.amazonaws.com/clouddog-solutions-us-east-1/infra/static-website/gatsbyjs/simple-template.yml, then select Next.
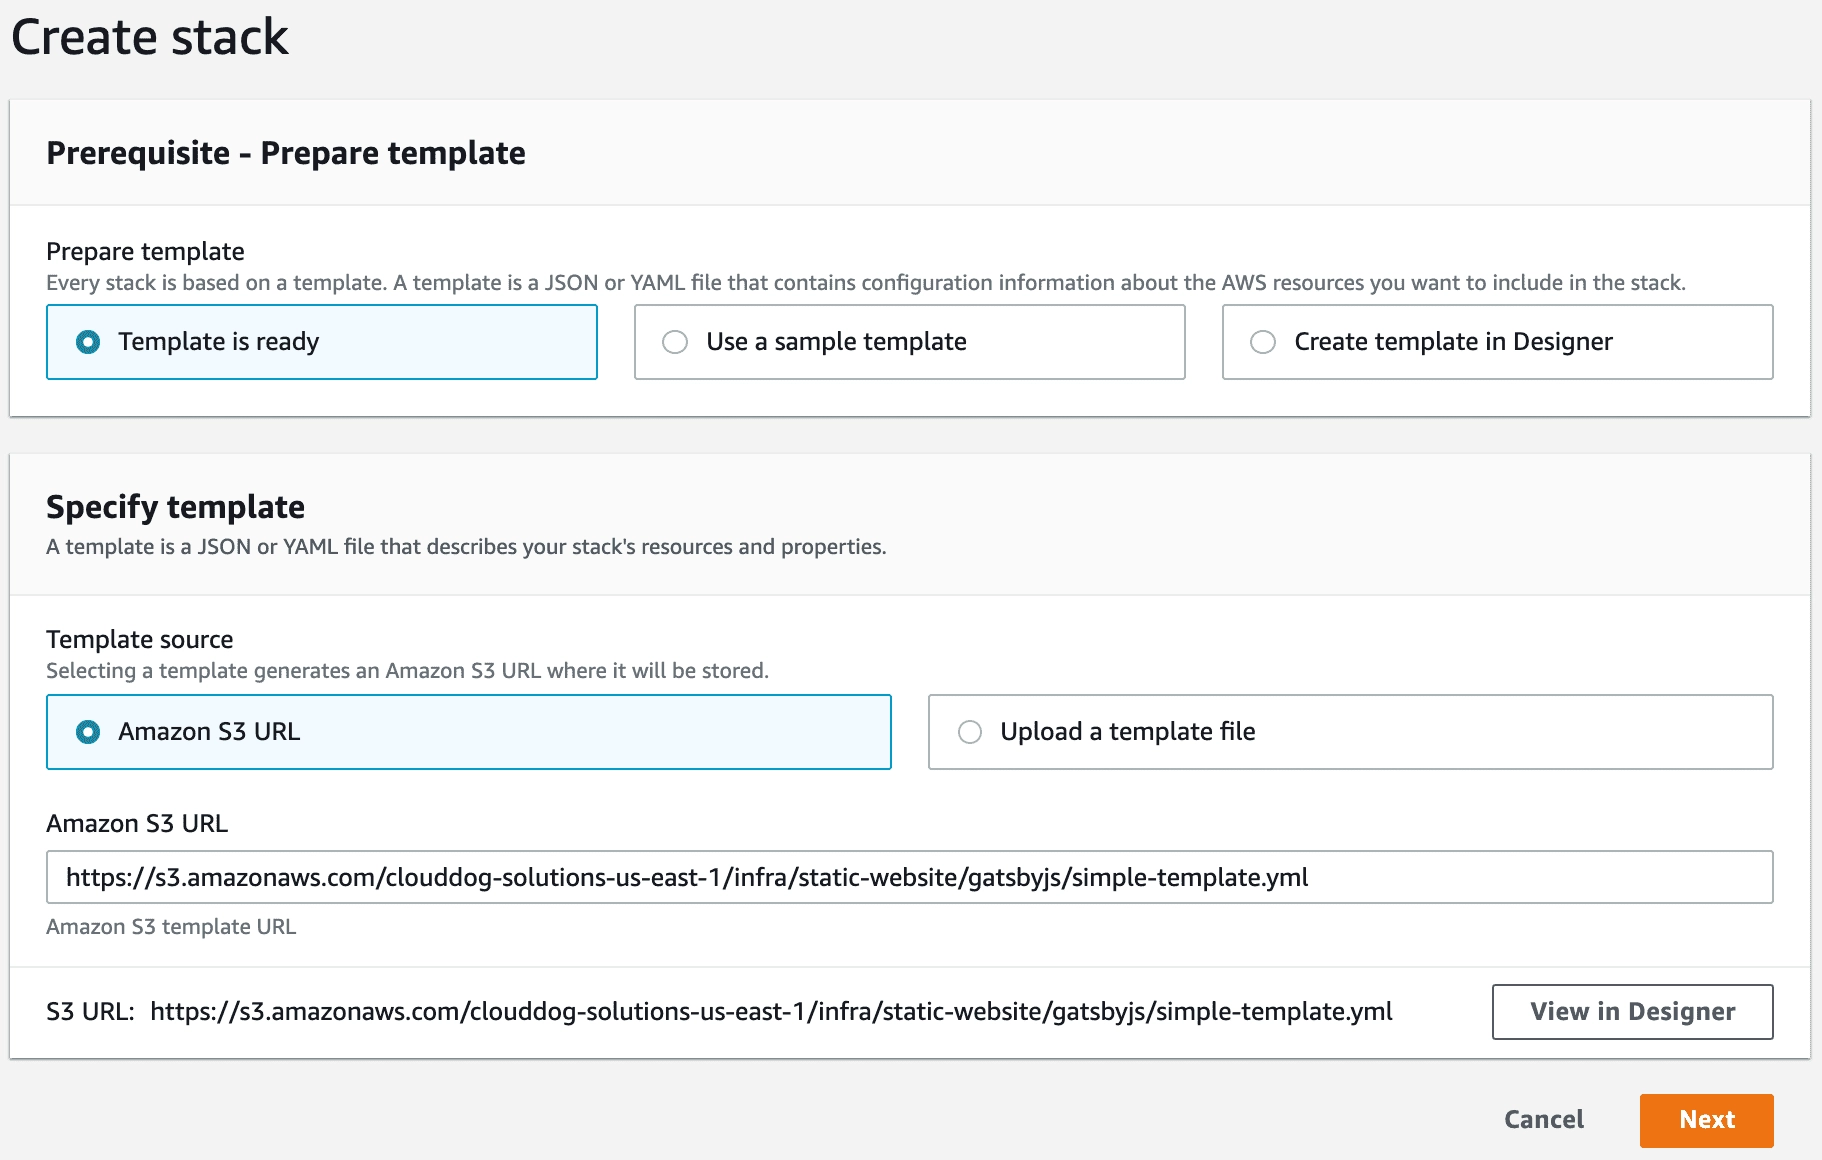
Next, configure the Stack Name and the other parameters with the information:
Stack Name: gatsby-site (or any other name as long as it does not have special characters) Hosted Zone Name: The Id of your hosted zone in Route53; in our example it shows the Id of the Hosted Zone of the domain labs.clouddog.com.br (adapt it to yours). Website Host Name: the full name of the host where the solution will be made available; in this case it must belong to the domain, in the example gastby-website.labs.clouddog.com.br (adapt it to yours). CertificateArn: is the ARN code of the certificate created for your domain. As shown below:
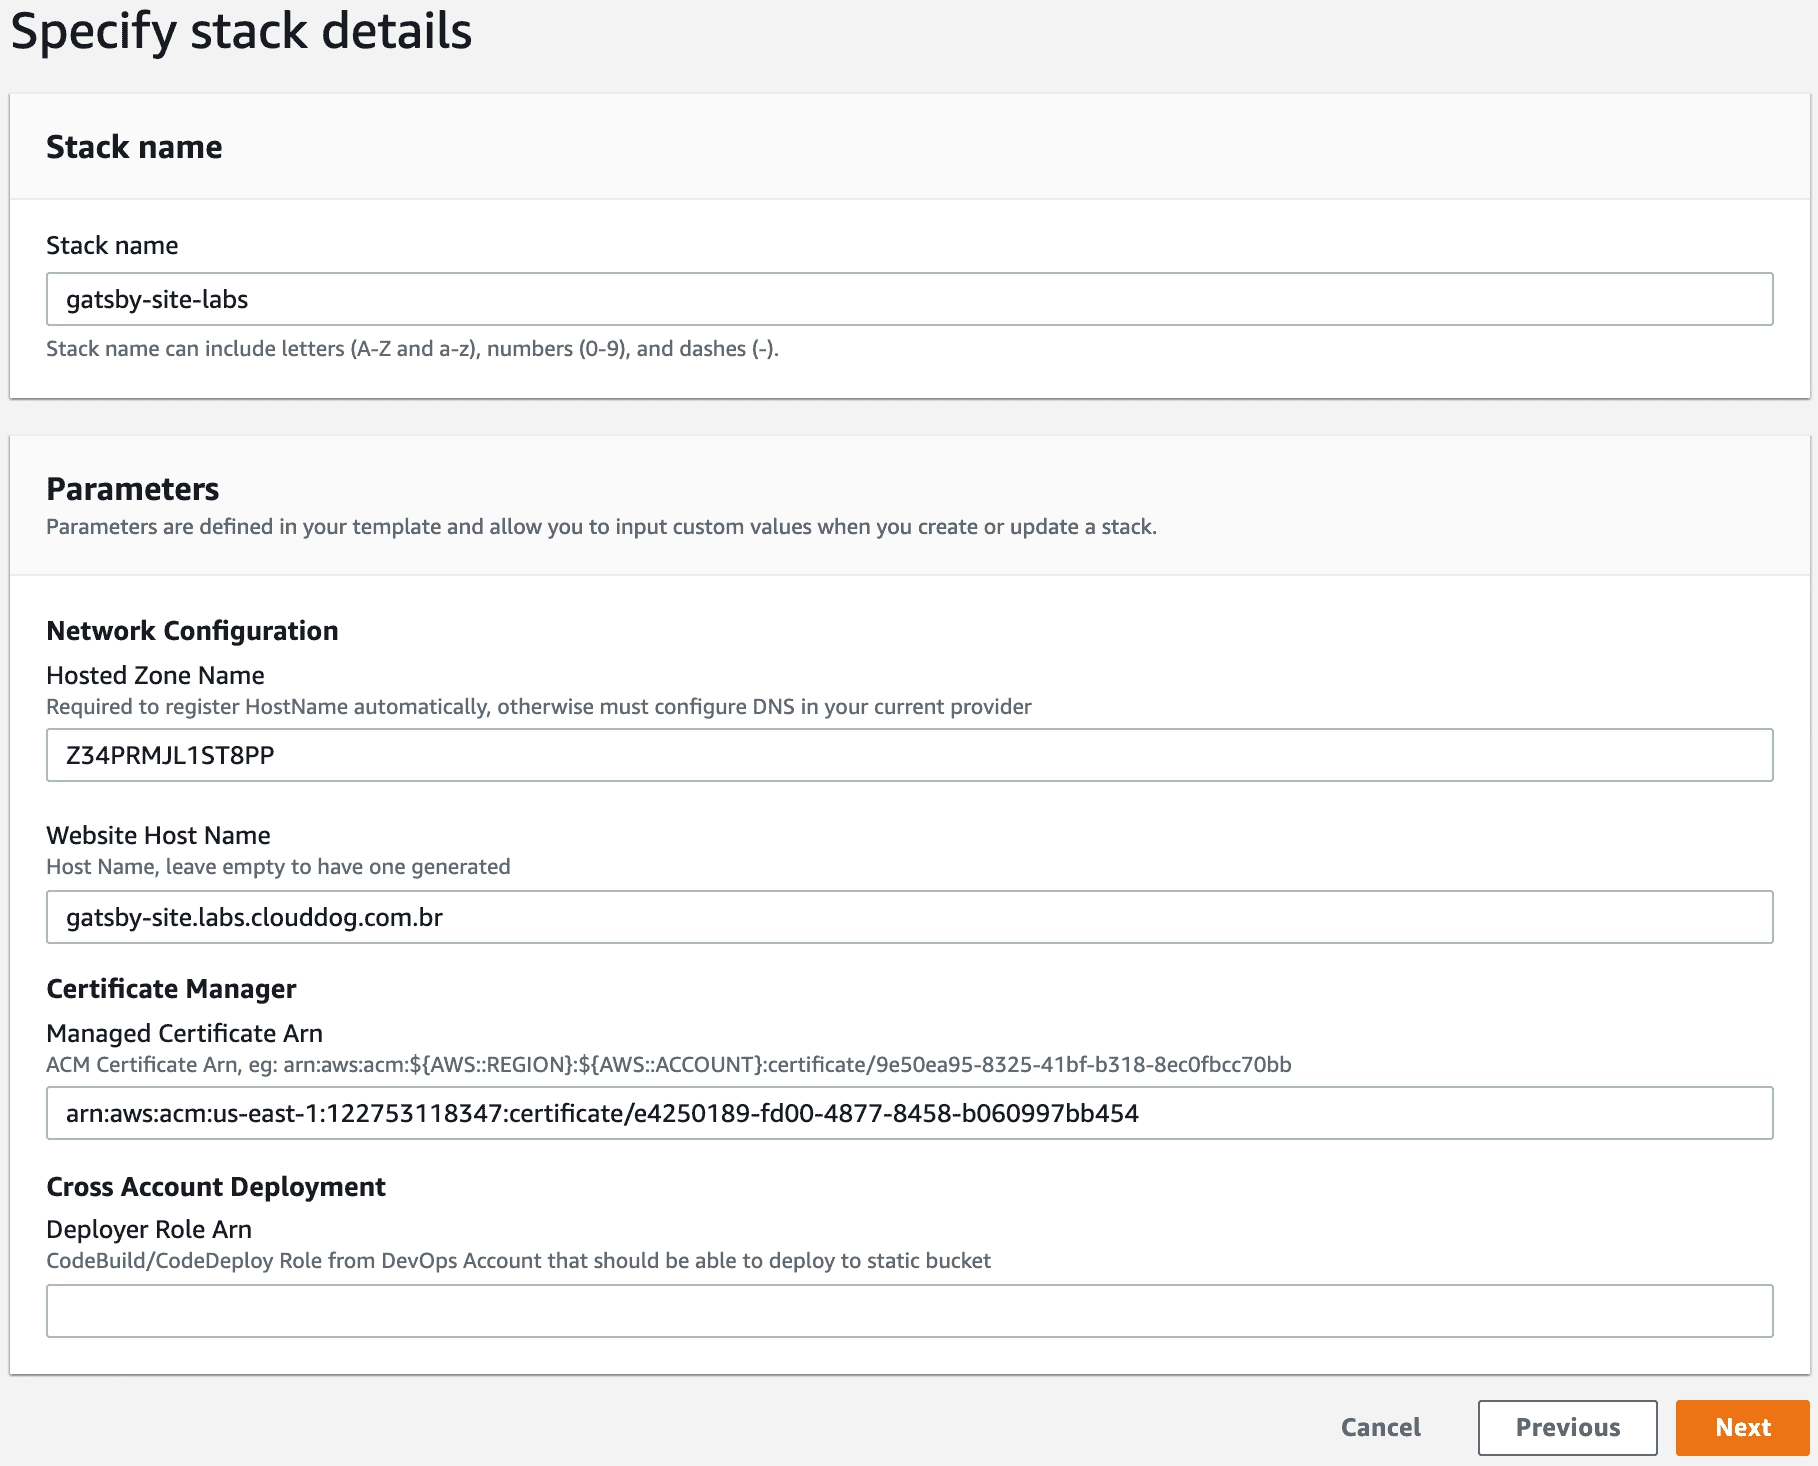
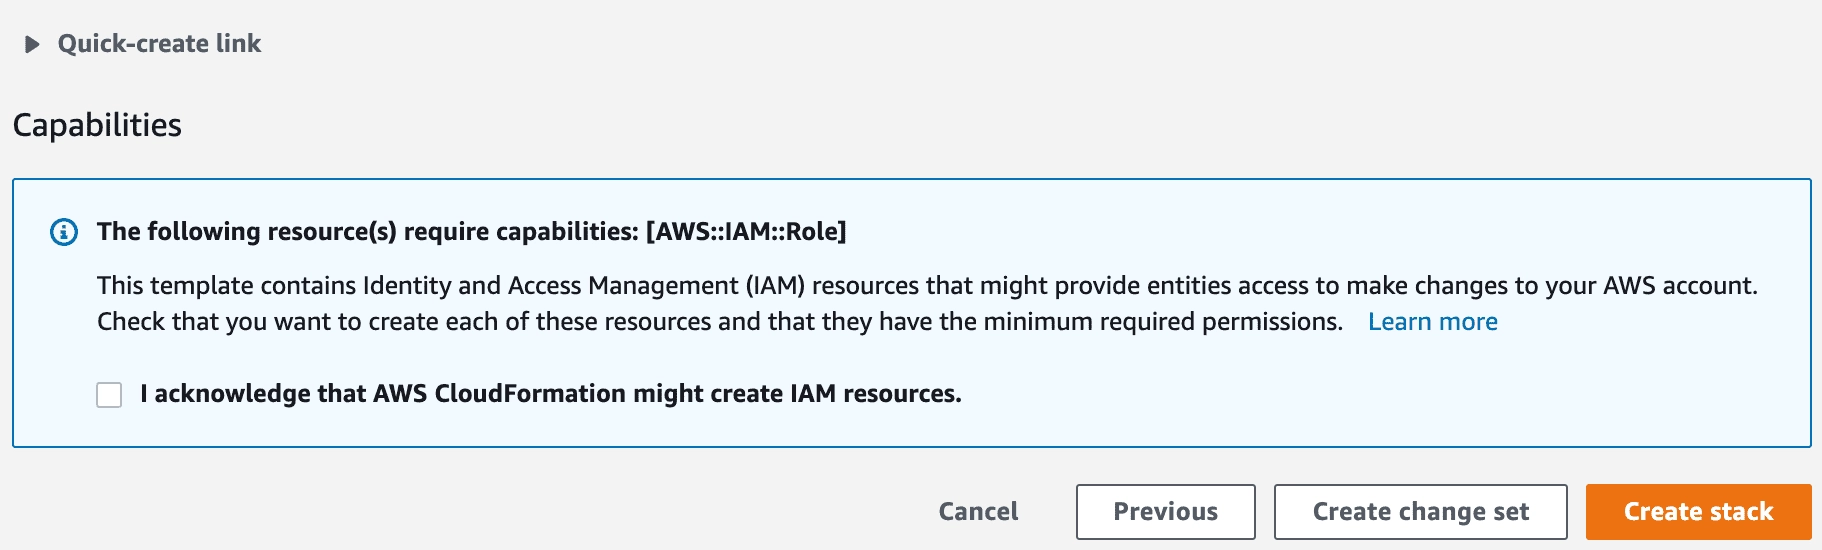
Next, select the Next option and, on the last screen, make sure you have checked the IAM checkbox as shown below:
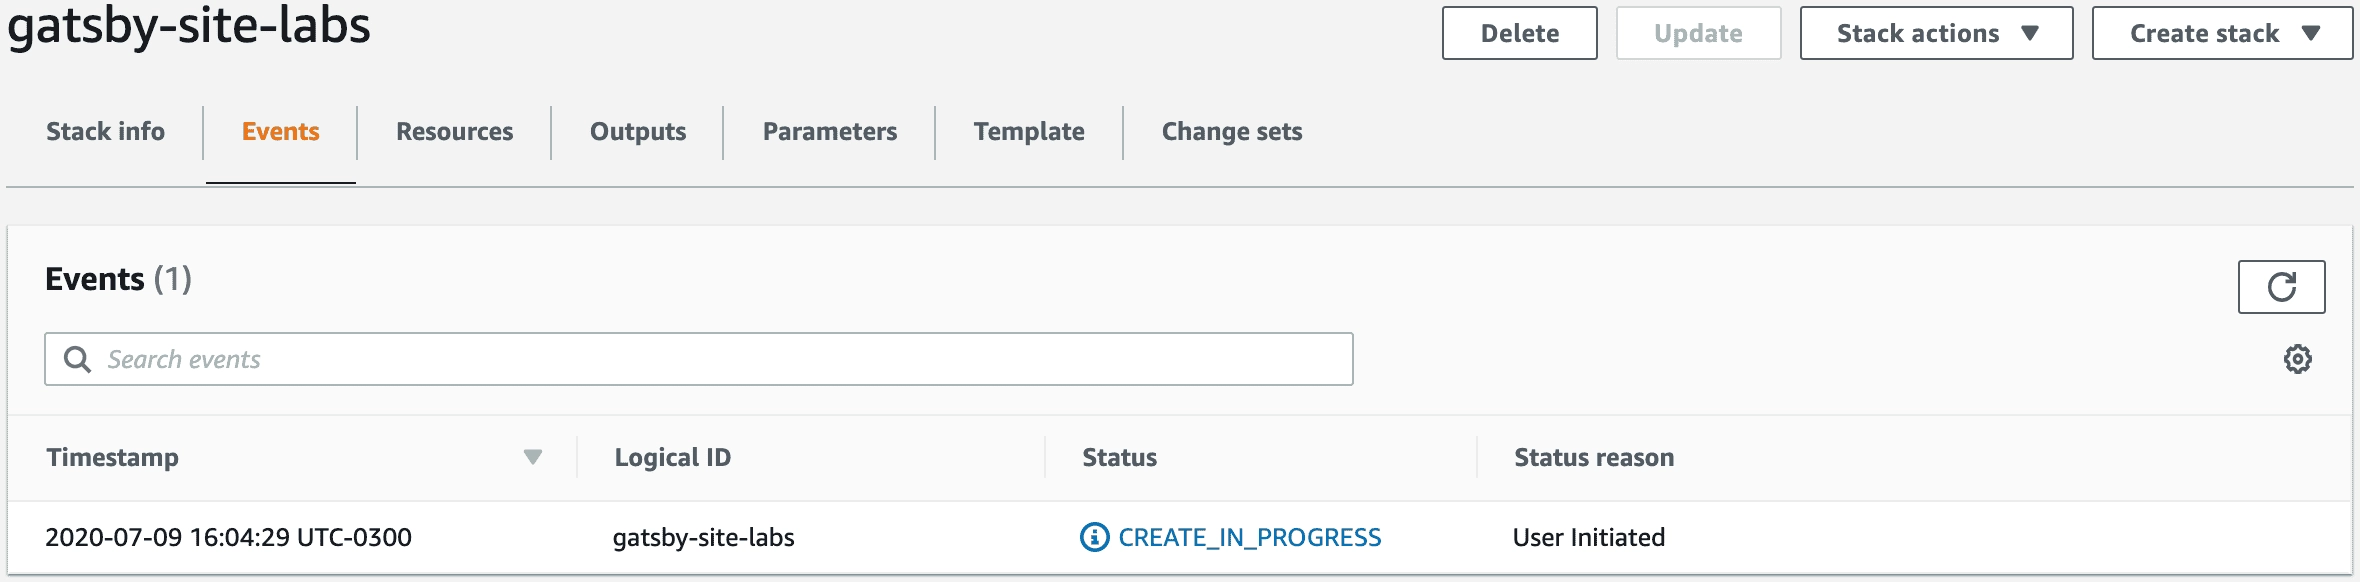
Then the stack creation screen will appear:
At the end of the Stack creation, you will be able to check all the resources provisioned by the solution:
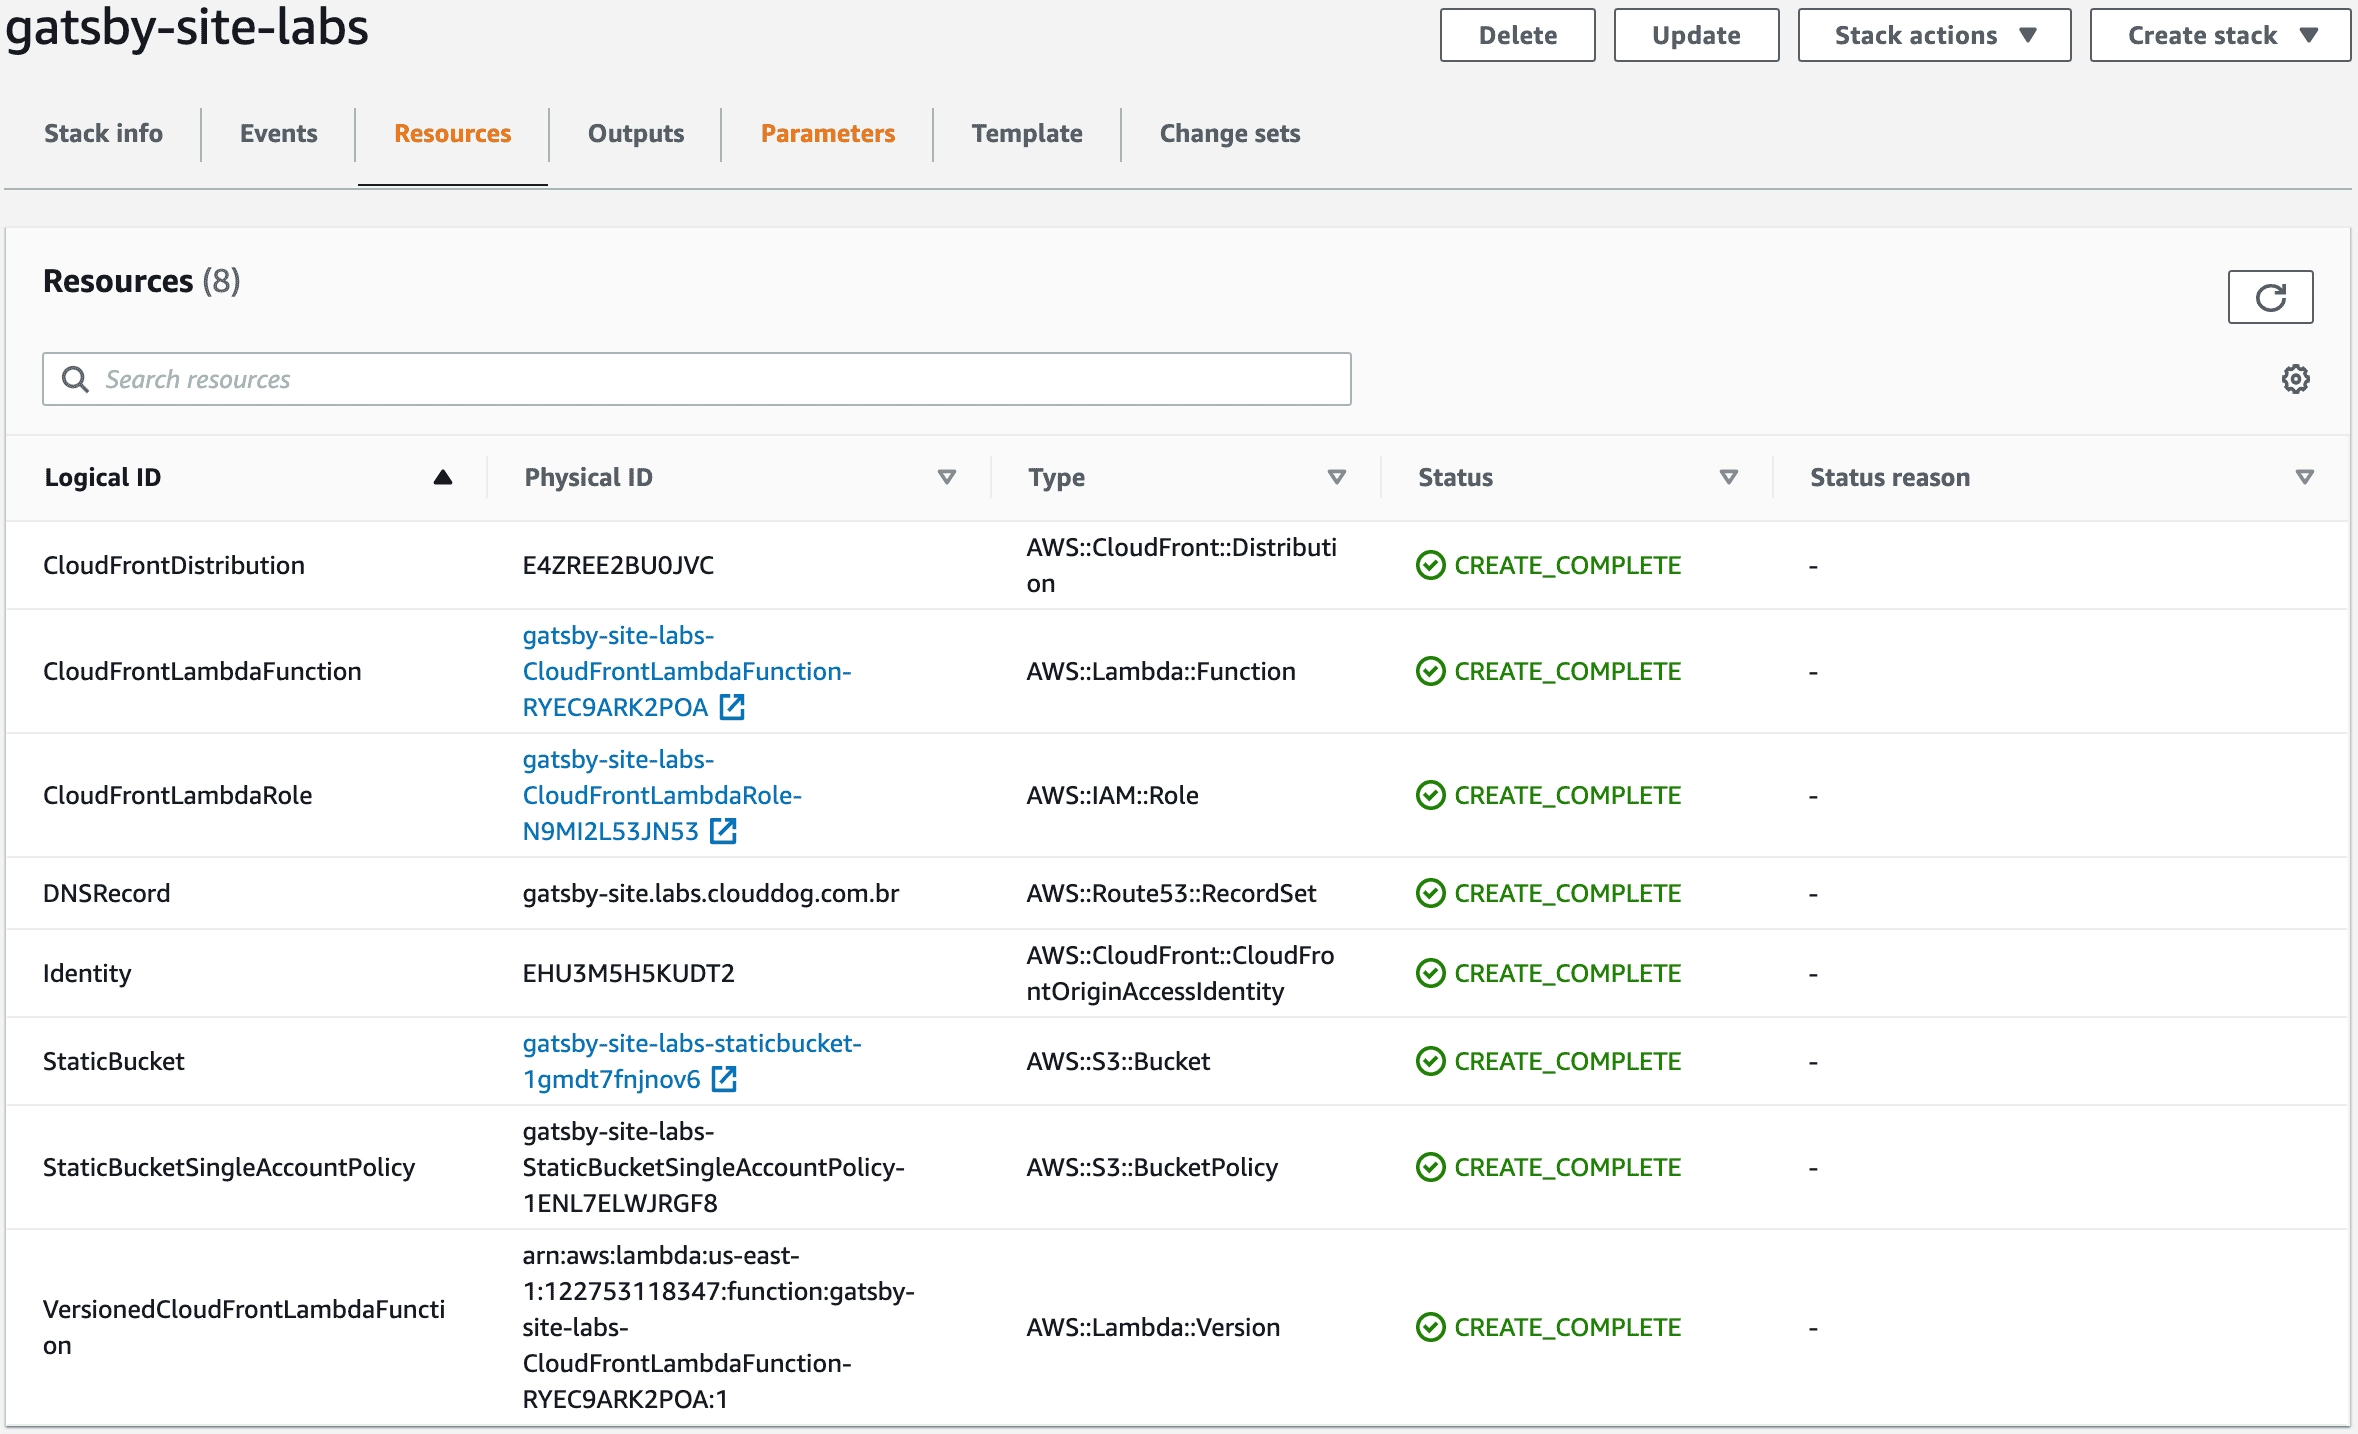
You will also be able to check some outputs of this Stack. These values are important so that you can load the gatsby site and access the published site.
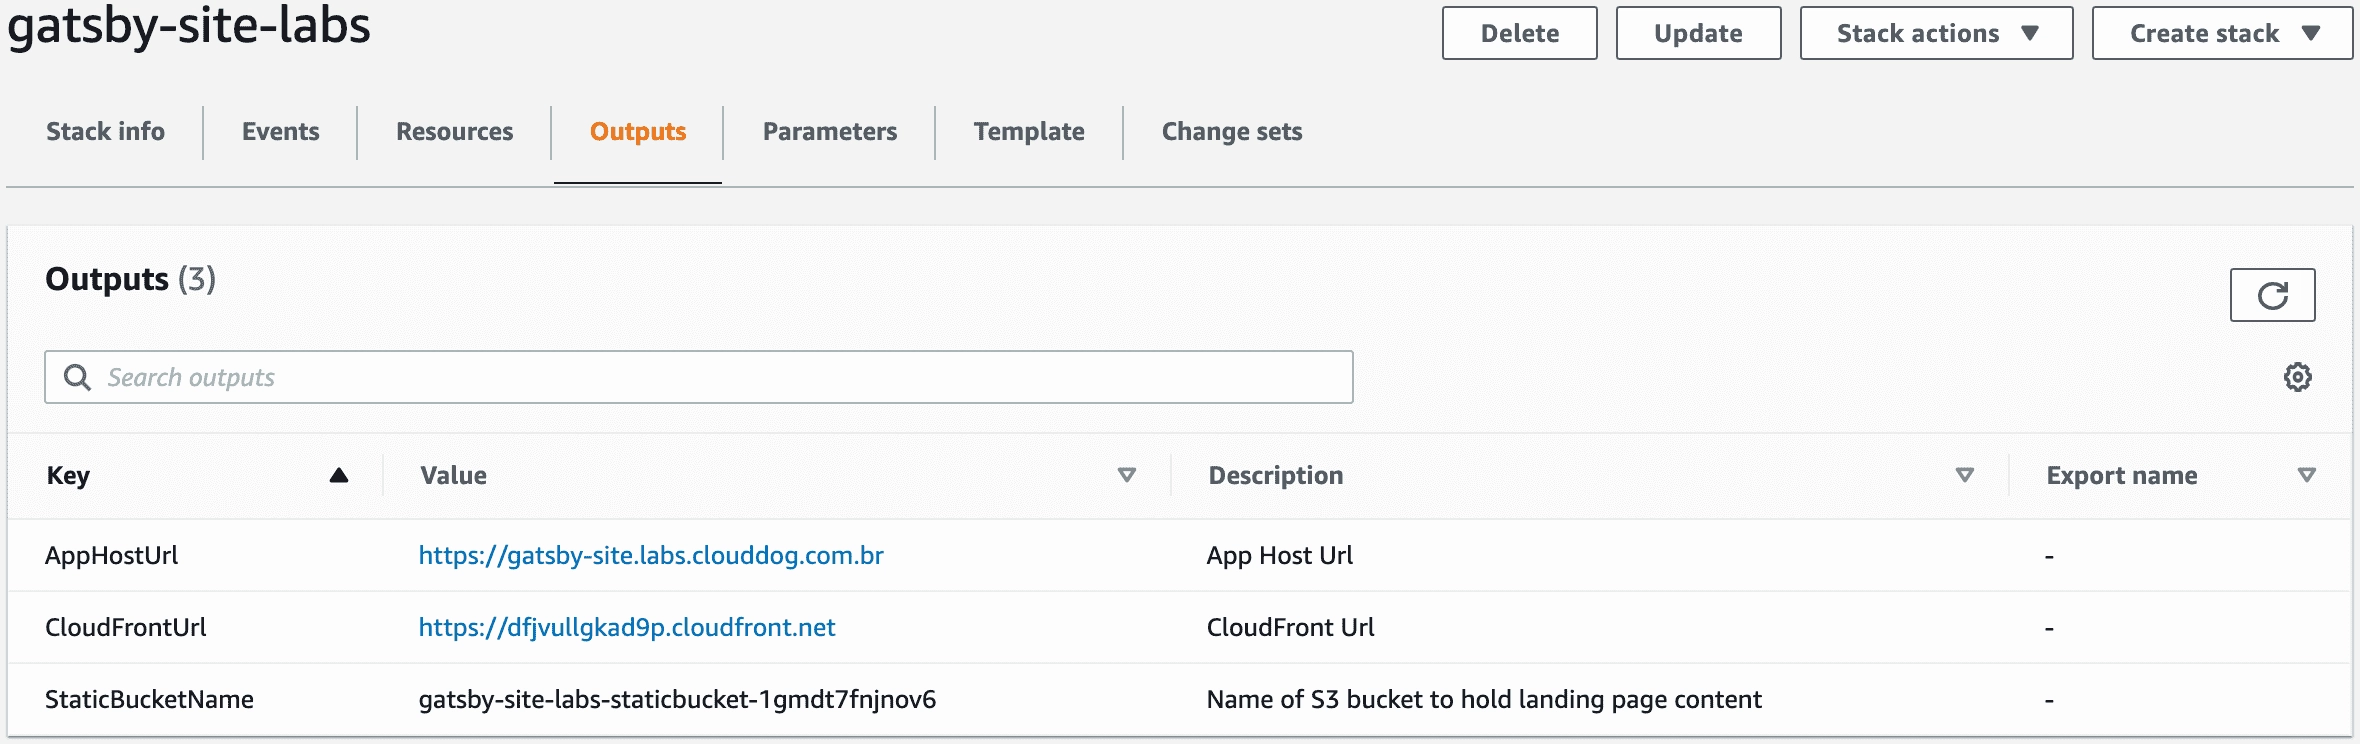
Copy the StaticBucketName to be used within the project in the deployment process.
Load the Site into the S3 Bucket
Back in the project, run the command:
npm i gatsby-plugin-s3 –save-dev
Then add the following configuration to the gatsby-config.js file
To make the deployment procedures easier, you can also include the script in package.json as shown below:
"scripts": { "build": "gatsby build", "develop": "gatsby develop", "format": "prettier --write "**/*.{js,jsx,ts,tsx,json,md}"", "start": "npm run develop", "serve": "gatsby serve", "clean": "gatsby clean", "test": "echo "Write tests! -> https://gatsby.dev/unit-testing" && exit 1", "deploy": "gatsby-plugin-s3 deploy --yes" },Run the command to build the site, already optimizing it for the production environment:
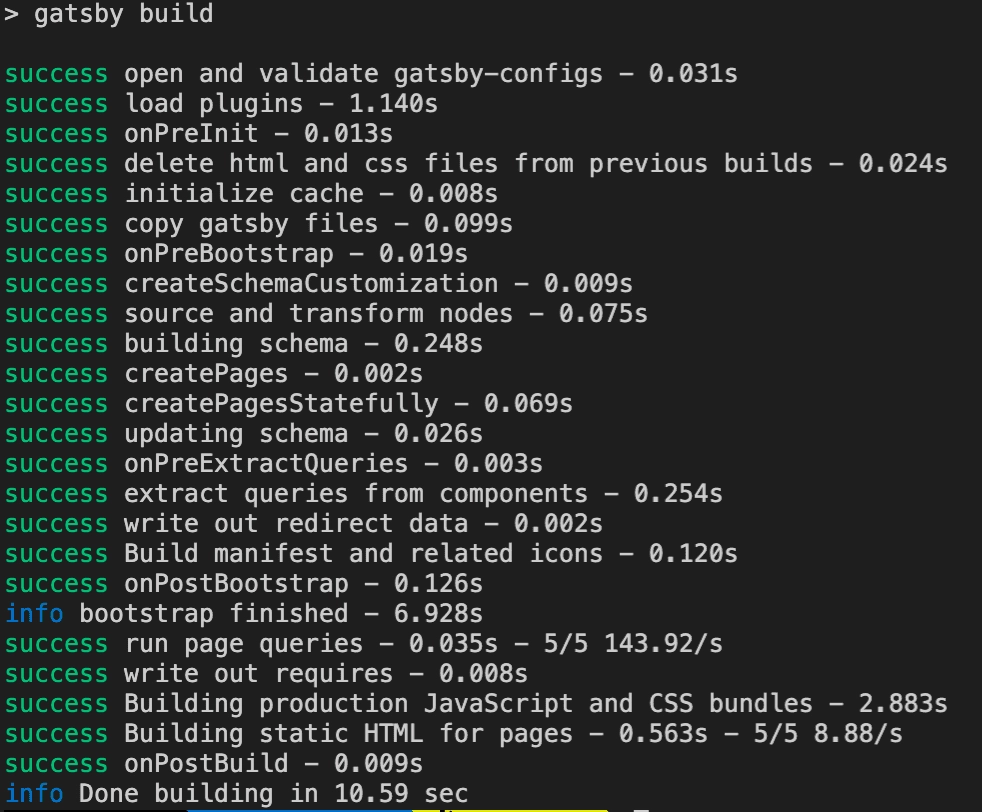
npm run build
You should see an output similar to the one below:
Configure the Amazon Web Services access credentials in your terminal with your data:
AWS_ACCESS_KEY_ID=xxxx AWS_SECRET_ACCESS_KEY=xxxx
Then run the deploy:
npm run deploy

Validating the Solution
After the deploy, you can already check the site at the URL provided after the Stack creation in the AppHostUrl parameter, which in our example is the Summary.
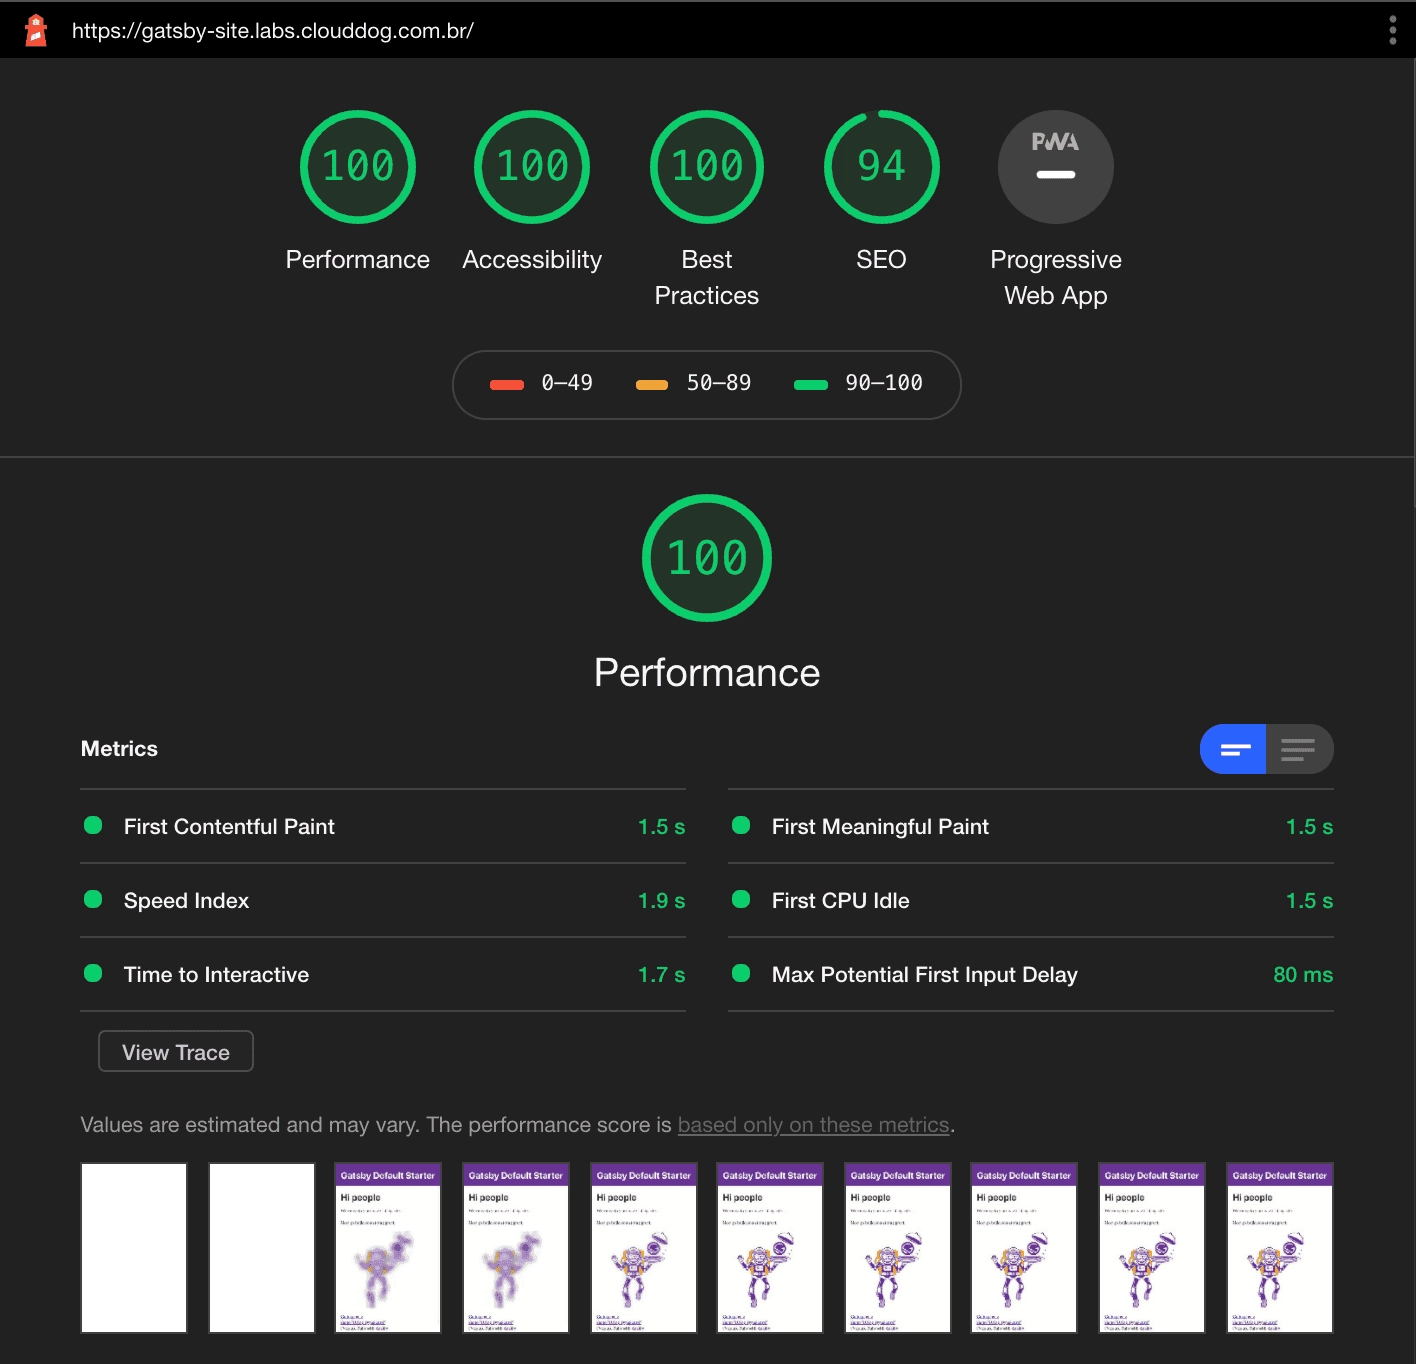
To make sure everything went well and the performance is within expectations, you can open the lighthouse tool within Google Chrome and analyze the page.
Summary
In this post we showed step by step how to create a simple project using GatsbyJS and how to deploy the site on an S3 Bucket and Amazon CloudFront, using an AWS CloudFormation template with all the resources pre-configured.