


Amazon Personalize is a machine learning service with which developers can provide individualized recommendations to the customers using their applications, based on user behavior in real time. A practical example is recommending similar items in a catalog, such as: Users who watched movie ‘X’ also watched ‘Y’
How Does It Work?
"For recommendations to be made, Amazon Personalize uses a machine learning model that is trained with the data provided (this can be through a csv file or in real time from events generated by users). A trained model is known as a solution version, which will later be used in a campaign within Personalize where users will receive the recommendations. [Learn More.](https://docs.aws.amazon.com/pt_br/personalize/latest/dg/how-it-works.html#how-it-works-workflow)"Example: A campaign can show movie recommendations on a website or application where the title shown is based on viewing habits that are part of the dataset.
Note: You are expected to have an account created and access to the AWS console.
Initial Steps
Create an IAM service role to allow Personalize to access your resources. A. Log in to the AWS Console and go to IAM. B. Select Roles. C. Click Create Role. D. Under Select type of trusted entity, select AWS Service. E. Find the Personalize service and select it. F. Click Next. G. Under Attach permissions policies, choose AmazonPersonalizeFullAccess and CloudWatchFullAccess. H. Choose Next. (There is no need to add Tags. Select Next: Review.). I. In the Review section, under Role Name, enter a name for the role (example: PersonalizeRole) and click Create Role. J. Open the role summary page and copy the ARN (you will need it later).
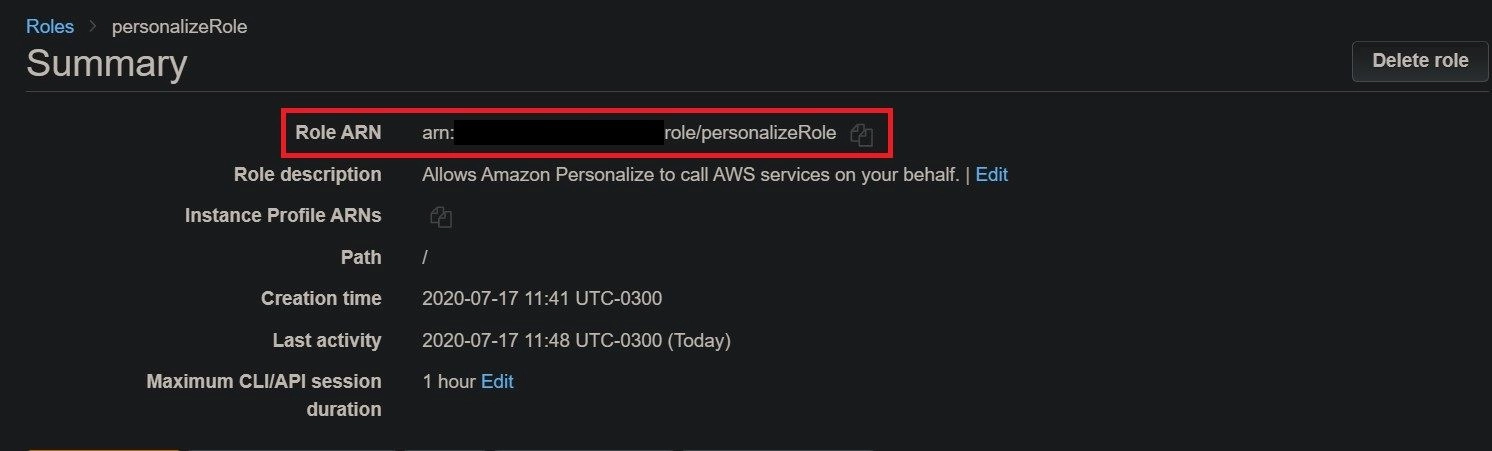
Upload the data to an S3 18. Download the csv File that contains user interaction data. 19. Create an S3 Bucket and upload the downloaded file. 20. Grant permission to Amazon Personalize to read the data in the bucket. (Select a bucket, in the Permissions tab, click Bucket Policy. 21. Paste the code below and click Save.

Paste the following JSON and, in the Resource, replace bucket-name with the name of your bucket.
{
  "Version": "2012-10-17",
  "Id": "PersonalizeS3BucketAccessPolicy",
  "Statement": [
    {
      "Sid": "PersonalizeS3BucketAccessPolicy",
      "Effect": "Allow",
      "Principal": { "Service": "personalize.amazonaws.com" },
      "Action": ["s3:GetObject", "s3:ListBucket"],
      "Resource": ["arn:aws:s3:::bucket-name", "arn:aws:s3:::bucket-name/*"]
    }
  ]
}
Basic Concepts Using the Console.
Step 1 - Import training data.
- Go to the Amazon Personalize Console and log in if you are not logged in.
- Choose Create dataset group (If this is the first time you access this service, click Get Started).
- Under Dataset Group Details, specify a name for the dataset group and click Next.
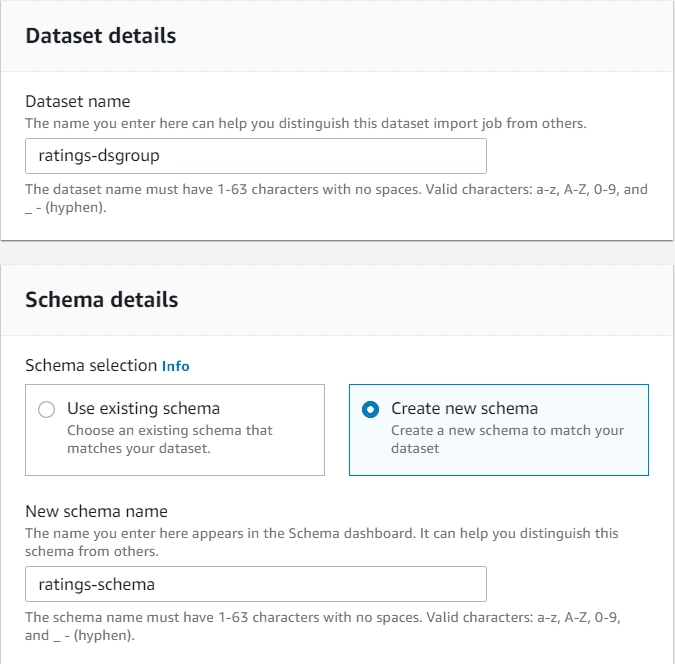
- Under Dataset Details, specify a name for the dataset (Dataset name). Example: ratings-dsgroup.
- Under Schema Details, for Schema Selection, select Create New Schema.
- Under New Schema name, specify a name for the new schema. Example: ratings-schema Your screen should look similar to the following.
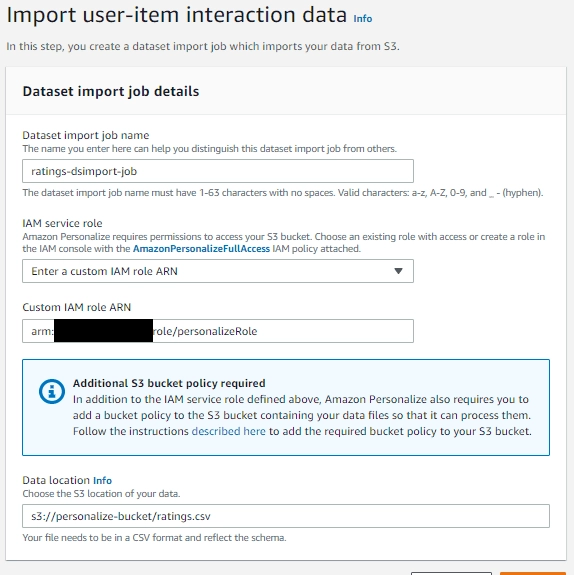
Import user interaction data.
Under Dataset import job name, specify a name for your Import job. Example: ratings-dsimport-job.
Under IAM service role, select the option Enter a Custom IAM role ARN.
Under Custom IAM role ARN, paste the ARN copied in step 1 - J (Initial Steps).
Under Data Location, specify the path to the data in your S3 bucket. s3://<bucket-name>/<file-name.csv>
Click Finish.
Your screen should look similar to the following:
DASHBOARD OVERVIEW
After completing the step above, you will be redirected to the Personalize Dashboard. Under Upload Datasets, the User-item interaction data should have the status Create Pending, and the Solution training button should be disabled. When the data import job is completed, the status of the User-item interaction data will change to Active.
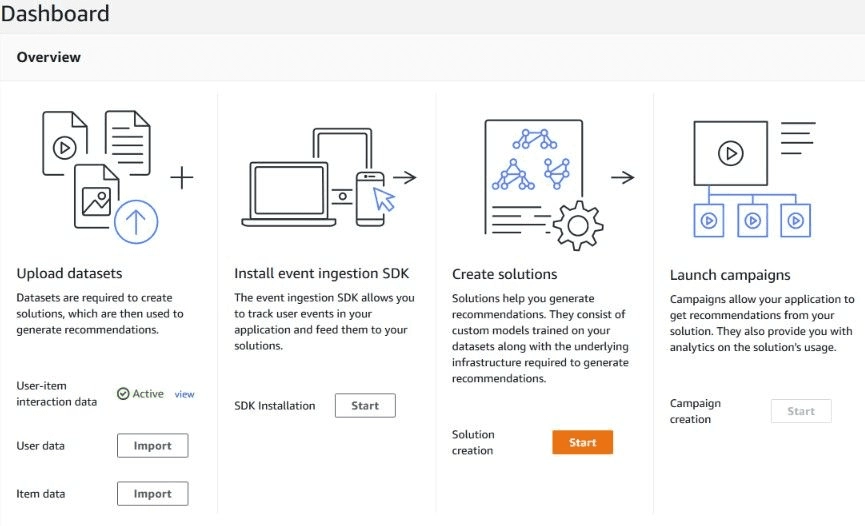
After the import job finishes, click the Start button under Create Solutions.
The import may take some time to complete.
Step 2 - Create a solution. In this step, we will use the dataset created earlier to train a model. A trained model will be called a solution version.
How to create a solution
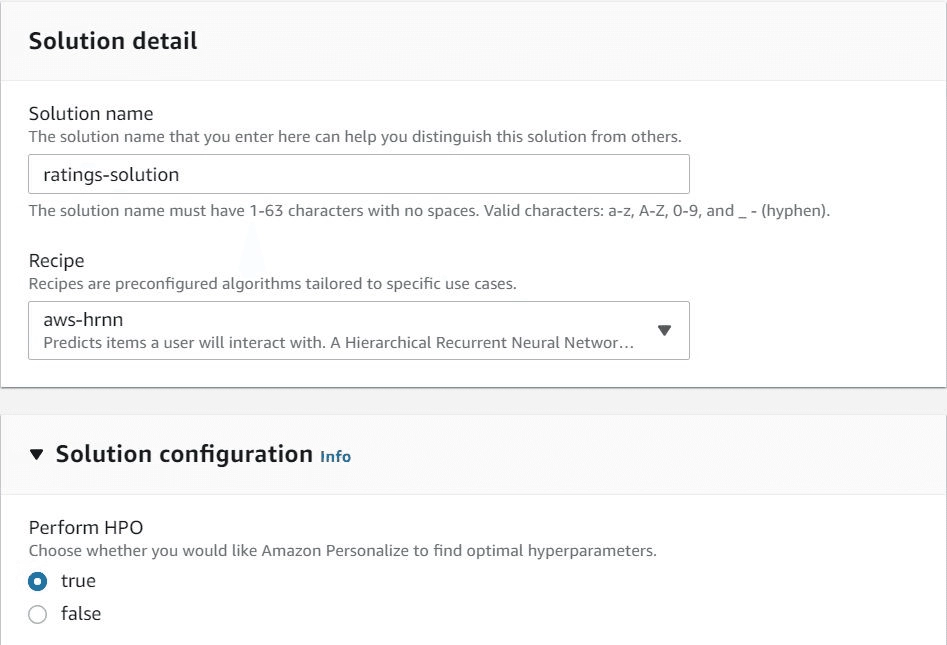
- On the Create Solution page, under Solution Detail, specify a name for the solution in Solution Name. (e.g., ratings-solution).
- Under Recipe, select the AWS-HRNN option.
- In the Solution Configuration section, check the true option under Perform HPO.
- Click Next.
Perform HPO allows Amazon Personalize to find the ideal hyperparameters for the recipe.
Hyperparameters are variables that control the training process itself. For example, it is part of configuring a neural network to decide how many hidden layers of nodes need to be used between the input layer and the output layer, as well as how many nodes each layer needs to use. These variables are not directly related to the training data. They are configuration variables. Parameters change during a training job, while hyperparameters generally remain constant during a job. Learn more.
Your screen should look like this:
After the training finishes, click Create new campaign.
The training may take some time to complete.
Step 3 - Create a campaign
In this step, we will create a campaign by deploying a solution version from the previous step.
Creating the Campaign
- Click Create new campaign.
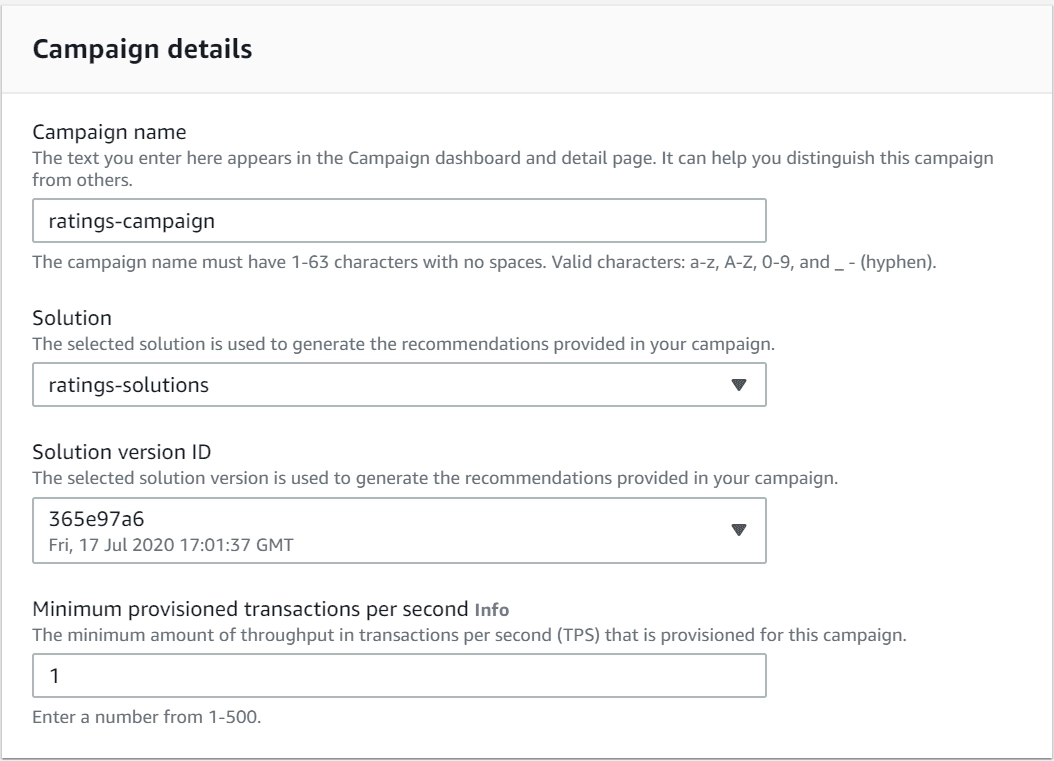
- Under Campaign details, give your campaign a name in the Campaign Name field. (e.g., ratings-campaign).
- Under Solution, select the solution version created in the previous step.
- Under Minimum provisioned transactions per second, keep the default of 1.
Creating the campaign may take some time to complete.
Your screen should look like the following:
Step 4 - Get recommendations
In the fourth and last step, we will use the campaign we created earlier to get recommendations through the id.
How to get recommendations
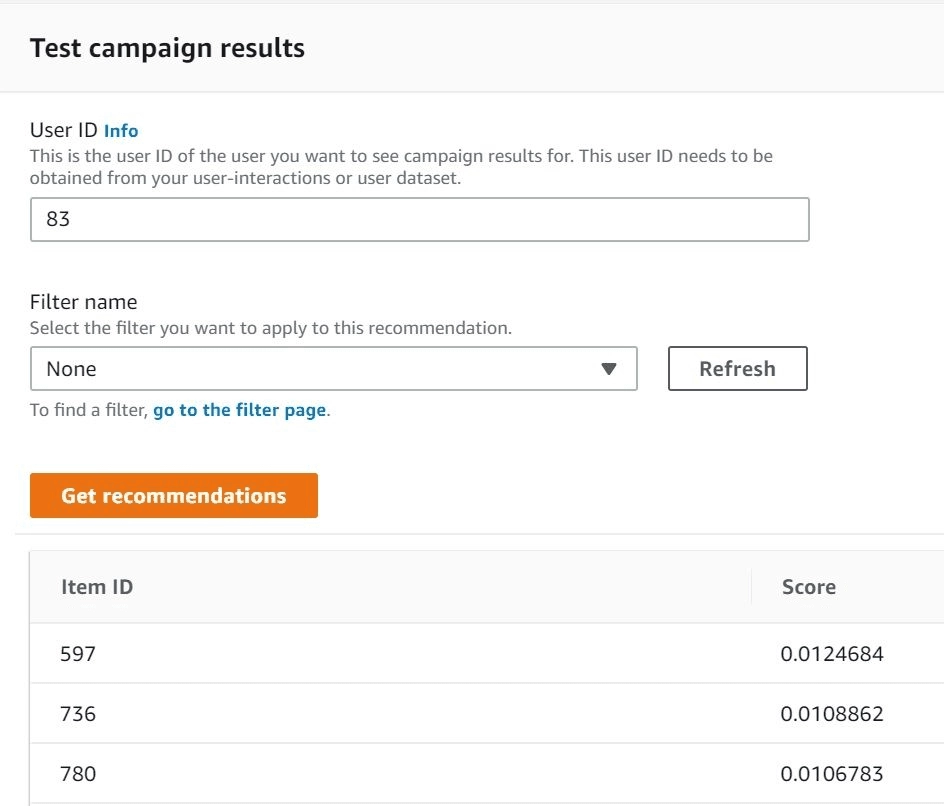
Under Test campaign results, in User Id, specify a value from the ratings dataset. (example: 83) Click Get Recommendations. The list shows the id of the item recommended for the user with id 83, followed by the Score. Your screen should look like the following:
Summary
In this article, we learned how to configure and train a machine learning model using AWS Personalize with the goal of getting accurate recommendations of which items to recommend to each user of a given system. All the examples in this article were made following Amazon’s best practices and documentation. If you are interested in learning more about the service, go to AWS Personalize.
