

What is CloudFormation
CloudFormation is, first of all, a service managed by AWS that helps organize the solutions created in the cloud. It is a fundamental piece for replicating configurations across clients’ development, staging, and production environments, but it can also be used to replicate reusable solutions across multiple clients.
I like to say that CloudFormation synthesizes knowledge, infrastructure provisioning, and hours of troubleshooting into solution templates.
Technically, CloudFormation is the official way to define infrastructure as code in the AWS cloud, so it is a fundamental piece for enabling continuous delivery and DevOps processes.
Organizing a template
A CloudFormation template can be defined in a YAML or JSON file. Initially my templates were defined in JSON, but over the last 2 years I have used only YAML because it is easier to read.
Example: Infrastructure Deployment
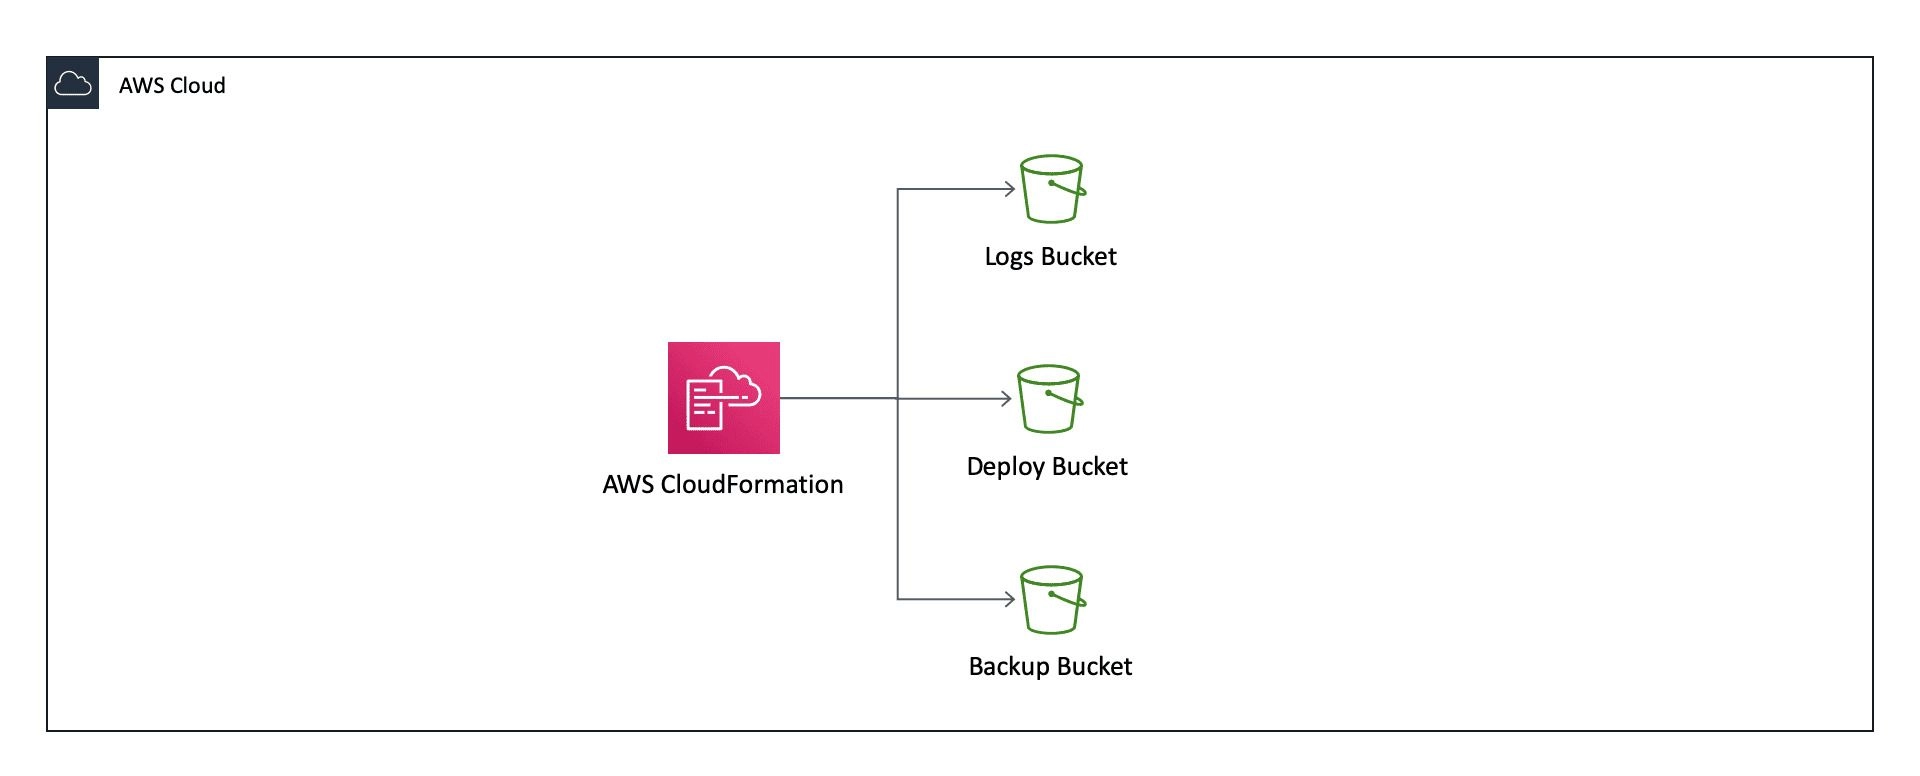
In every AWS account that CloudDog provisions, we run this template or some derivative of it, creating a stack that provisions 3 S3 buckets shared among the other stacks.
The resources provisioned by this stack are:
- LogsBucket: to store logs from Amazon CloudFront or another managed service that generates logs.
- DeployBucket: used in continuous deployment processes to store copies of CloudFormation templates and application binaries that are eventually accessed during deployments.
- BackupBucket: stores backup files that may be generated by other processes.
CloudFormation template.yml
AWSTemplateFormatVersion: '2010-09-09' Description: Infraestrutura Deployment Resources: LogsBucket: Type: AWS::S3::Bucket
Properties: AccessControl: LogDeliveryWrite DeployBucket: Type: AWS::S3::Bucket
BackupBucket: Type: AWS::S3::Bucket
Outputs: LogsBucketName: Value: !Ref LogsBucket Description: Bucket to store logging in general Export: Name: !Sub ${AWS::StackName}-LogsBucketName DeployBucketName: Value: !Ref DeployBucket Description: Bucket to store deployment artifacts Export: Name: !Sub ${AWS::StackName}-DeployBucketName BackupBucketName: Value: !Ref BackupBucket Description: Bucket to store RDS or any other backup Export: Name: !Sub ${AWS::StackName}-BackupBucketName
The template sections
The complete structure of a template can become more complex than this one, but in this example we already have the most important sections, which are:
- AWSTemplateFormatVersion: declares the version of the template
- Description: defines the description of the template, which can help you understand things when there is a large number of stacks
- Resources: where all the resources that must be provisioned are declared
- Outputs: allows quick visualization of attributes of the created resources using the command line and the AWS console. When the export parameter is used, it also allows other stacks to reference these attributes, enabling chaining of stacks.
Running template.yml via the console
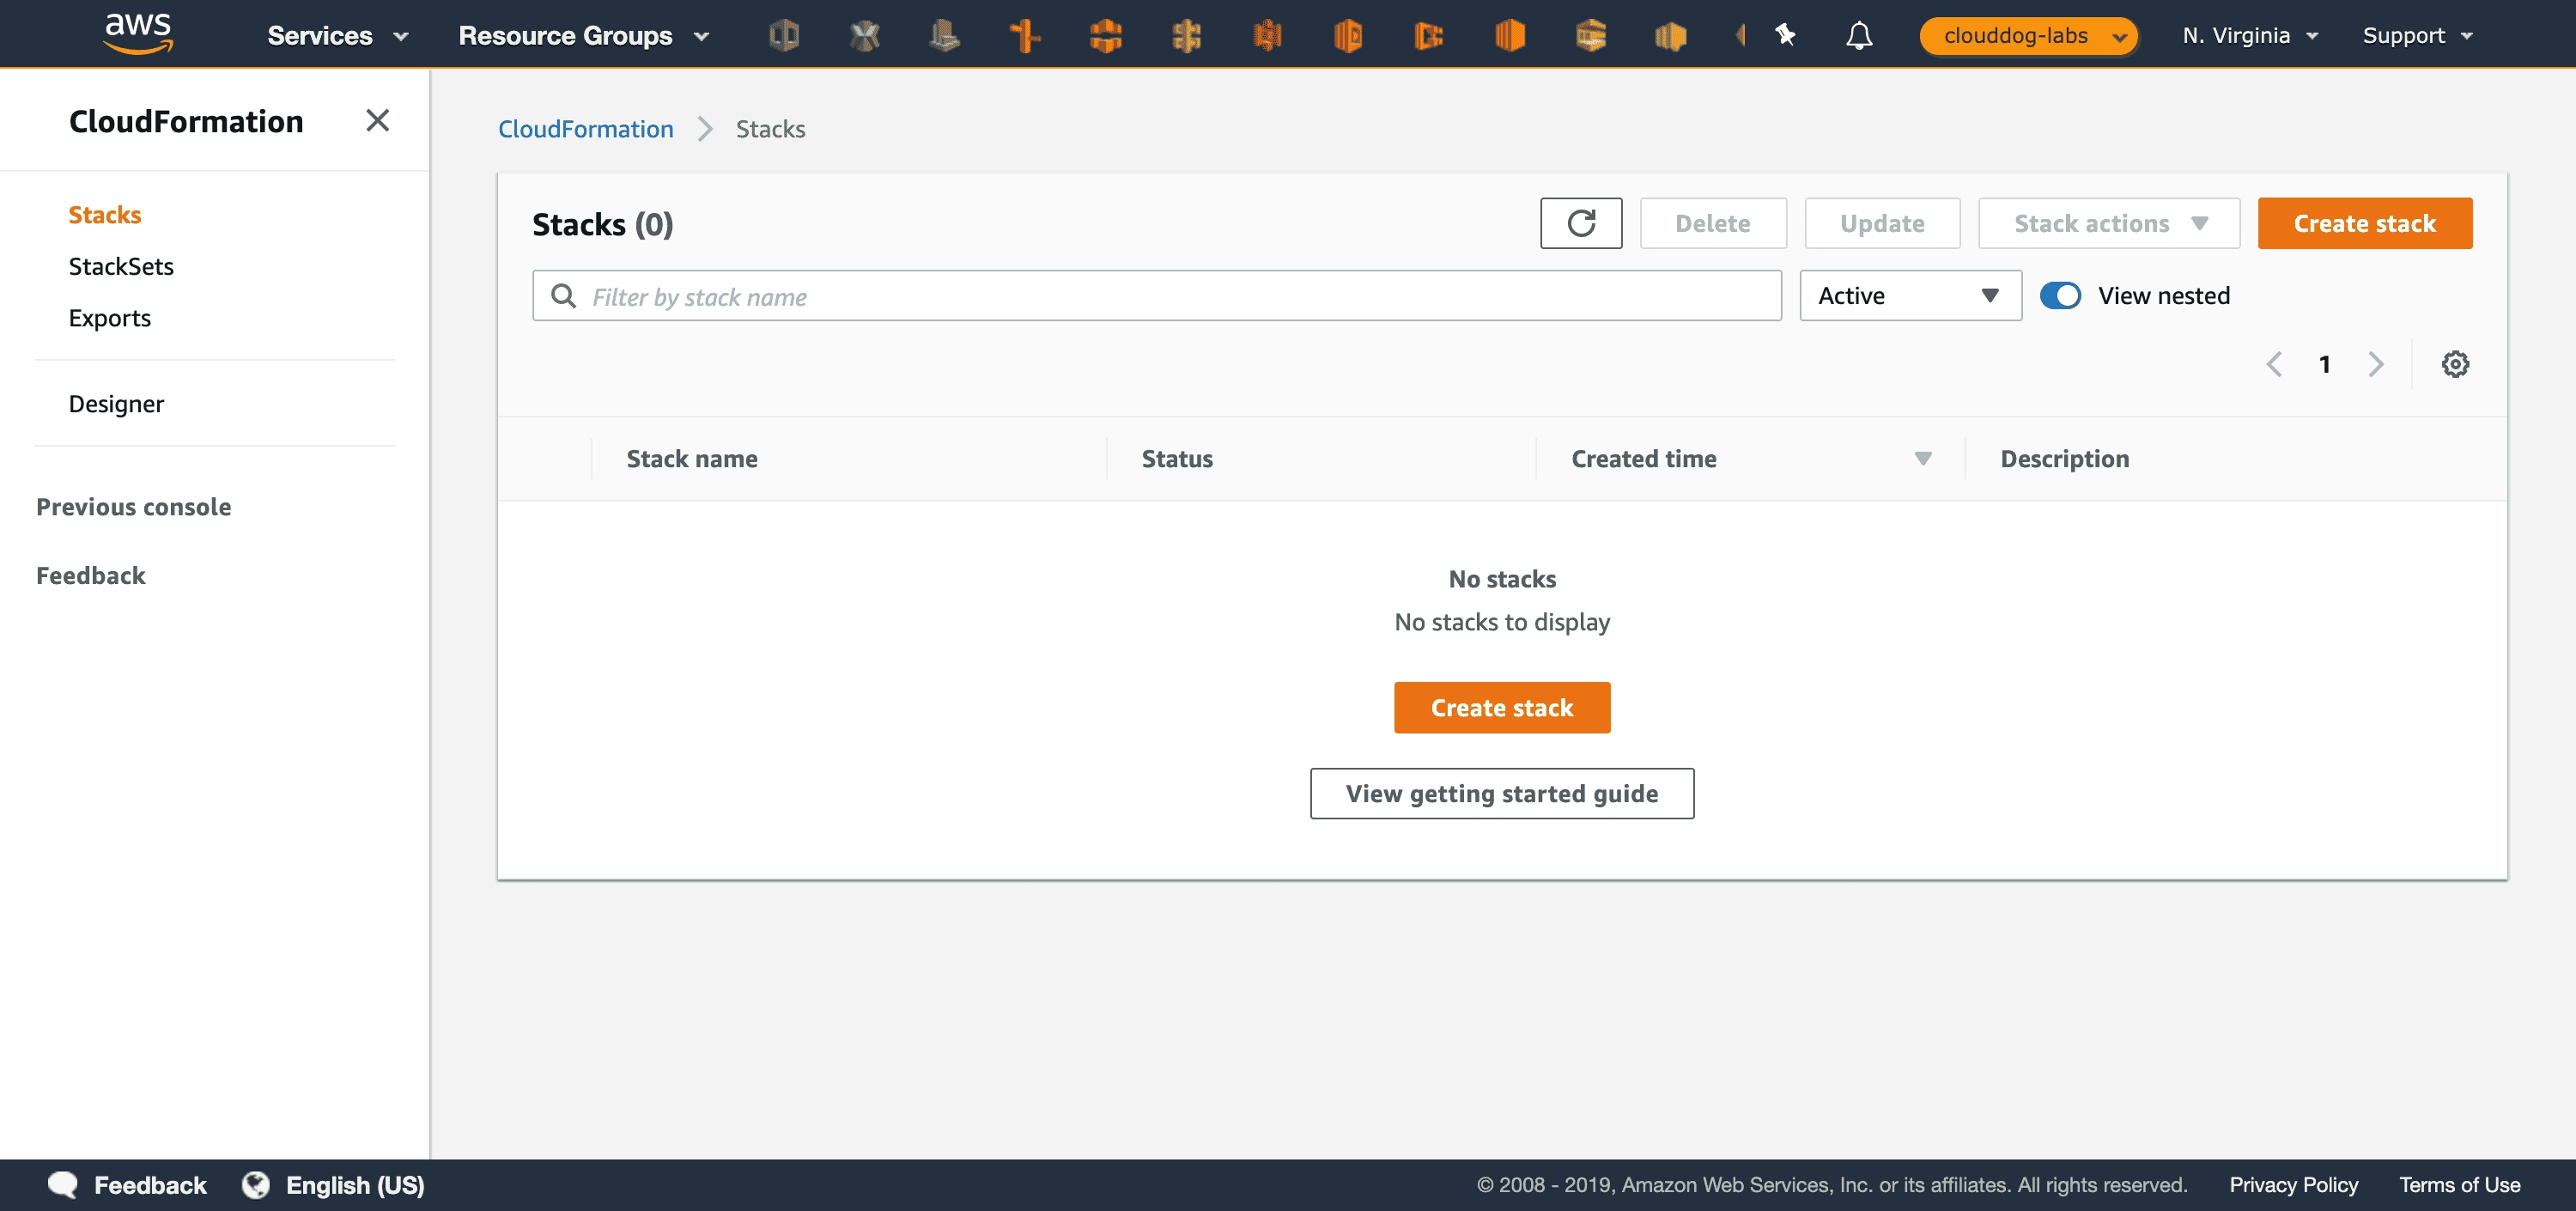
##Select the CloudFormation service Search the console menu for the CloudFormation service. If you have not created any stack yet, it will show a screen similar to the one below:
Create a Stack
Select the ‘Create Stack’ option and move on to the next screen.
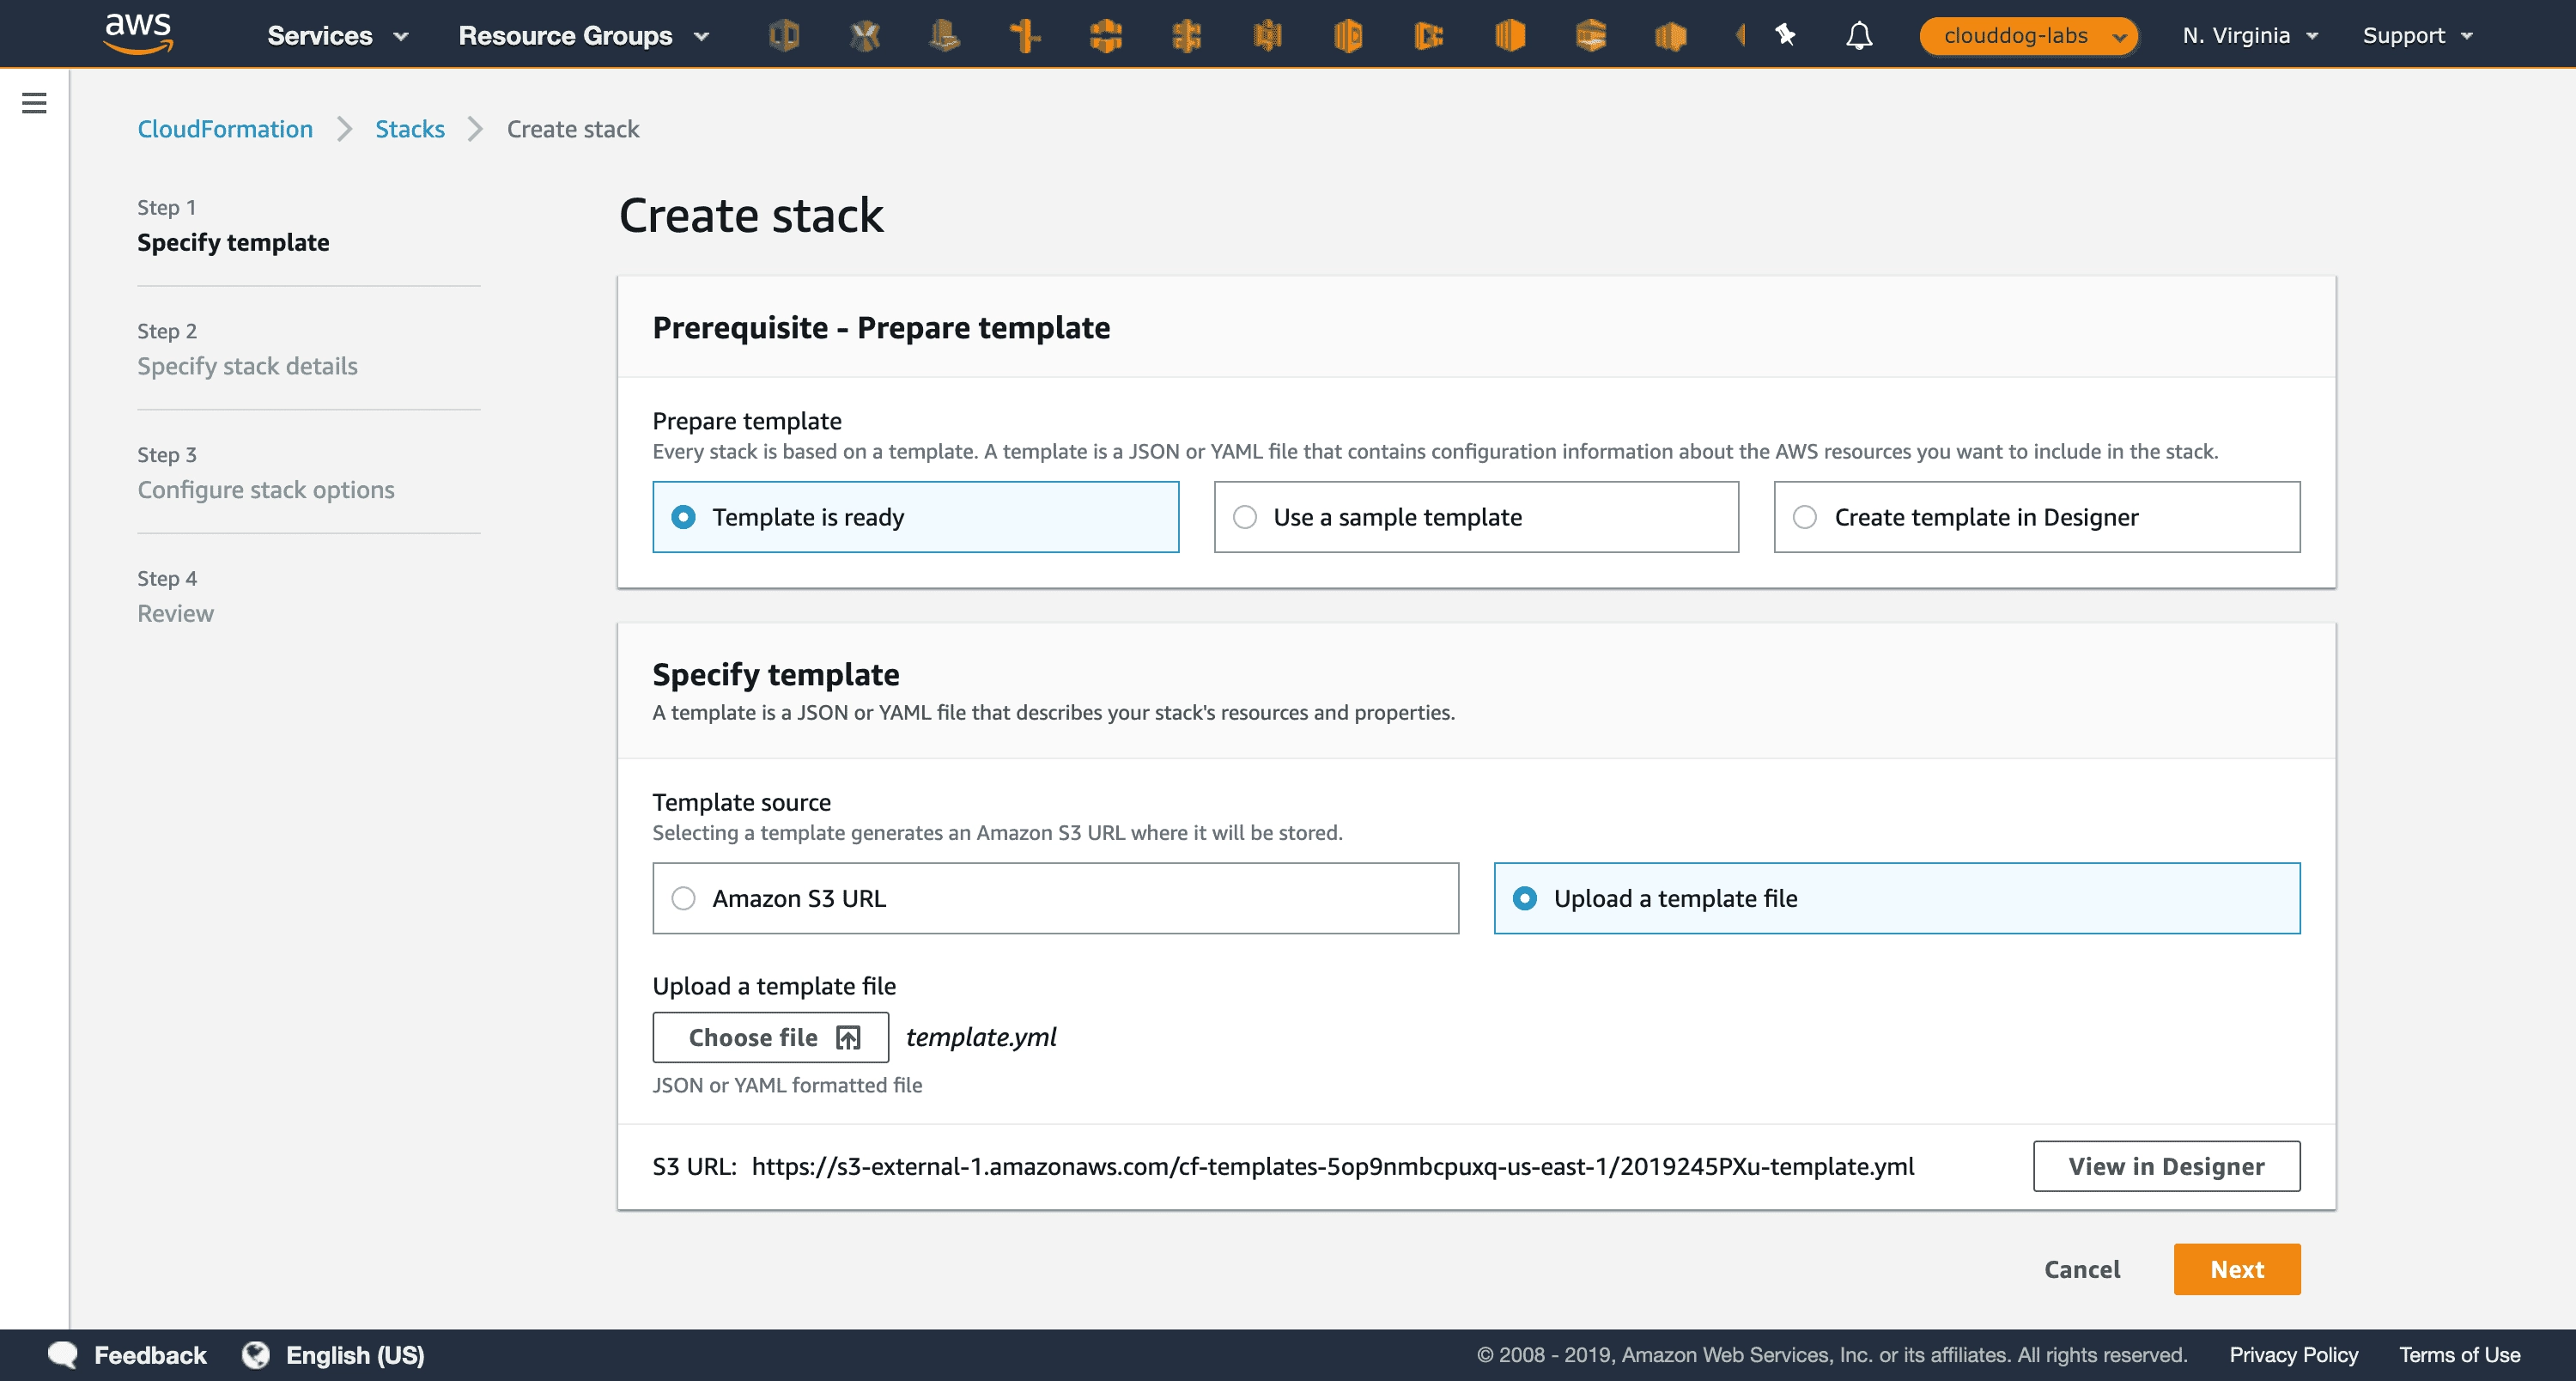
Next, leave the first option configured as ‘Template is Ready’, in template source select the option to load a template ‘Upload a template file’, select the file according to the configuration above, and click ‘Next’.
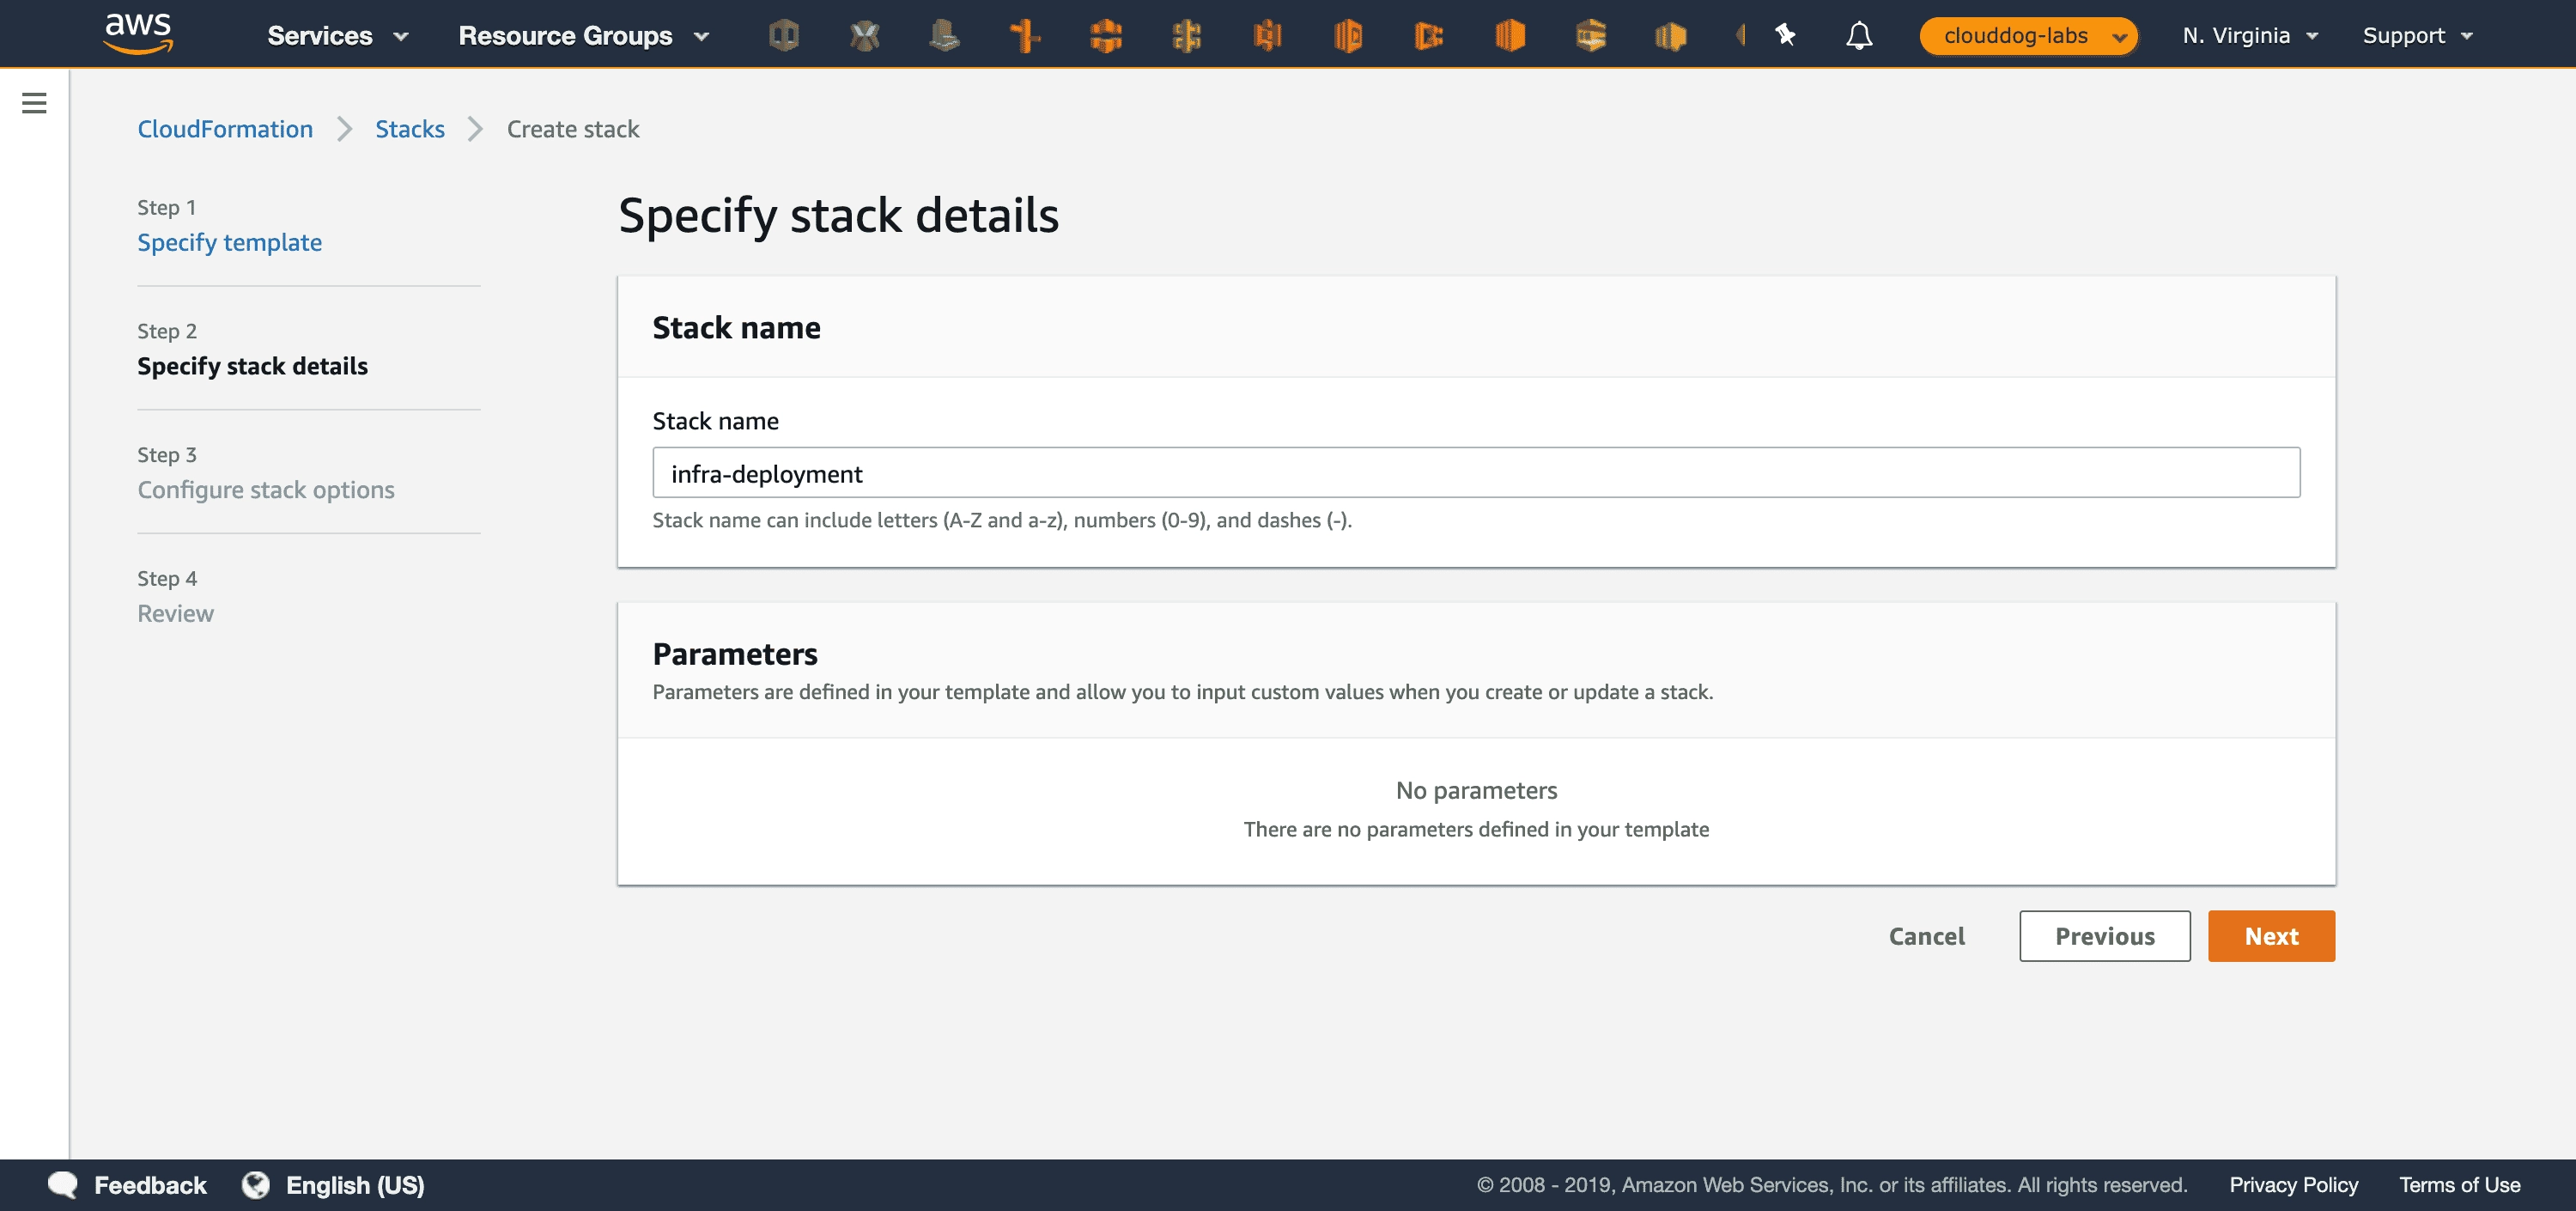
Configure the ‘Stack Name’; in our example we use infra-deployment, but it could be any name that meets the requirements of the regular expression described below the field, and click ‘Next’ again.
Now leave all the options as they are, without any changes, and click ‘Next’ again.
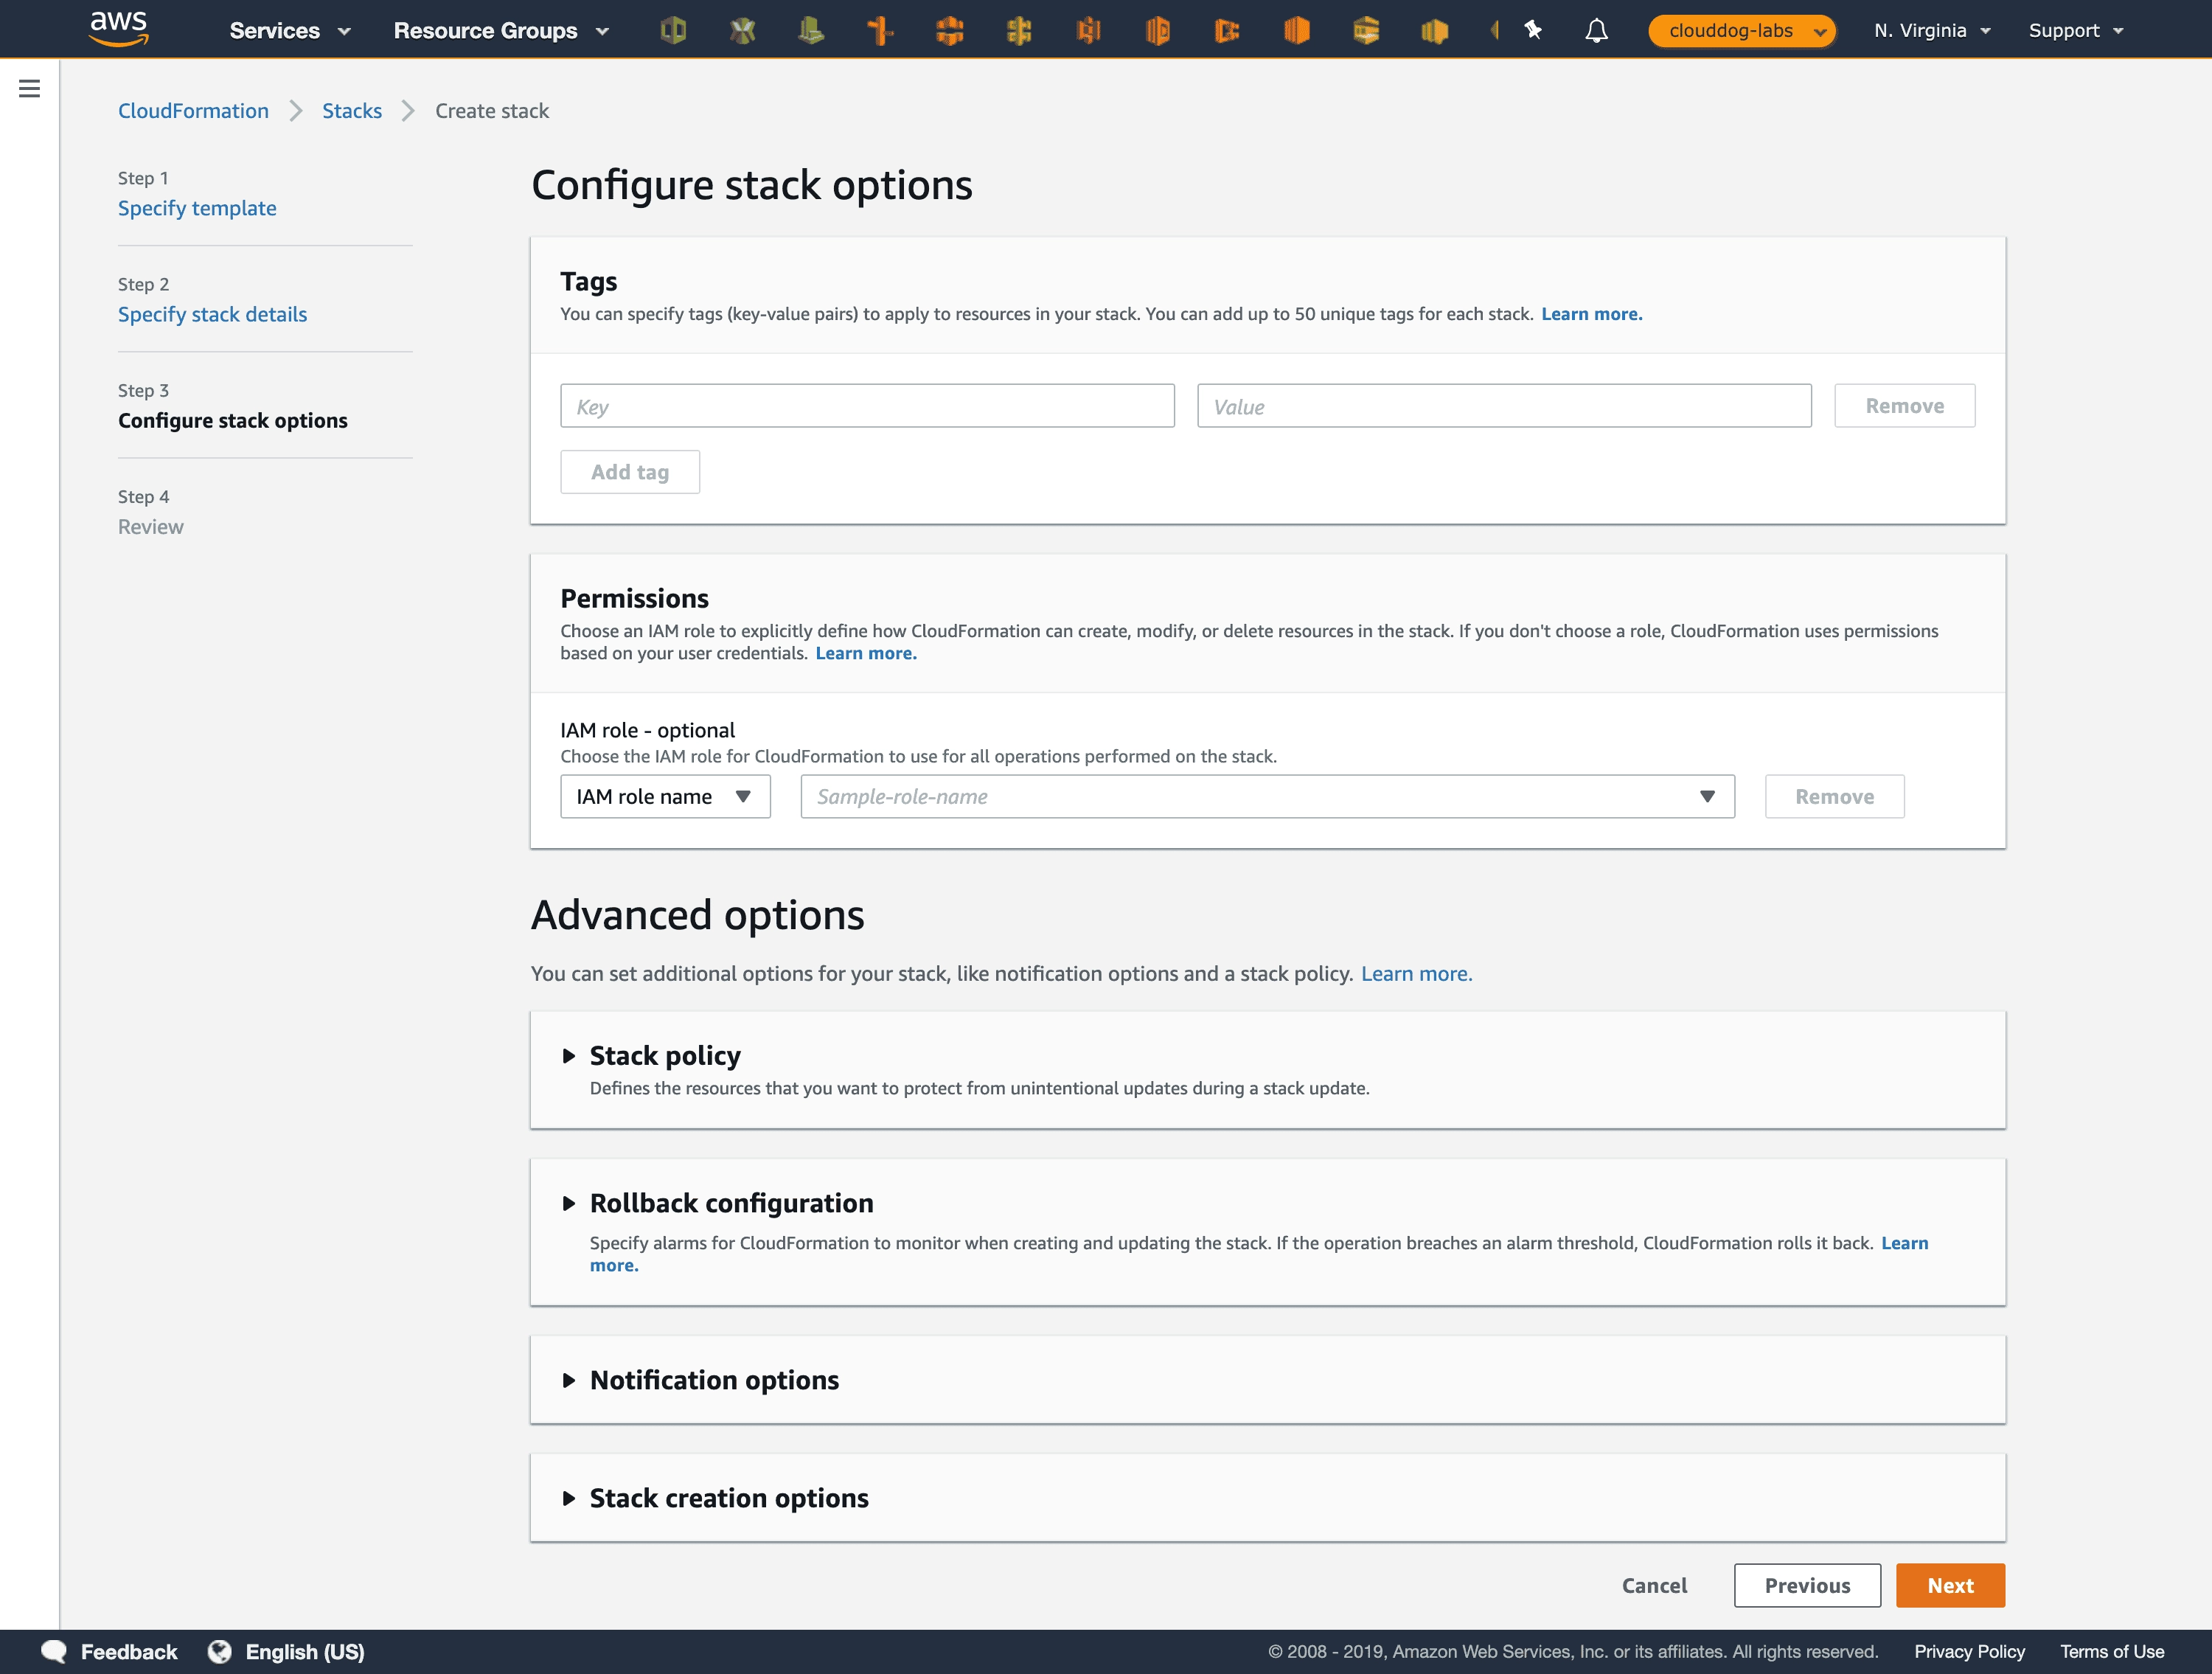
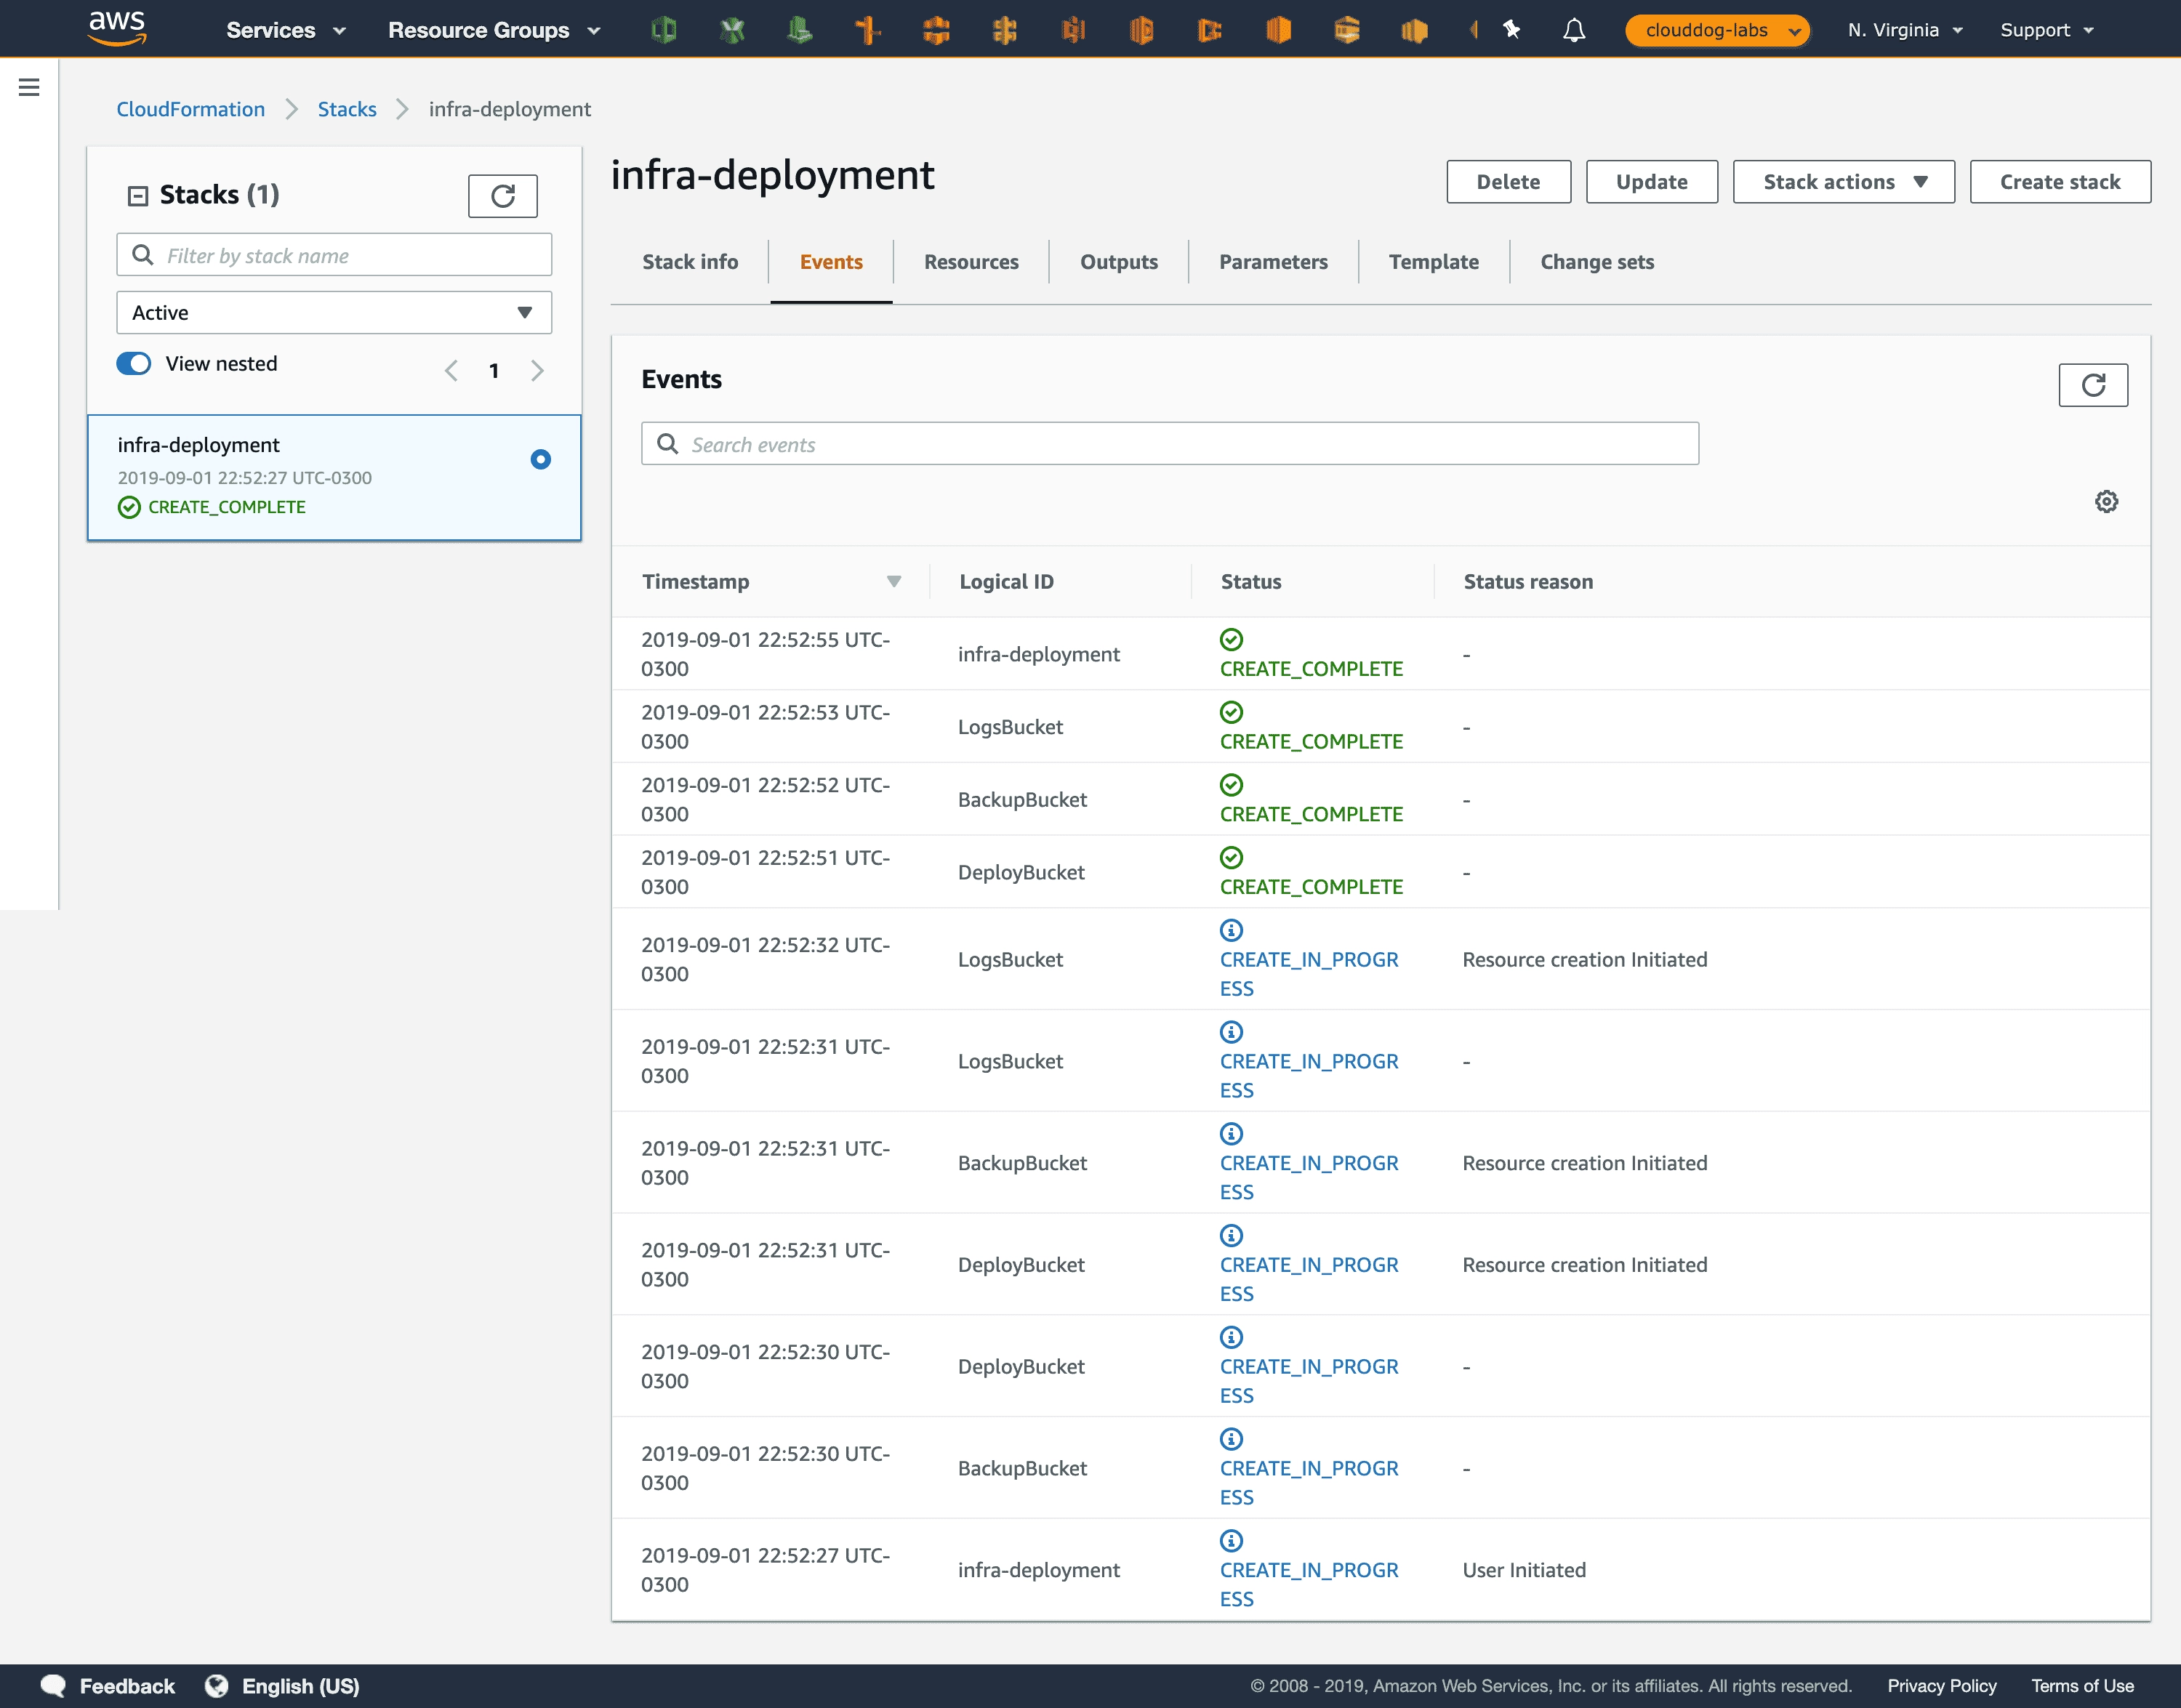
In the last step you will be able to review all the settings and select the ‘Create Stack’ option, then you will see a screen similar to the image below with the list of events generated by CloudFormation. If any problem occurs, such as an invalid configuration, the entire stack is rolled back automatically.
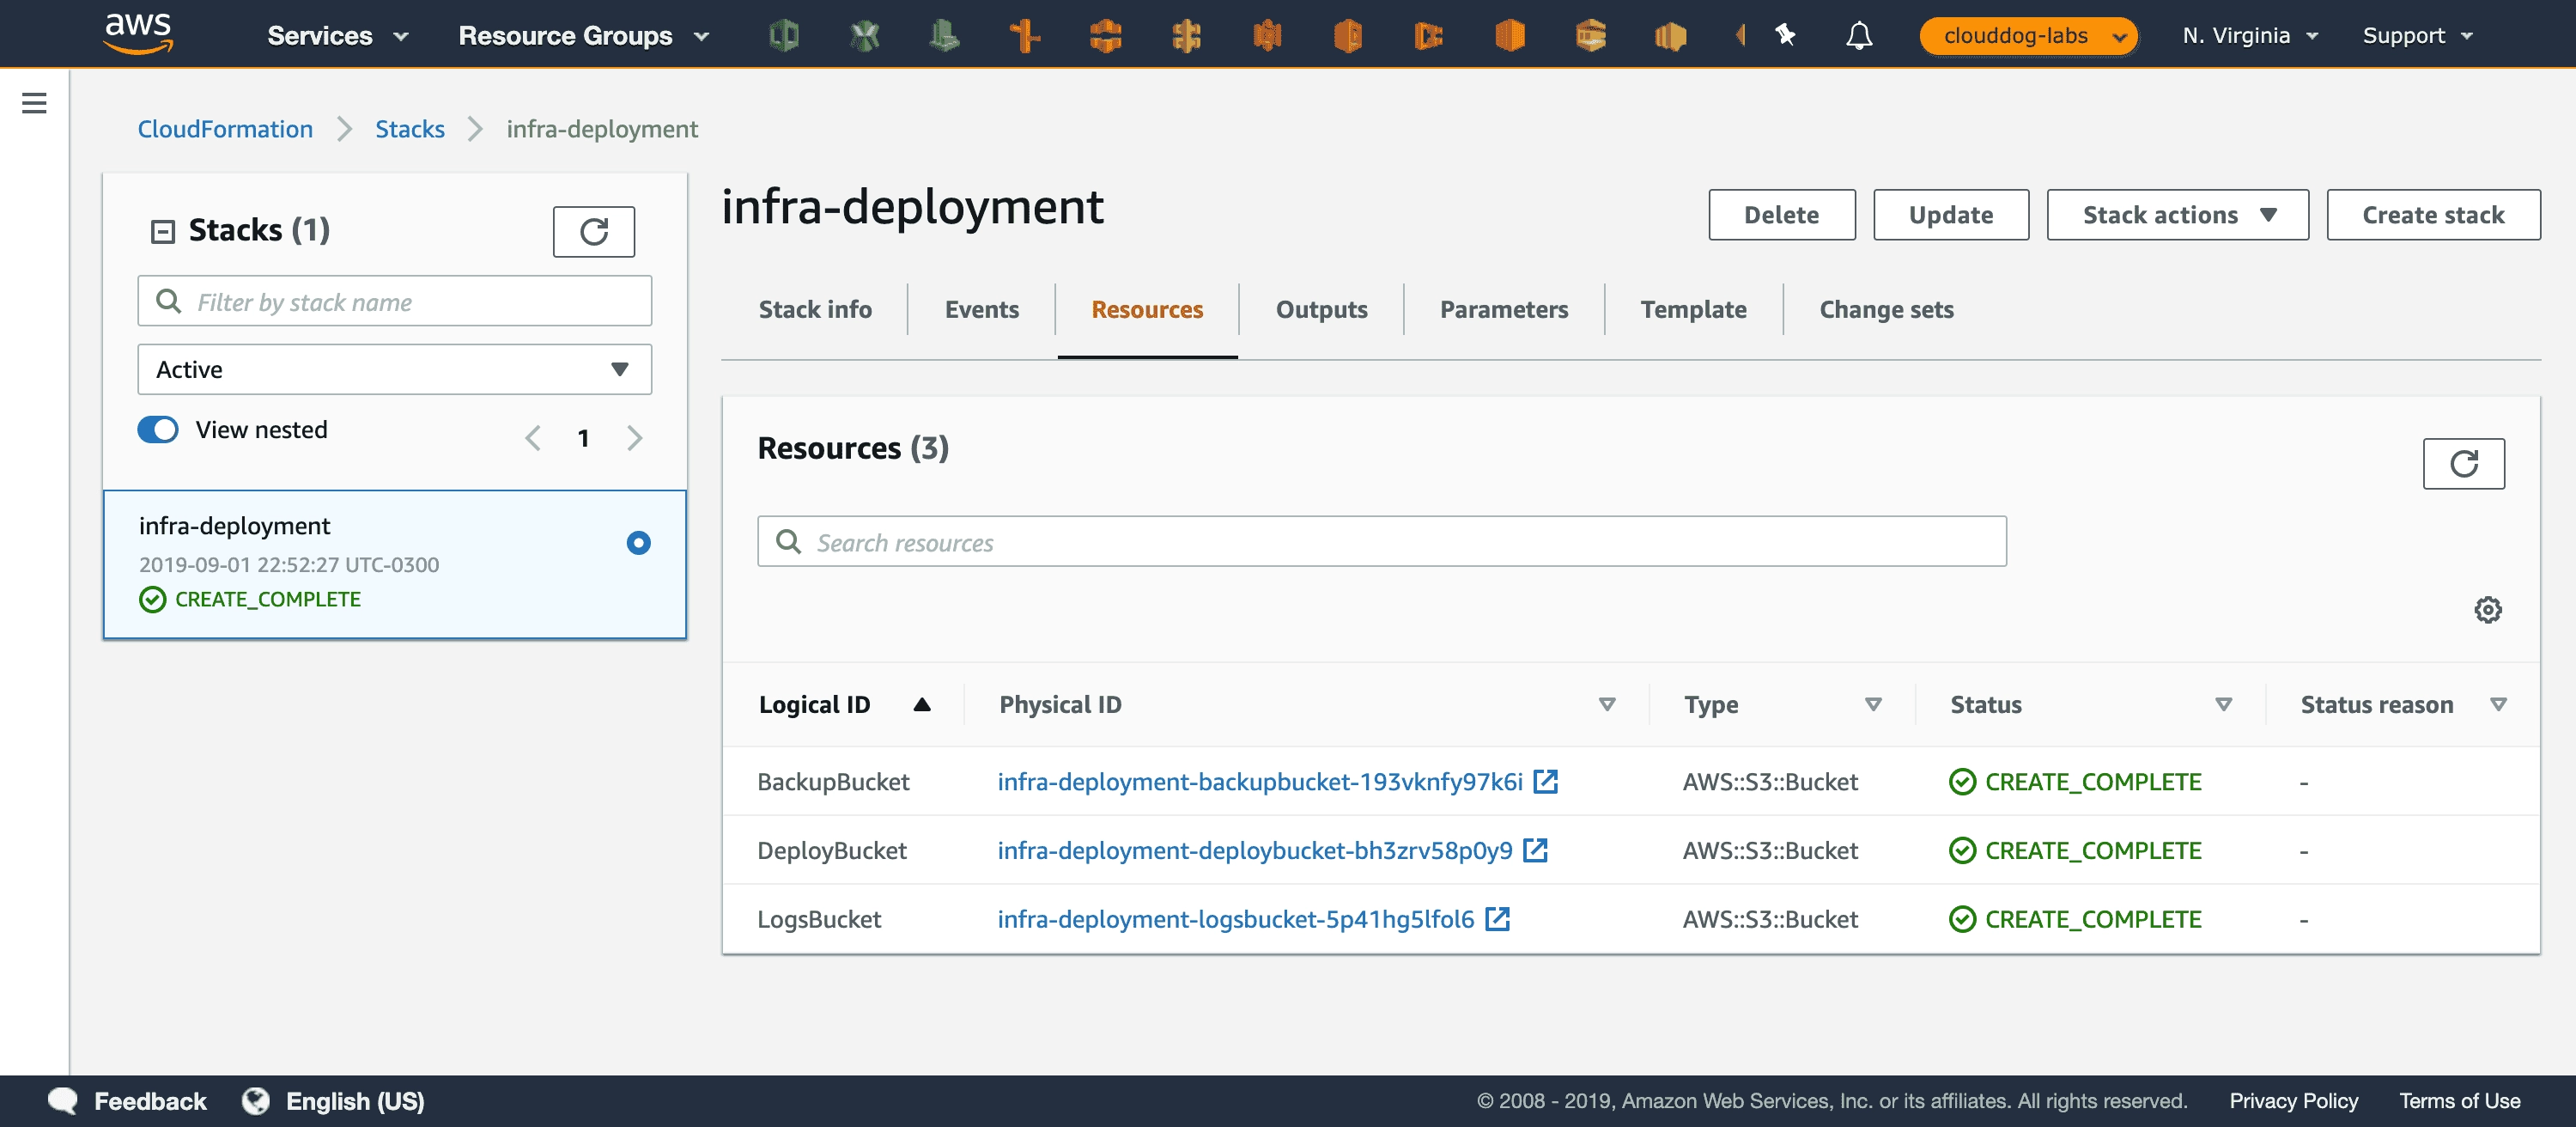
By selecting the ‘Resources’ tab, you can check a summary of all the provisioned resources.
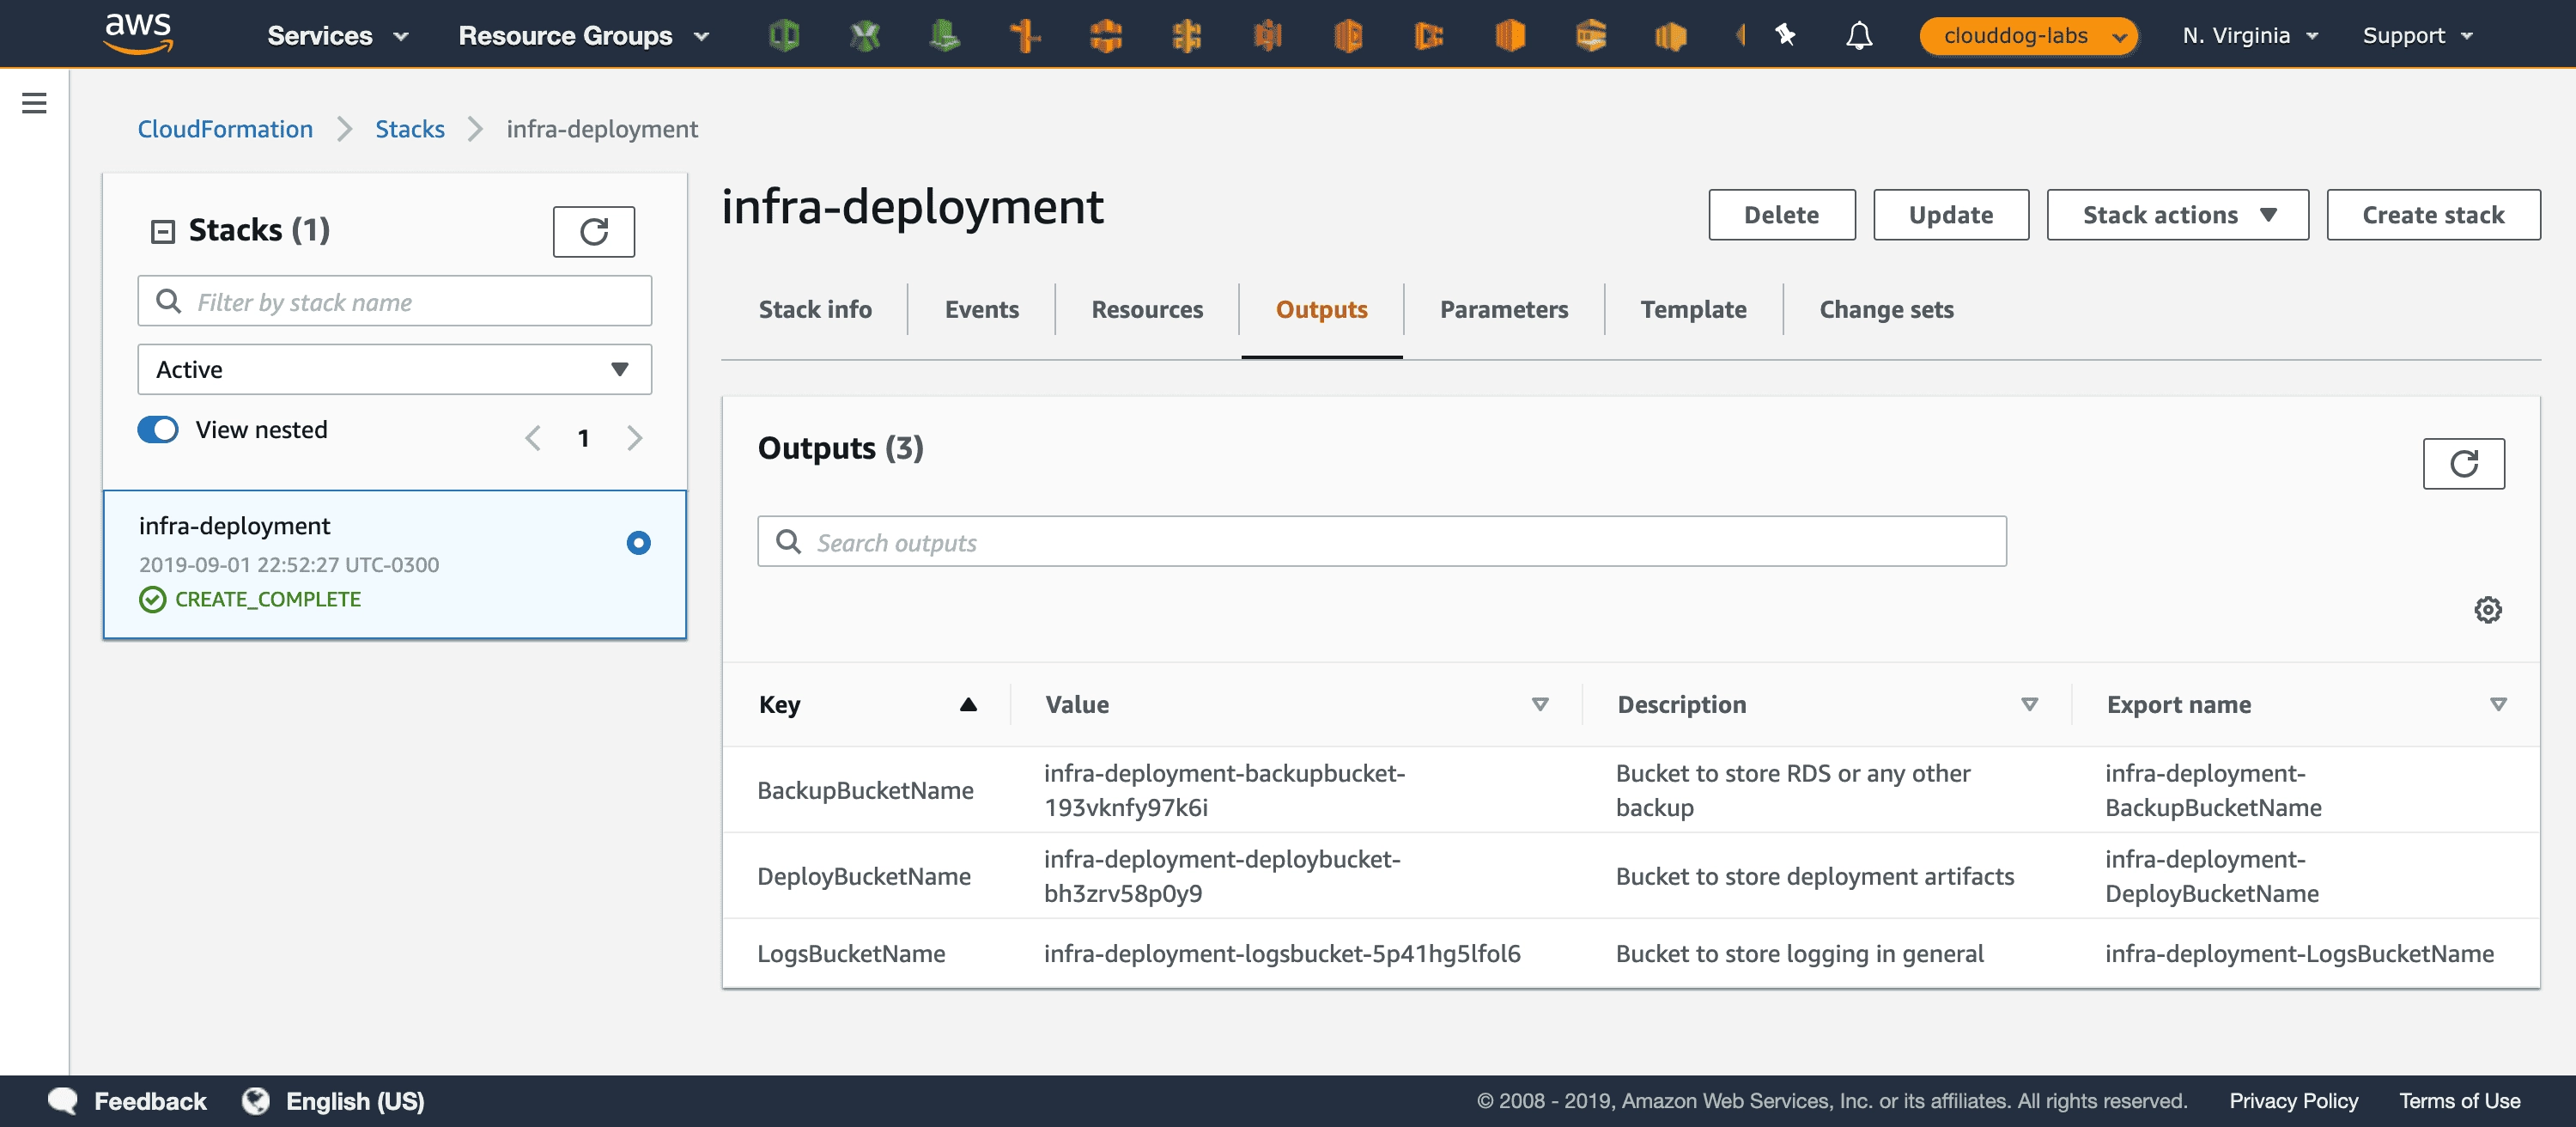
By selecting the ‘Output’ tab, you can check all the variables configured in the ‘Output’ section of the template, where the ‘Export Name’ will correspond to the names that can be referenced in other stacks.
Verify Created Resources
After the ‘Stack’ creation is finished, in the ‘Stack Info’ tab the Status should appear as CREATE_COMPLETE, and then it will be possible to check the created resources.
To do this, search the AWS services menu for S3 or Simple Storage Service; at this point you should see a screen similar to the one below:
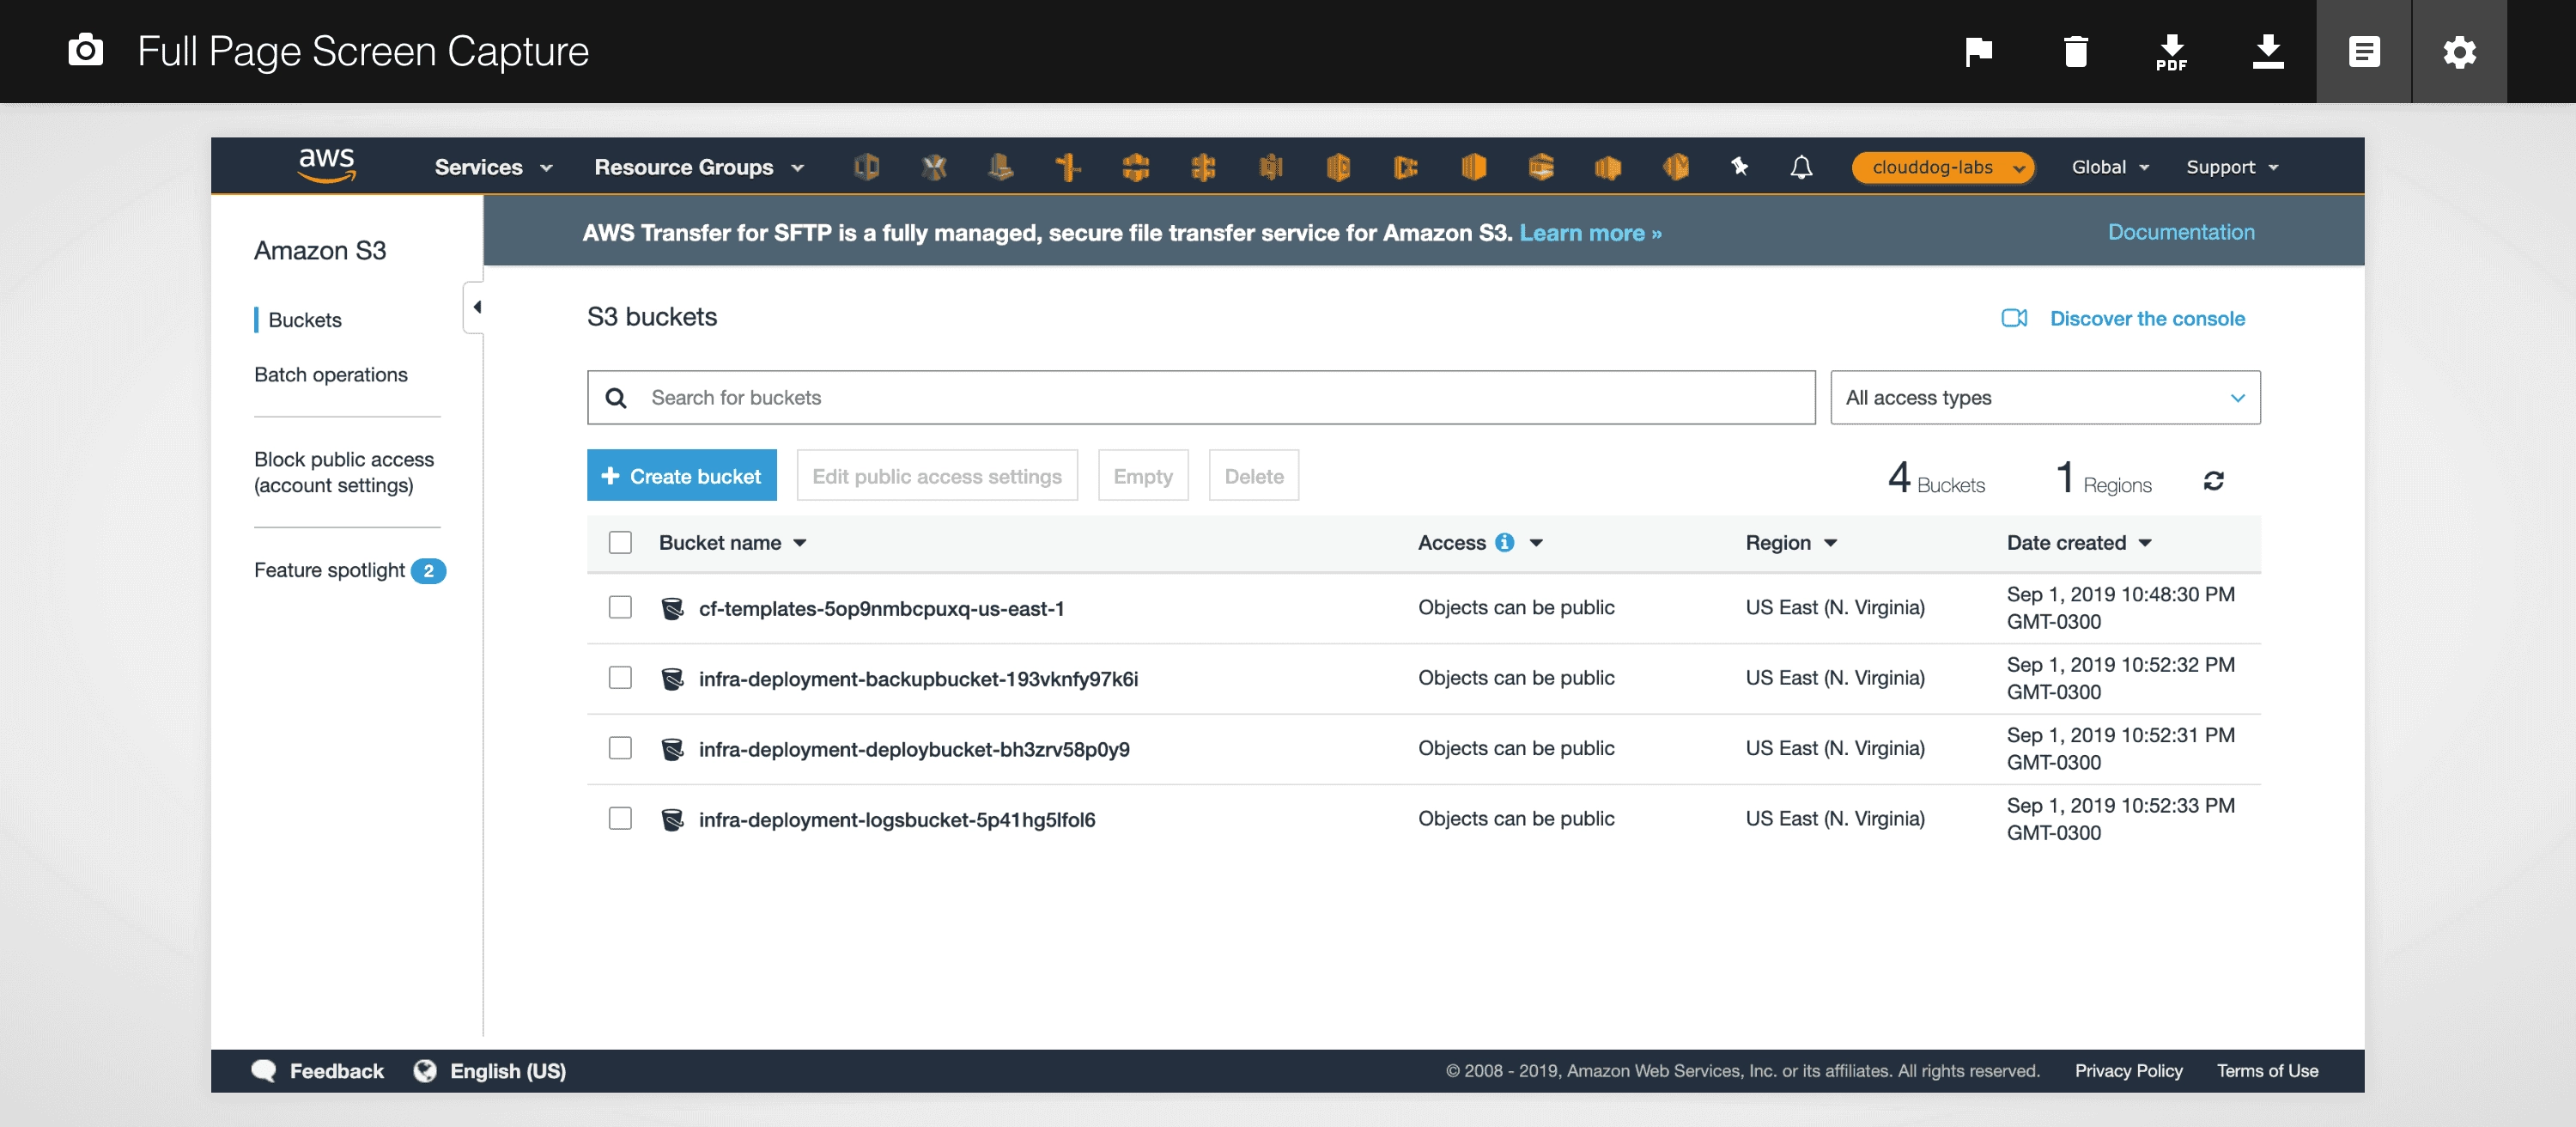
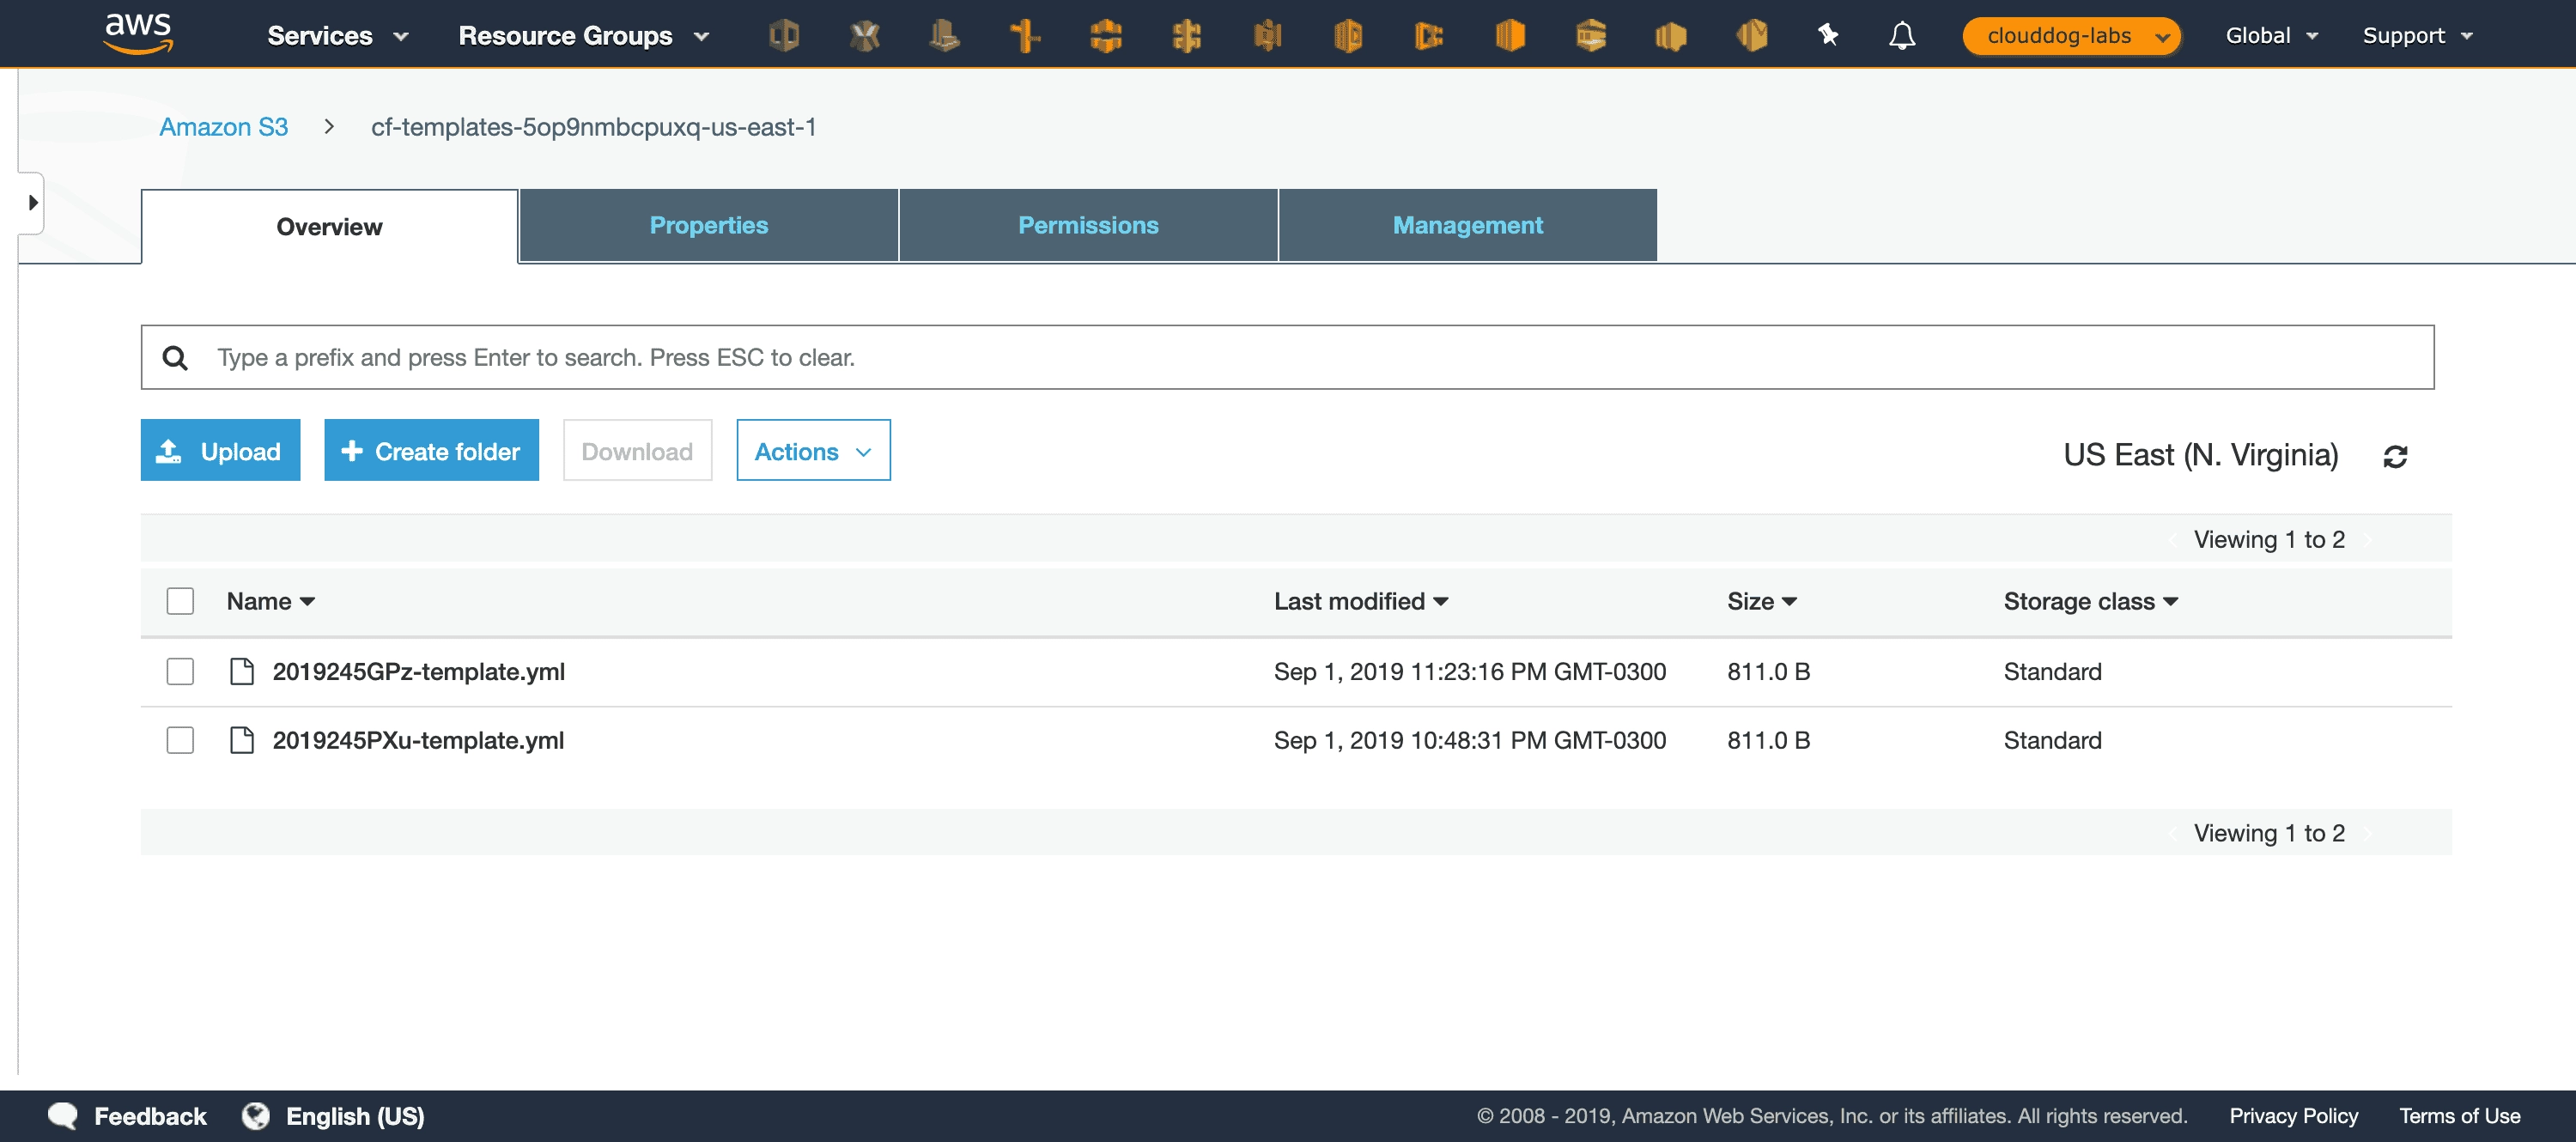
Note that in addition to the 3 buckets created by the template, a bucket named cf-template--us-east-1 was also created. This bucket was created by CloudFormation itself when the template was uploaded; if you enter the bucket you can see something like
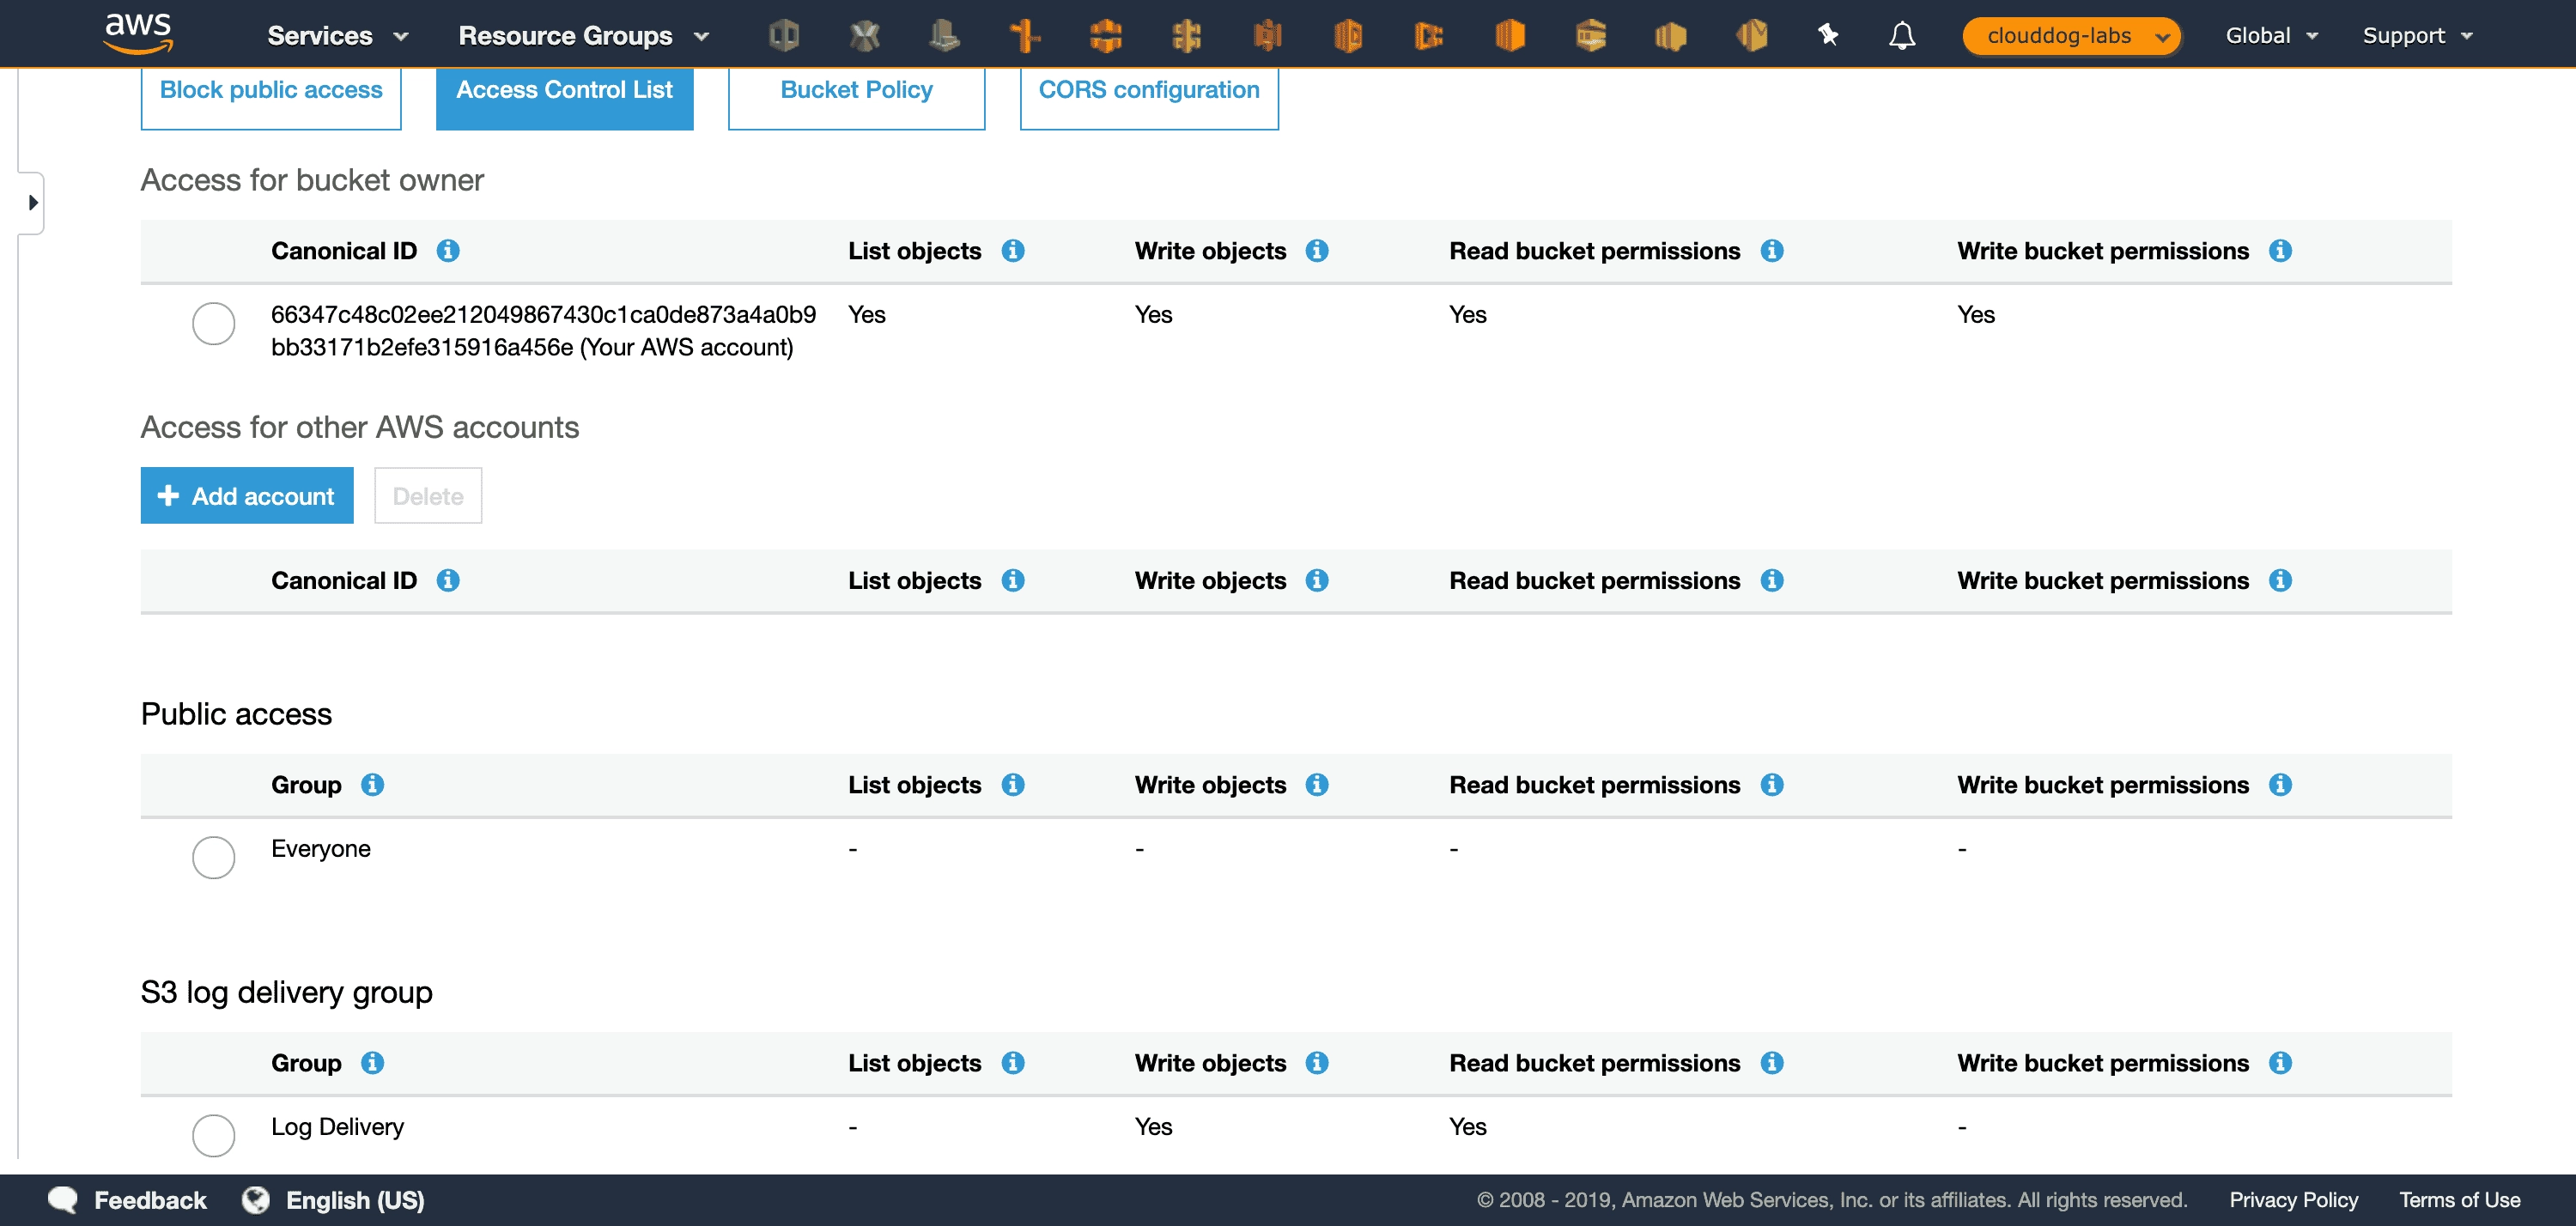
Going back to the bucket listing and selecting the logs bucket, you can check that it was created with a distinct ‘Permissions’ and ‘Access Control List’ configuration where the S3 Log Delivery Group has both ‘Write Objects’ and ‘Read Bucket Permissions’ set to ‘yes’, as you can see in the next image:
Naming
The naming adopted for the buckets is ${StackName}-${LogicalName}-${HashCode}, where StackName is the name of the stack as defined in the creation process, LogicalName is the logical name assigned in the ‘Resources’ section of the template, and HashCode is generated automatically during execution.
This naming may seem a bit odd at first, but it helps keep things organized. There are some services, such as the S3 bucket itself, that use a common namespace, which makes it impossible to use fixed names across different accounts.
Updating the previously created stack
Imagine you forgot to add some configuration to this stack, or you improved something and need to replicate it across environments.
To keep infrastructure as code and keep the templates aligned with the stacks, we should update the template and then create a ‘Change Set’ on the stack.
Adjusting the template
We will use the same scenario as the previous example. As you may have noticed by now, the LogsBucket has a distinct configuration to allow receiving log files; however, the other buckets, BackupBucket and DeployBucket, were not configured correctly.
Adjusted CloudFormation template.yml
It is necessary to add the following properties to the original template.
DeployBucket: Type: AWS::S3::Bucket
Properties: LoggingConfiguration: DestinationBucketName: !Ref LogsBucket LogFilePrefix: !Sub ${AWS::StackName}/deploy-bucket/ BackupBucket: Type: AWS::S3::Bucket
Properties: LoggingConfiguration: DestinationBucketName: !Ref LogsBucket LogFilePrefix: !Sub ${AWS::StackName}/backup-bucket/
Creating a Change Set
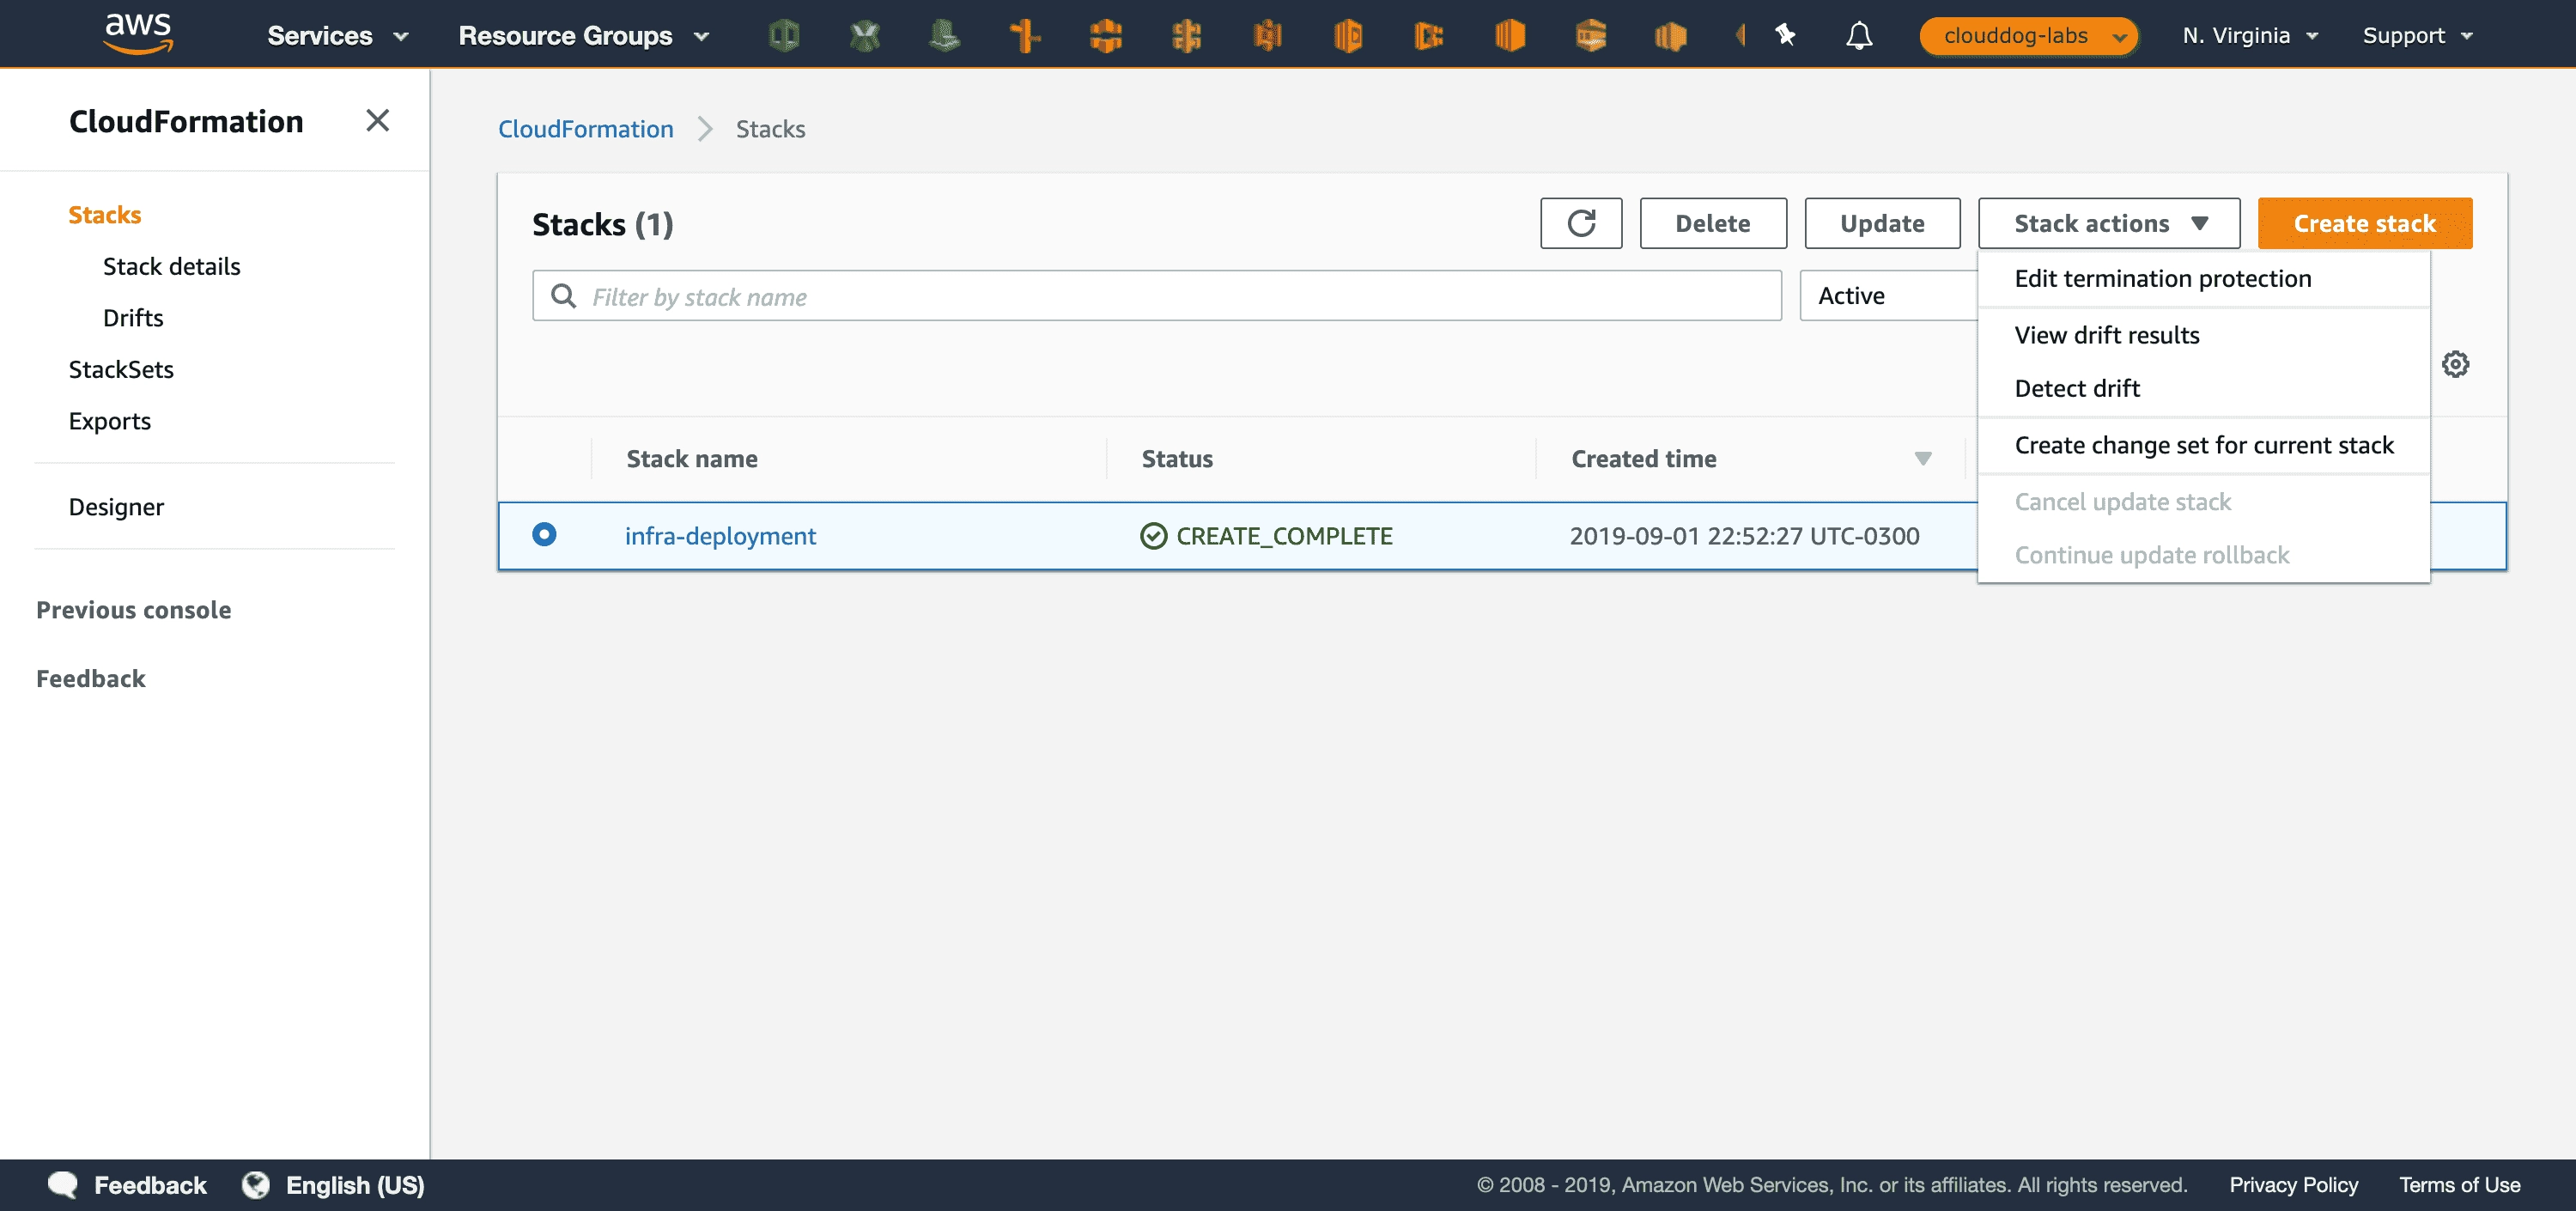
In the CloudFormation service in the AWS console, select the previously created stack, in our case infra-deployment, and in the ‘Stack Actions’ menu select the option ‘Create change set for current stack’, as shown in the image below:
Then select the option ‘Replace current template’ to allow loading the updated template, and load the template using ‘Upload a template file’ and selecting the template.yml file.
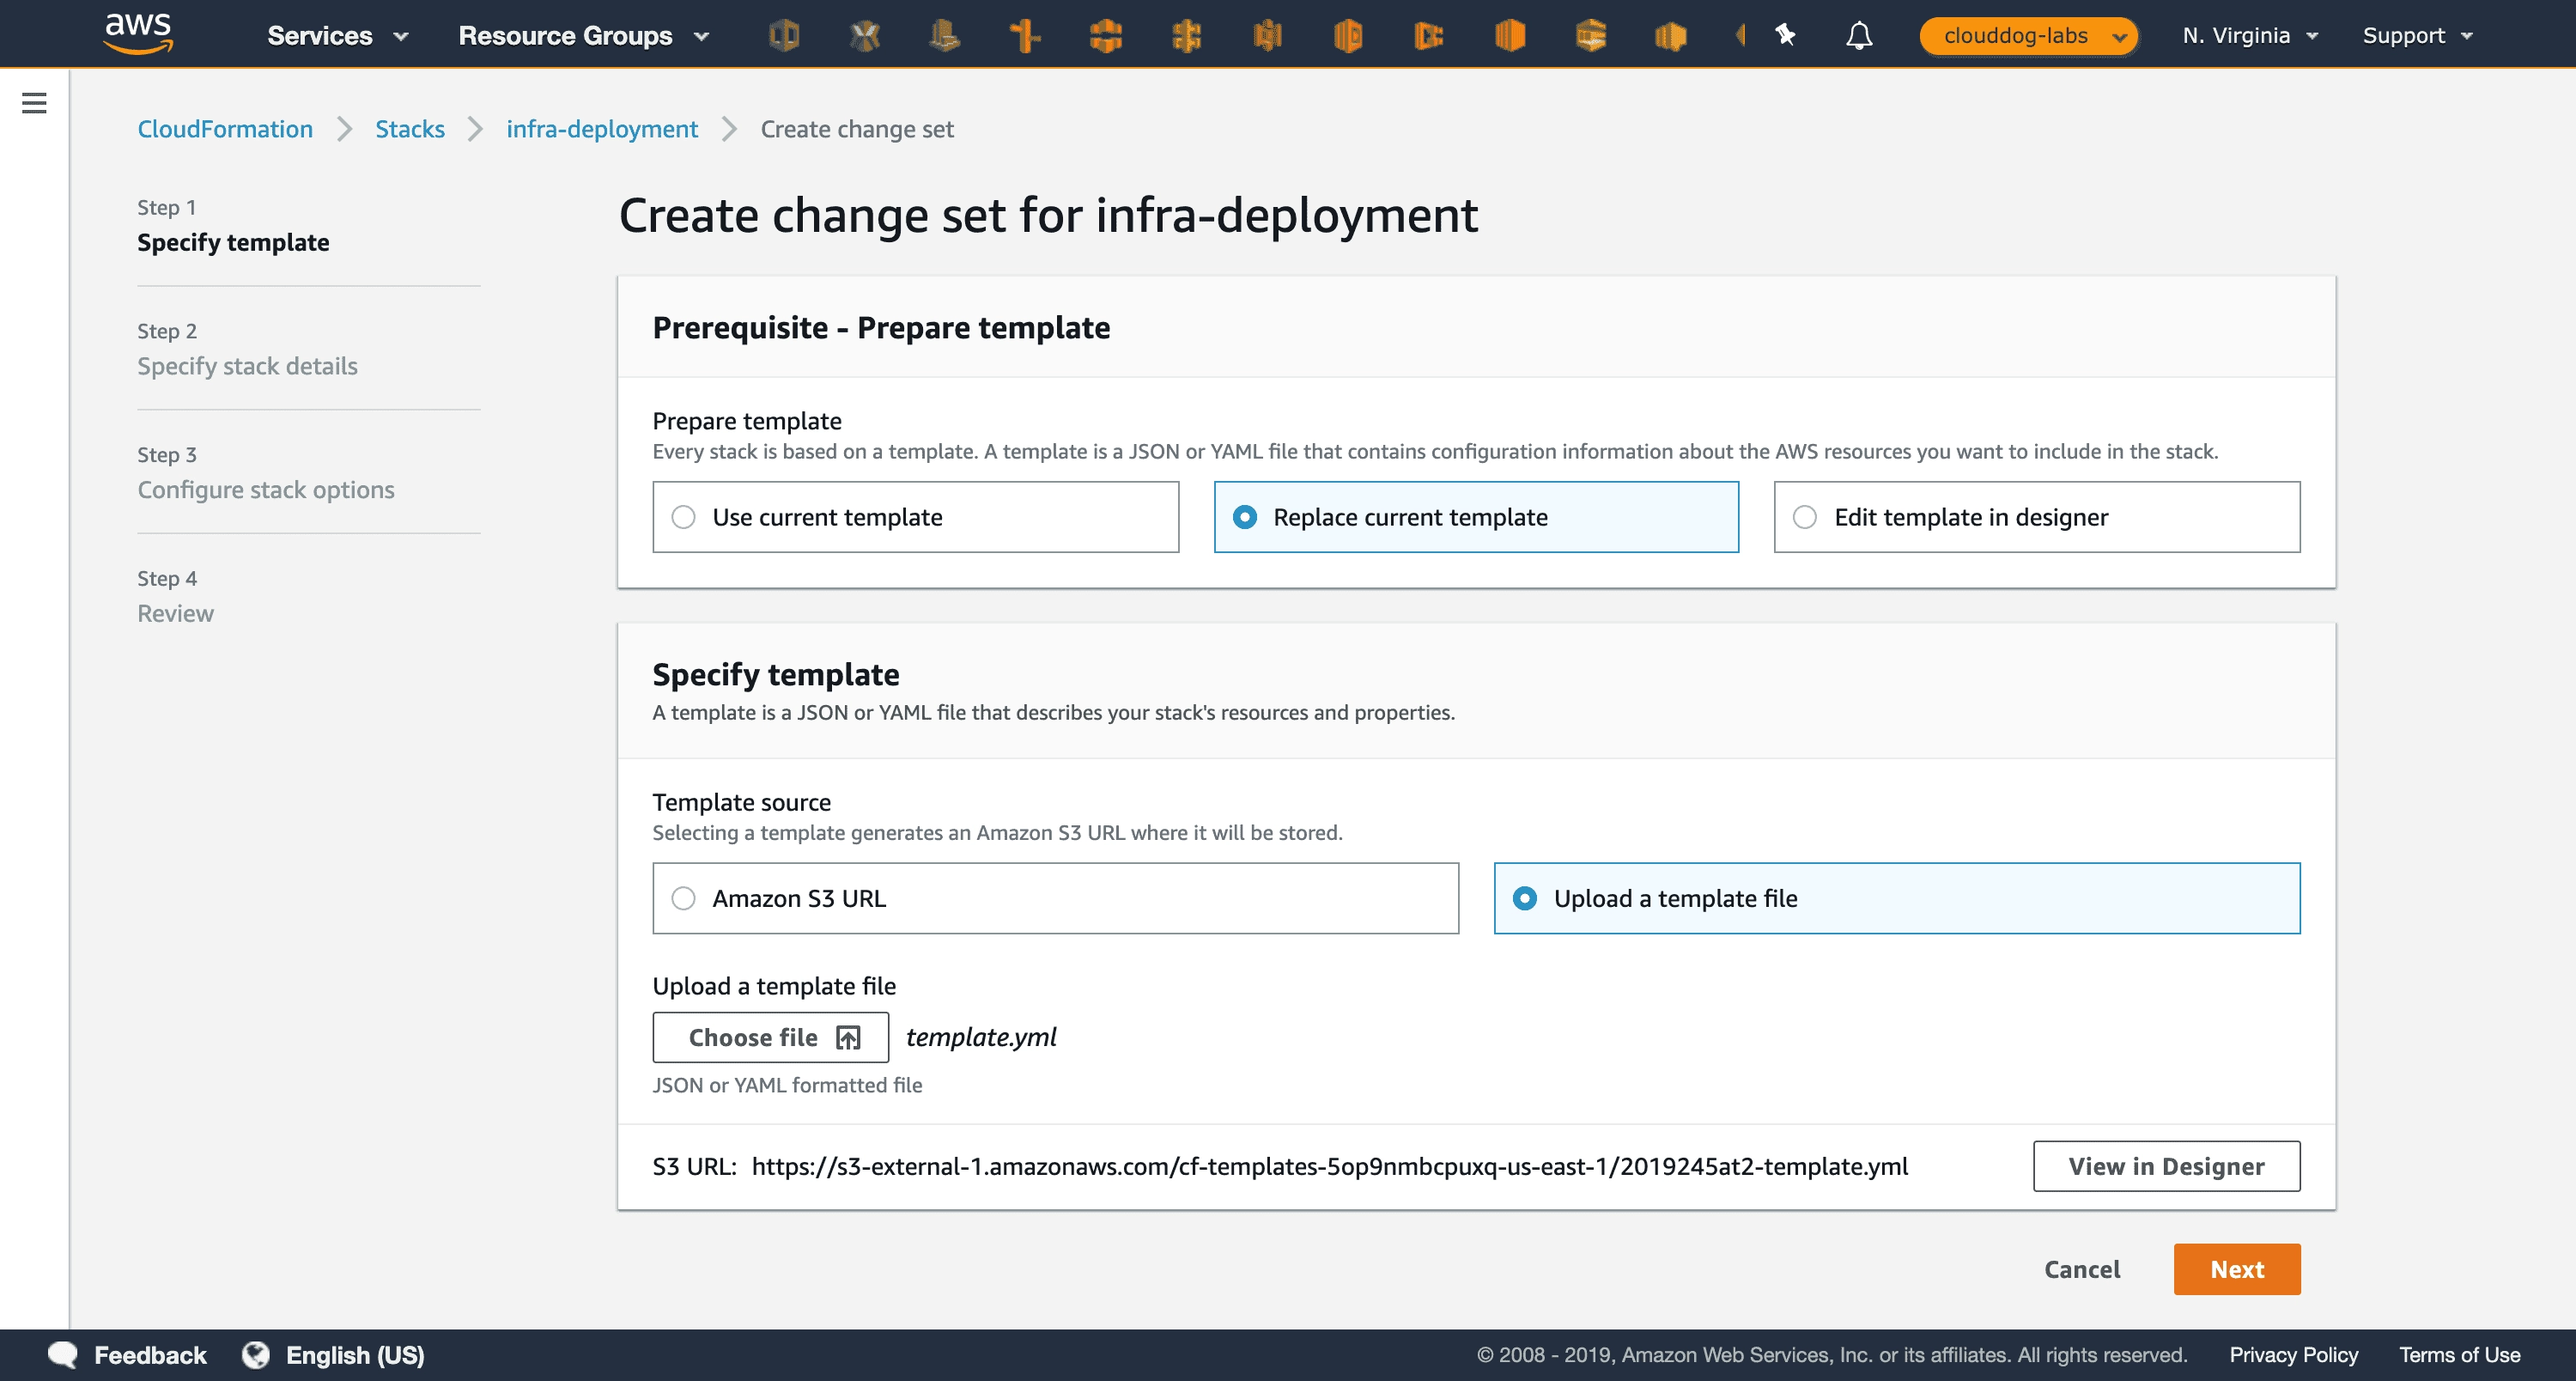
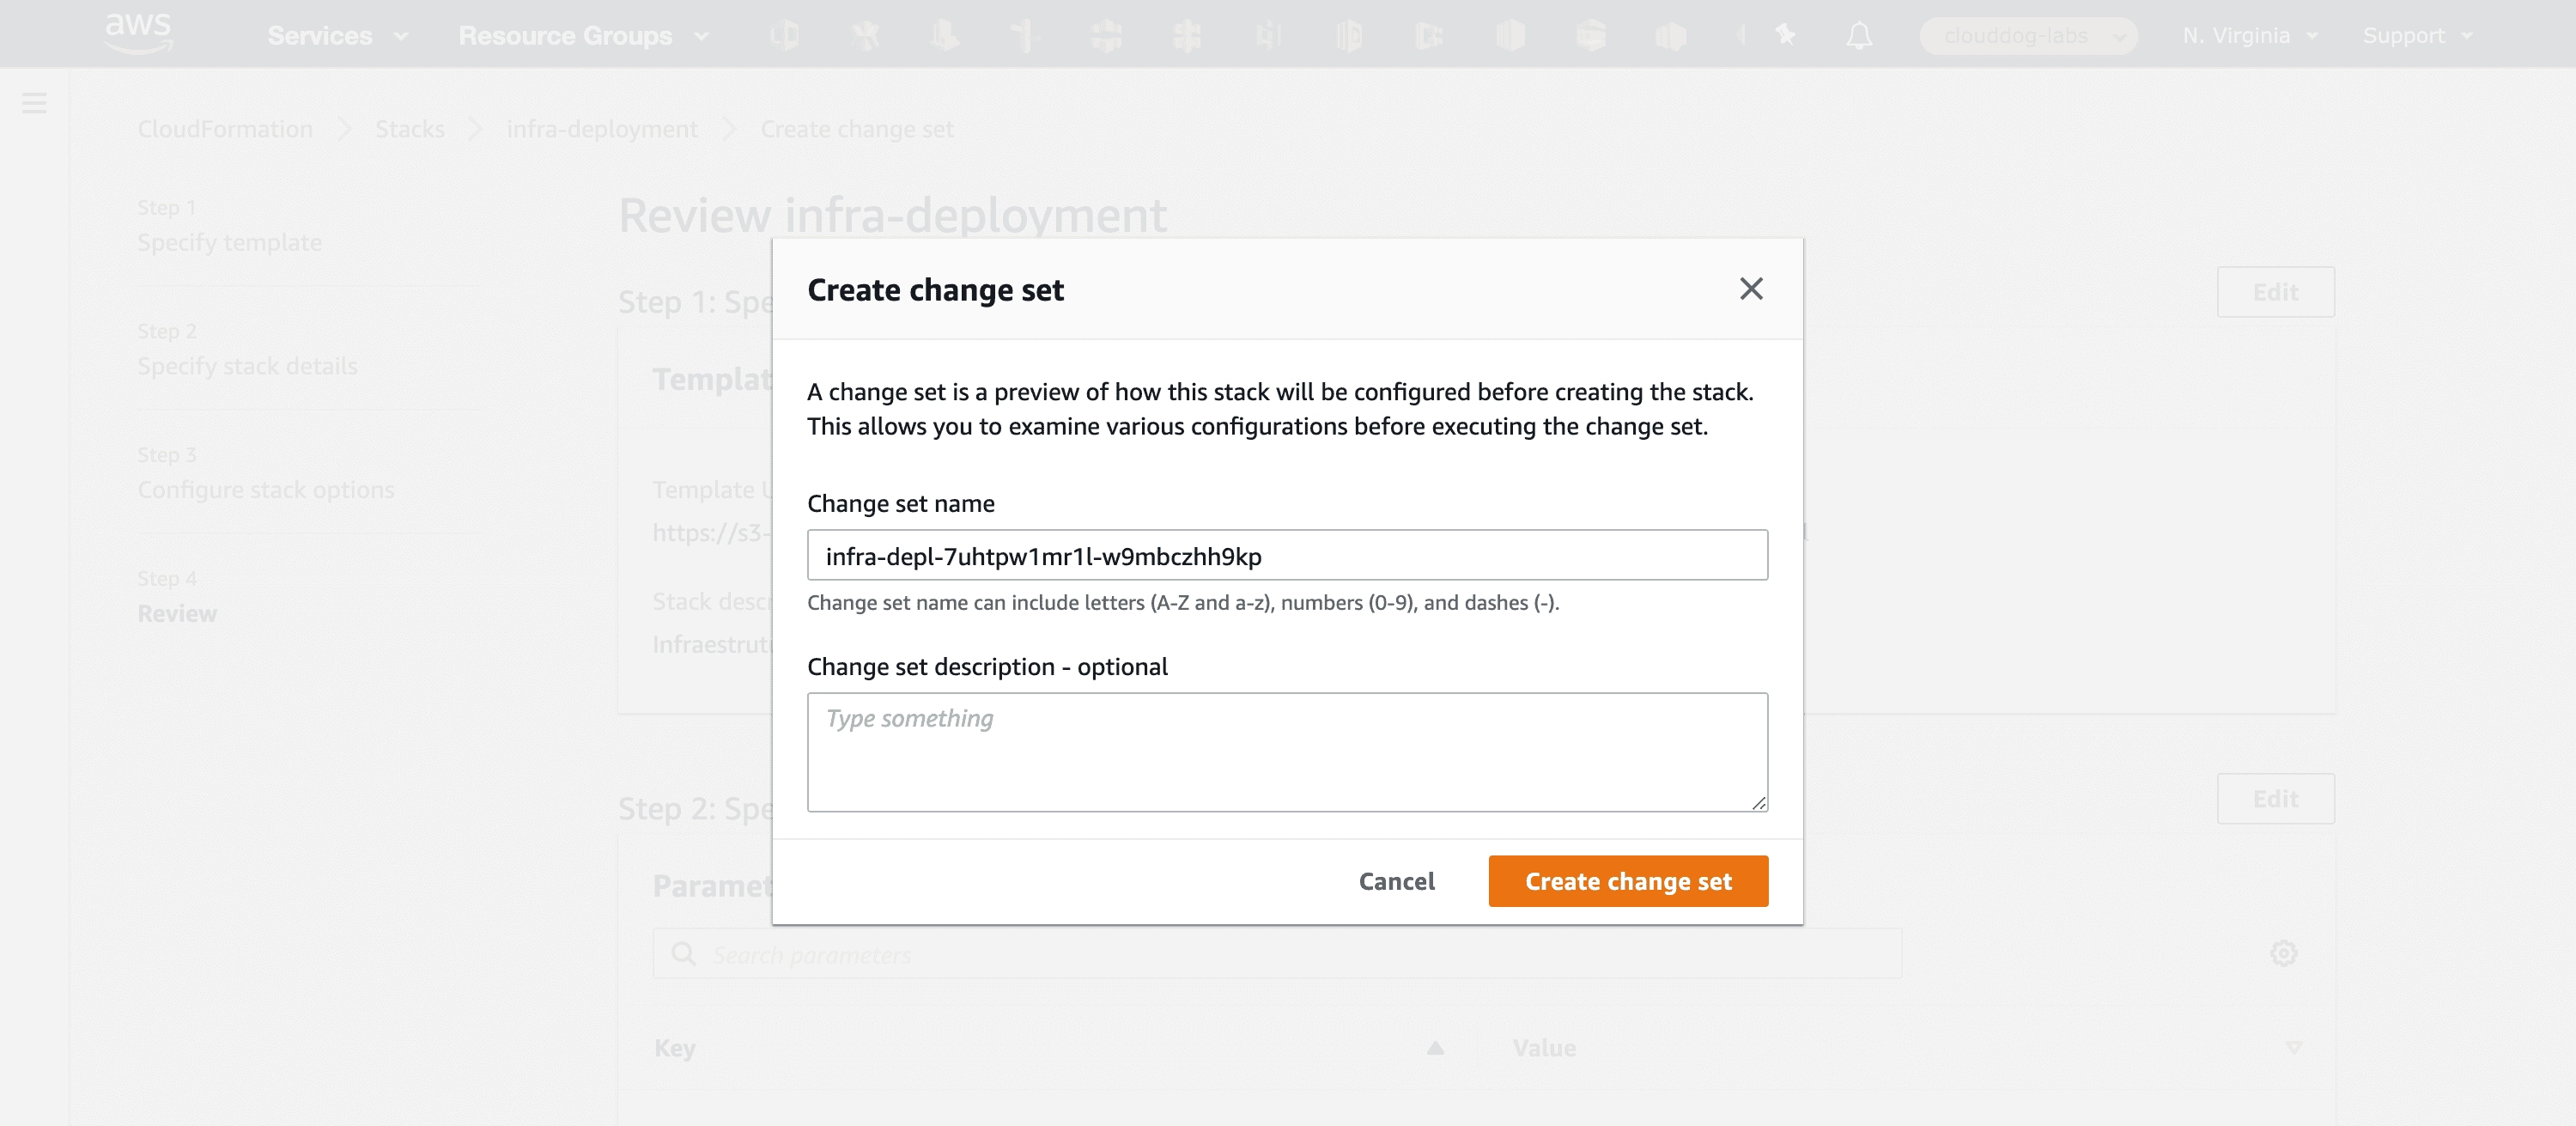
Next click ‘Next’, accepting the default settings until the popup below appears to configure the change set name; you can keep the suggested name and then click ‘Create Change Set’.
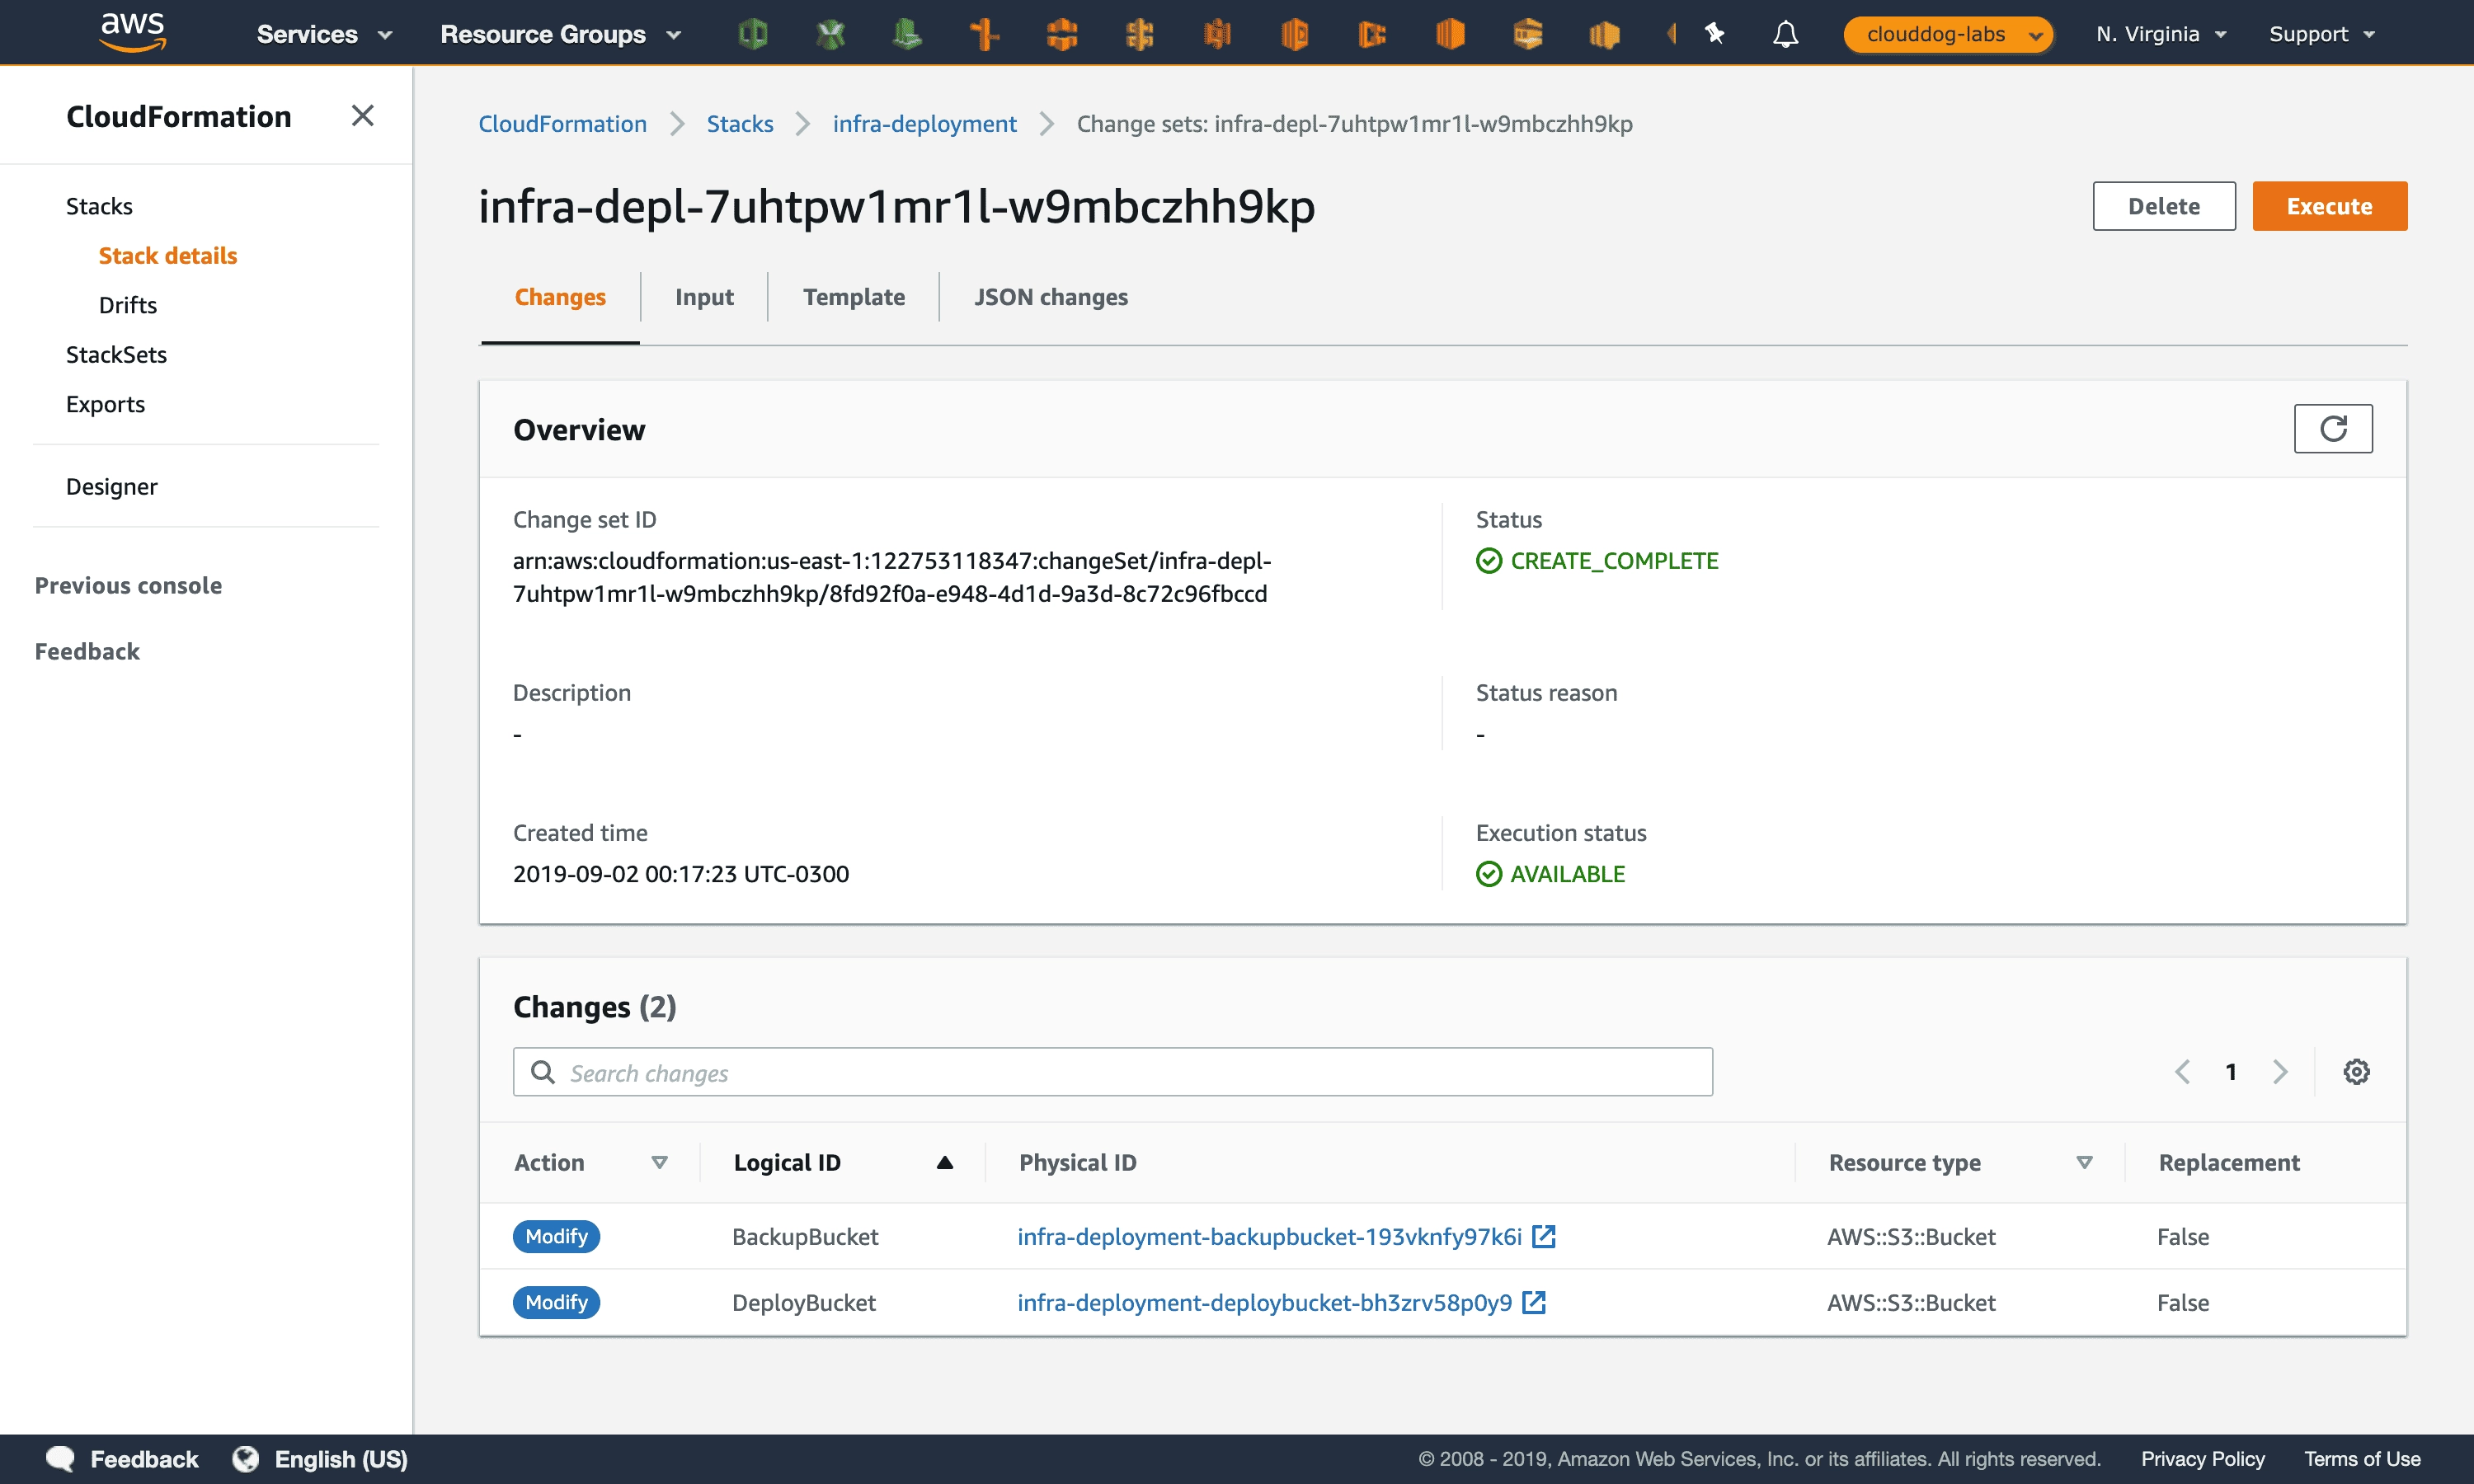
After the change set is created, you will be able to check which resources will be changed by this change set; if everything went well, only BackupBucket and DeployBucket should appear in the list. It is important to note that the ‘Replacement’ column is set to ‘false’ for both resources, which means there will be no data loss. At this point, you can safely execute the change set by clicking the ‘Execute’ button.
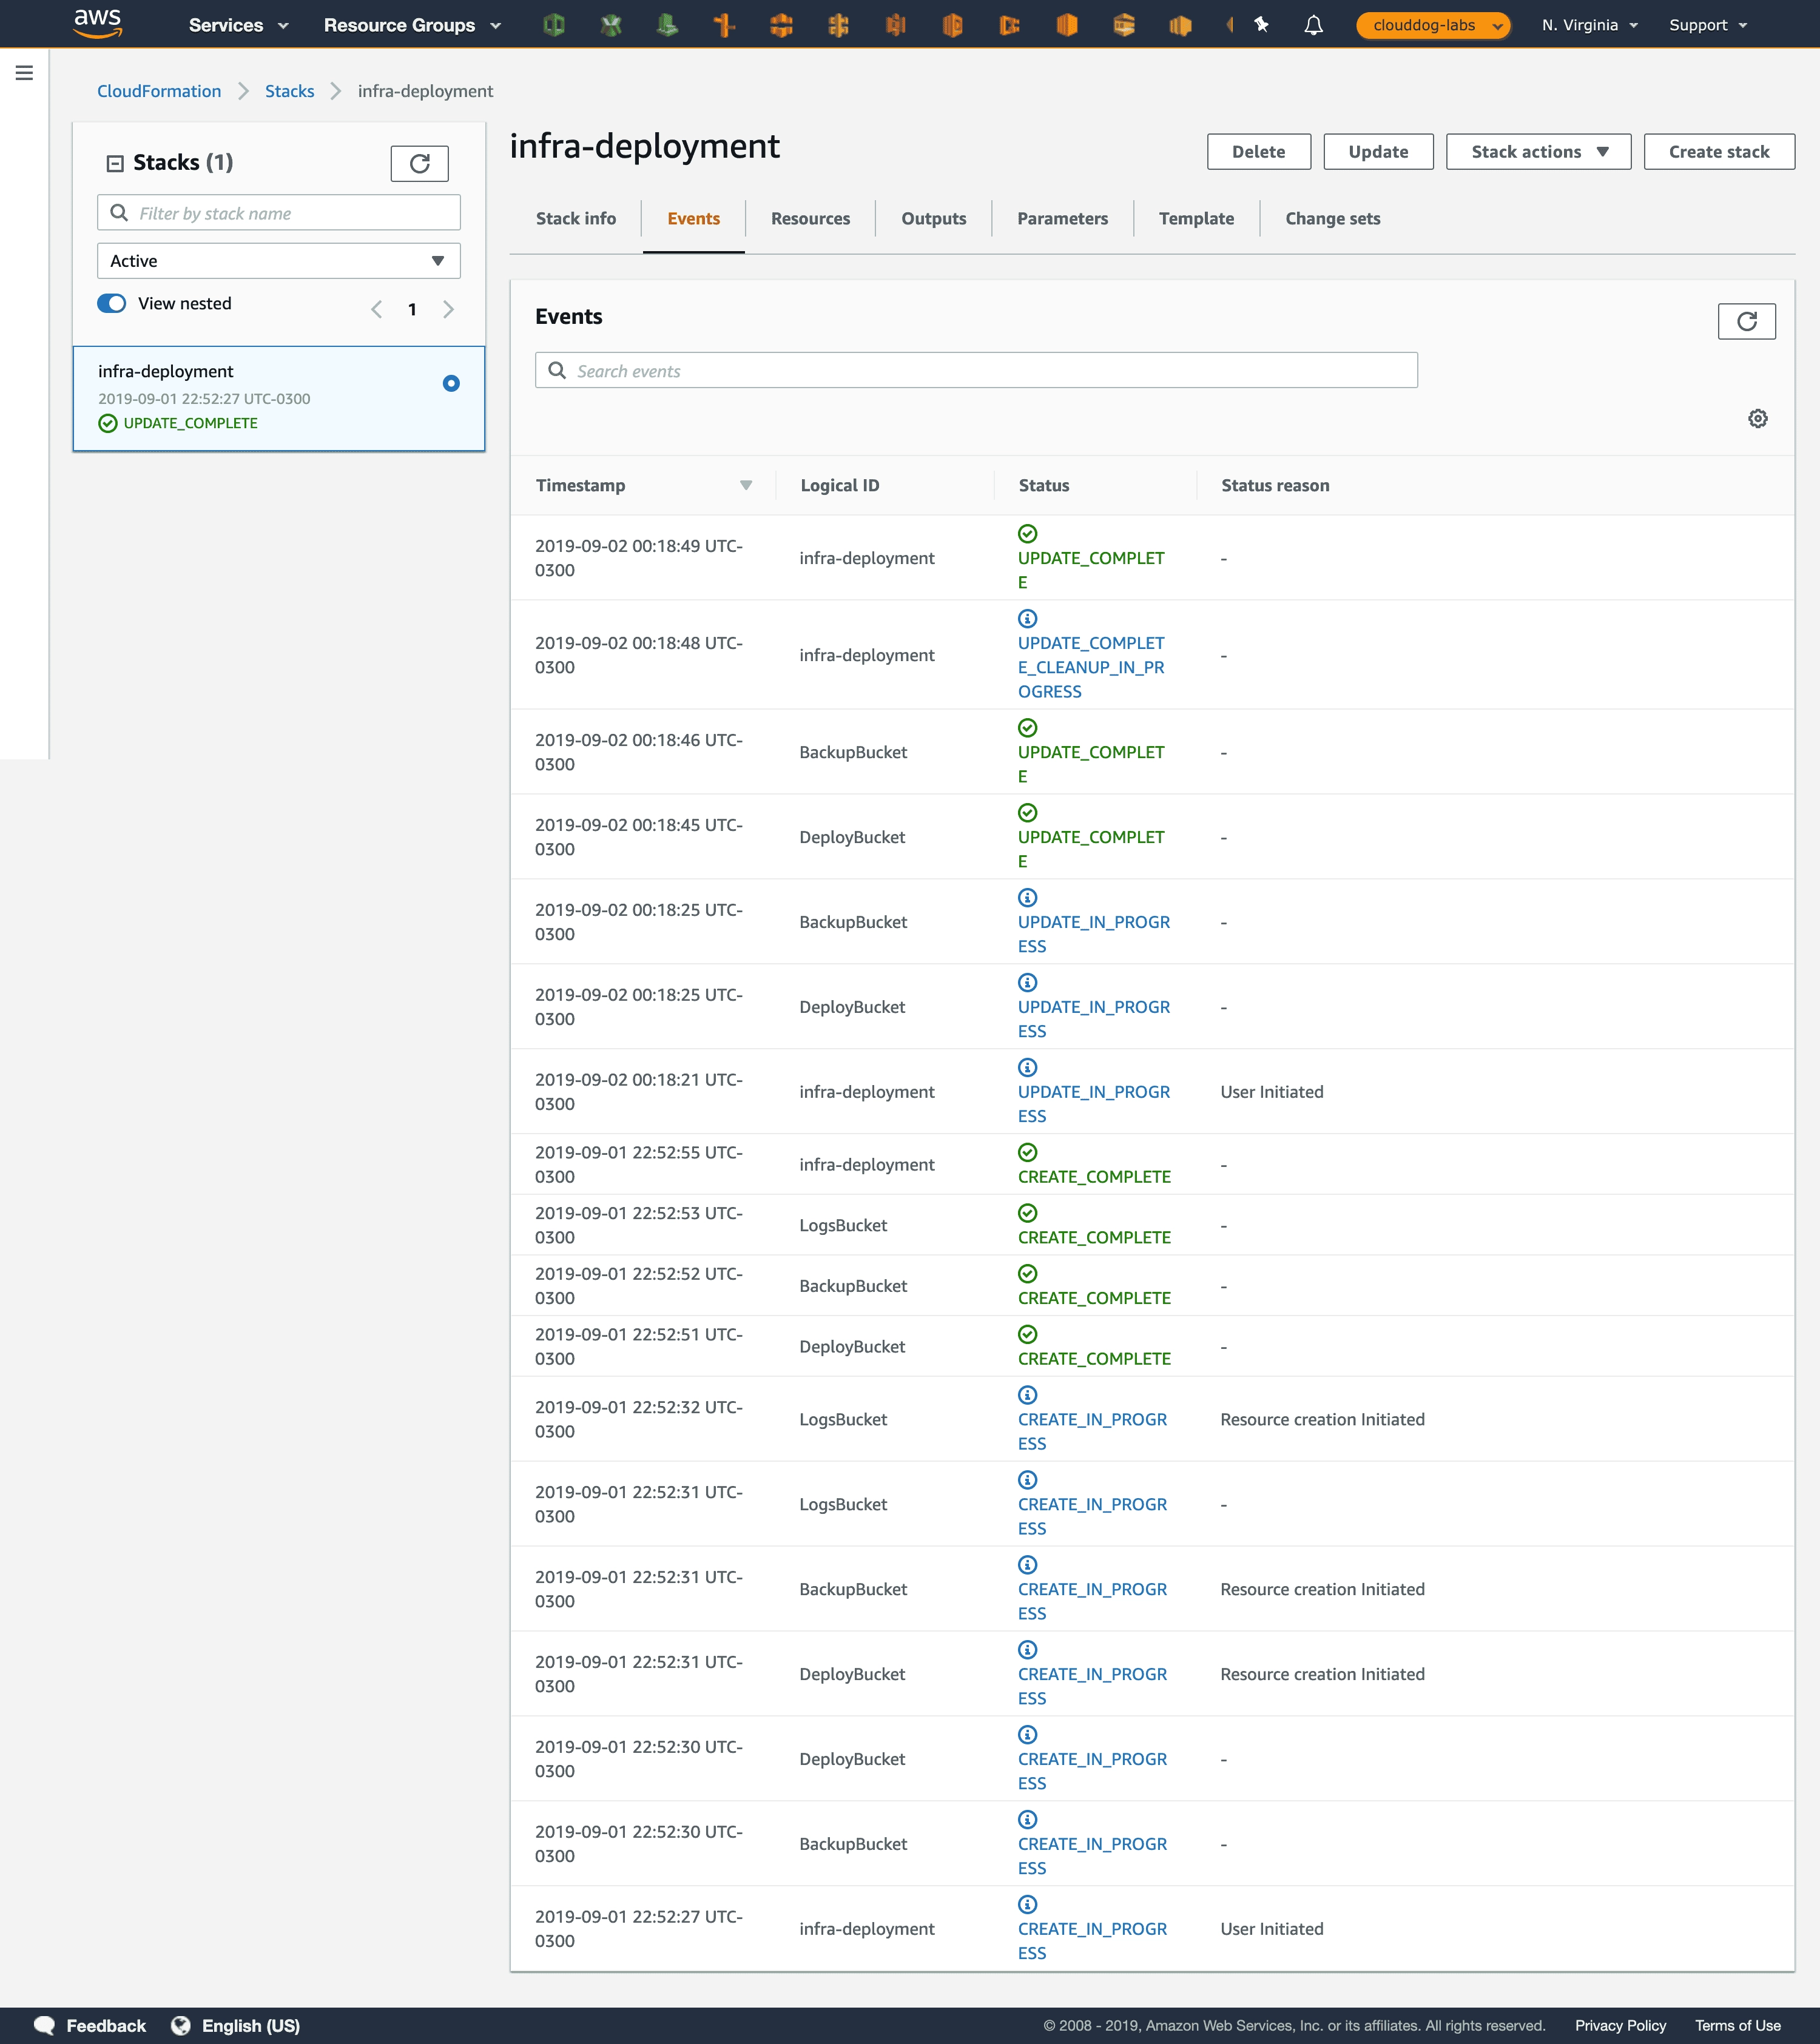
The change set will start running and will return to the Stack events tab; you can click the refresh button until the line ‘infra-deployment’ appears at the top with status ‘UPDATE_COMPLETE’, as shown in the image below.
Validating the Change Set
It is always important to open the updated resources and confirm that the adjustment was made satisfactorily.
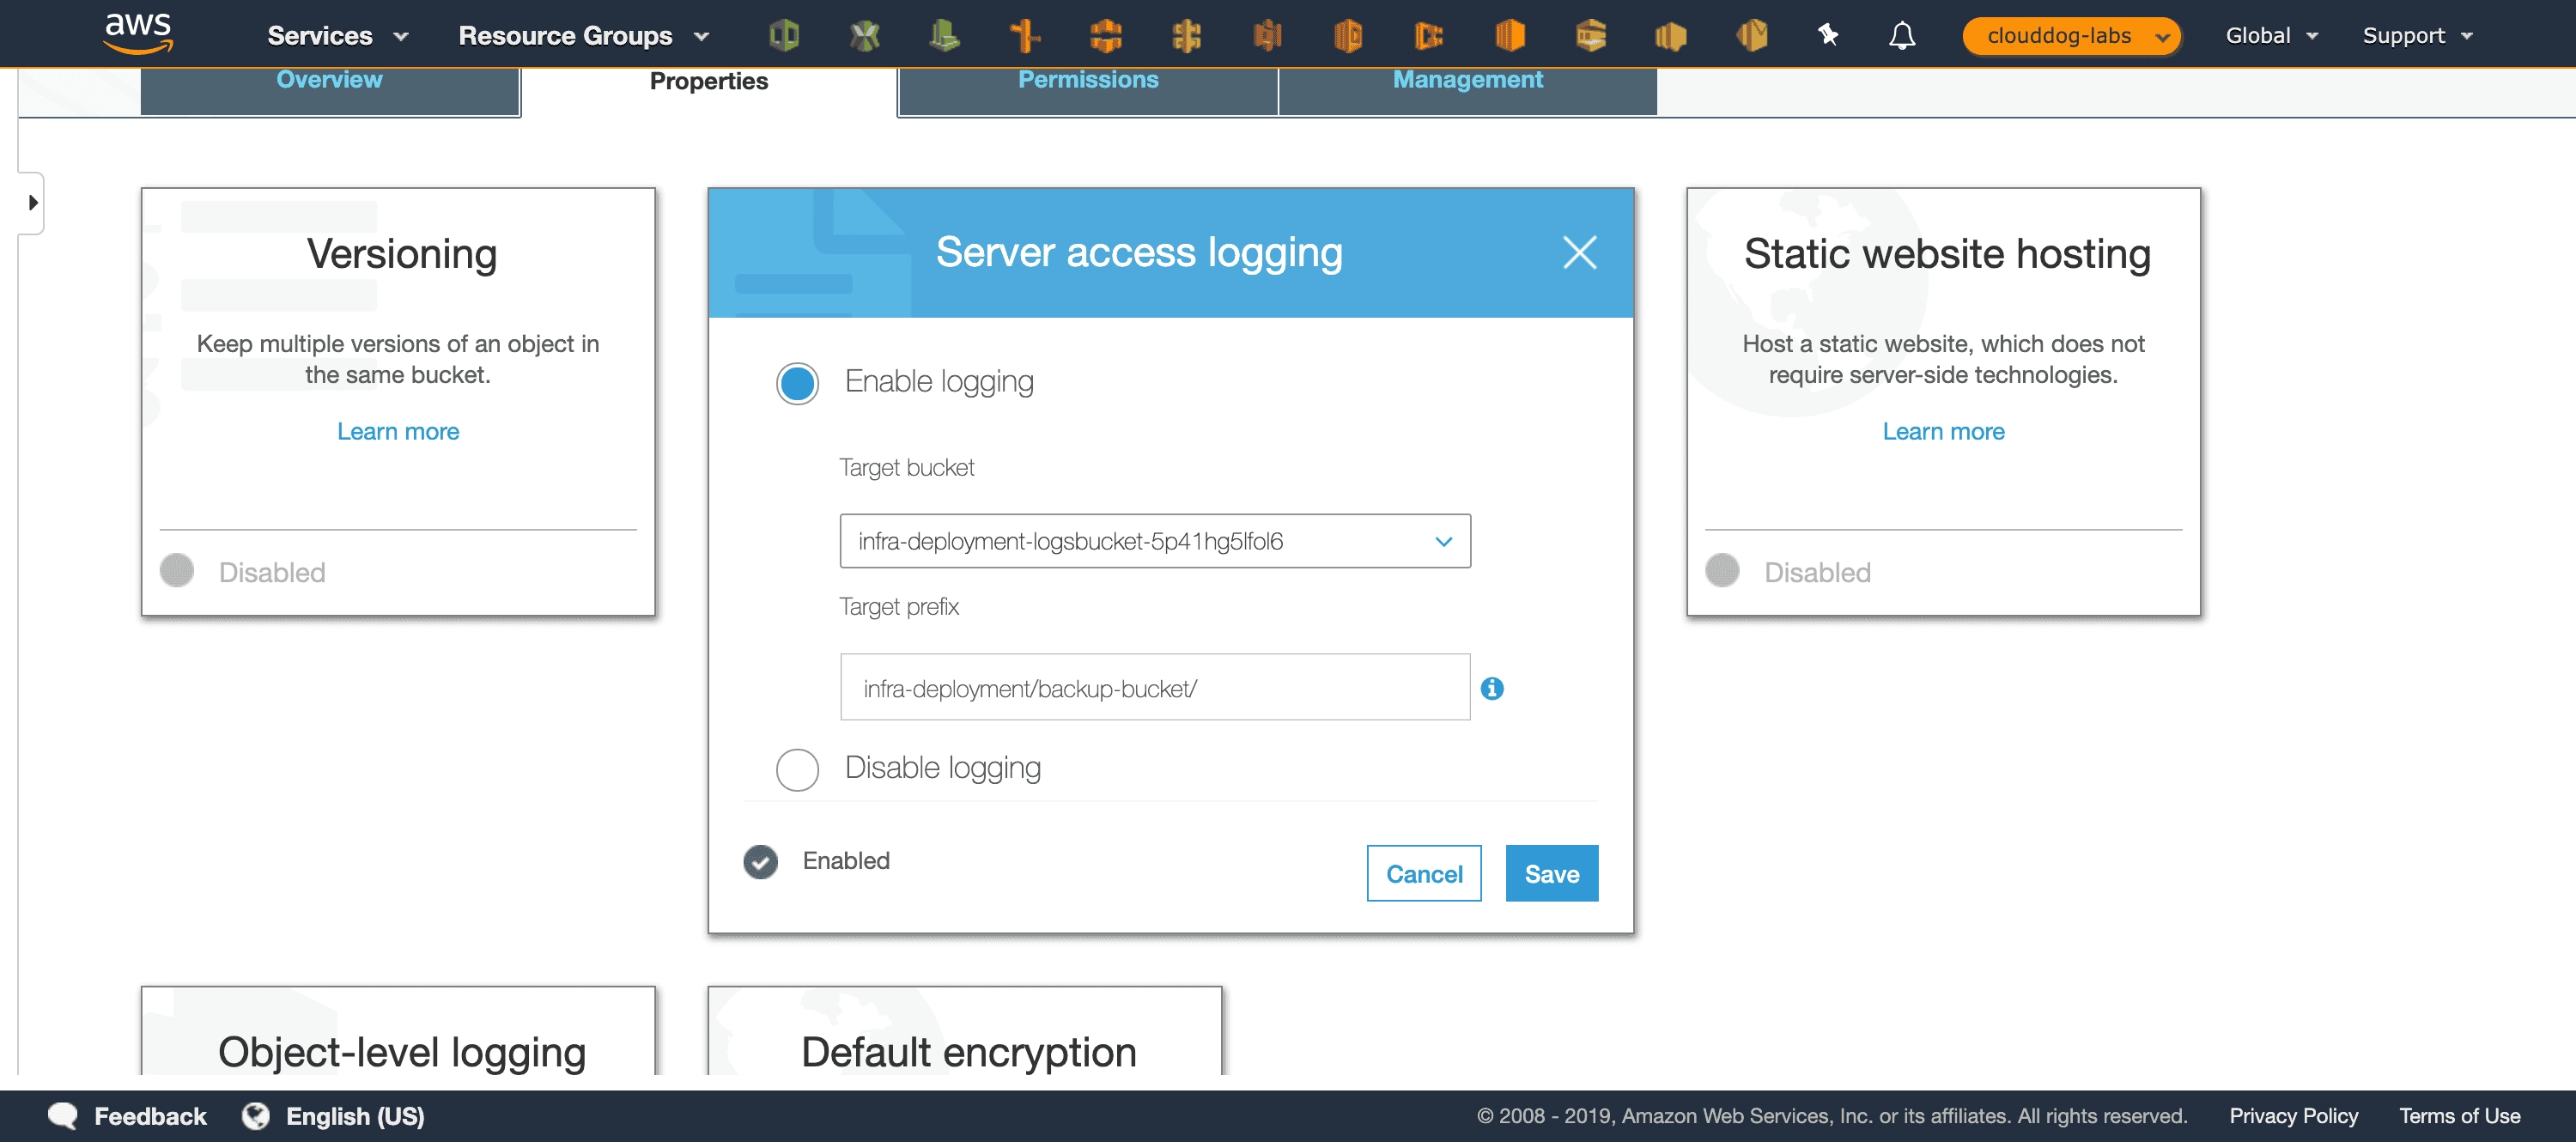
Protecting a Stack
After creating and updating the stack, we already have a solid base to continue, and it becomes important to prevent someone from accidentally deleting this stack.
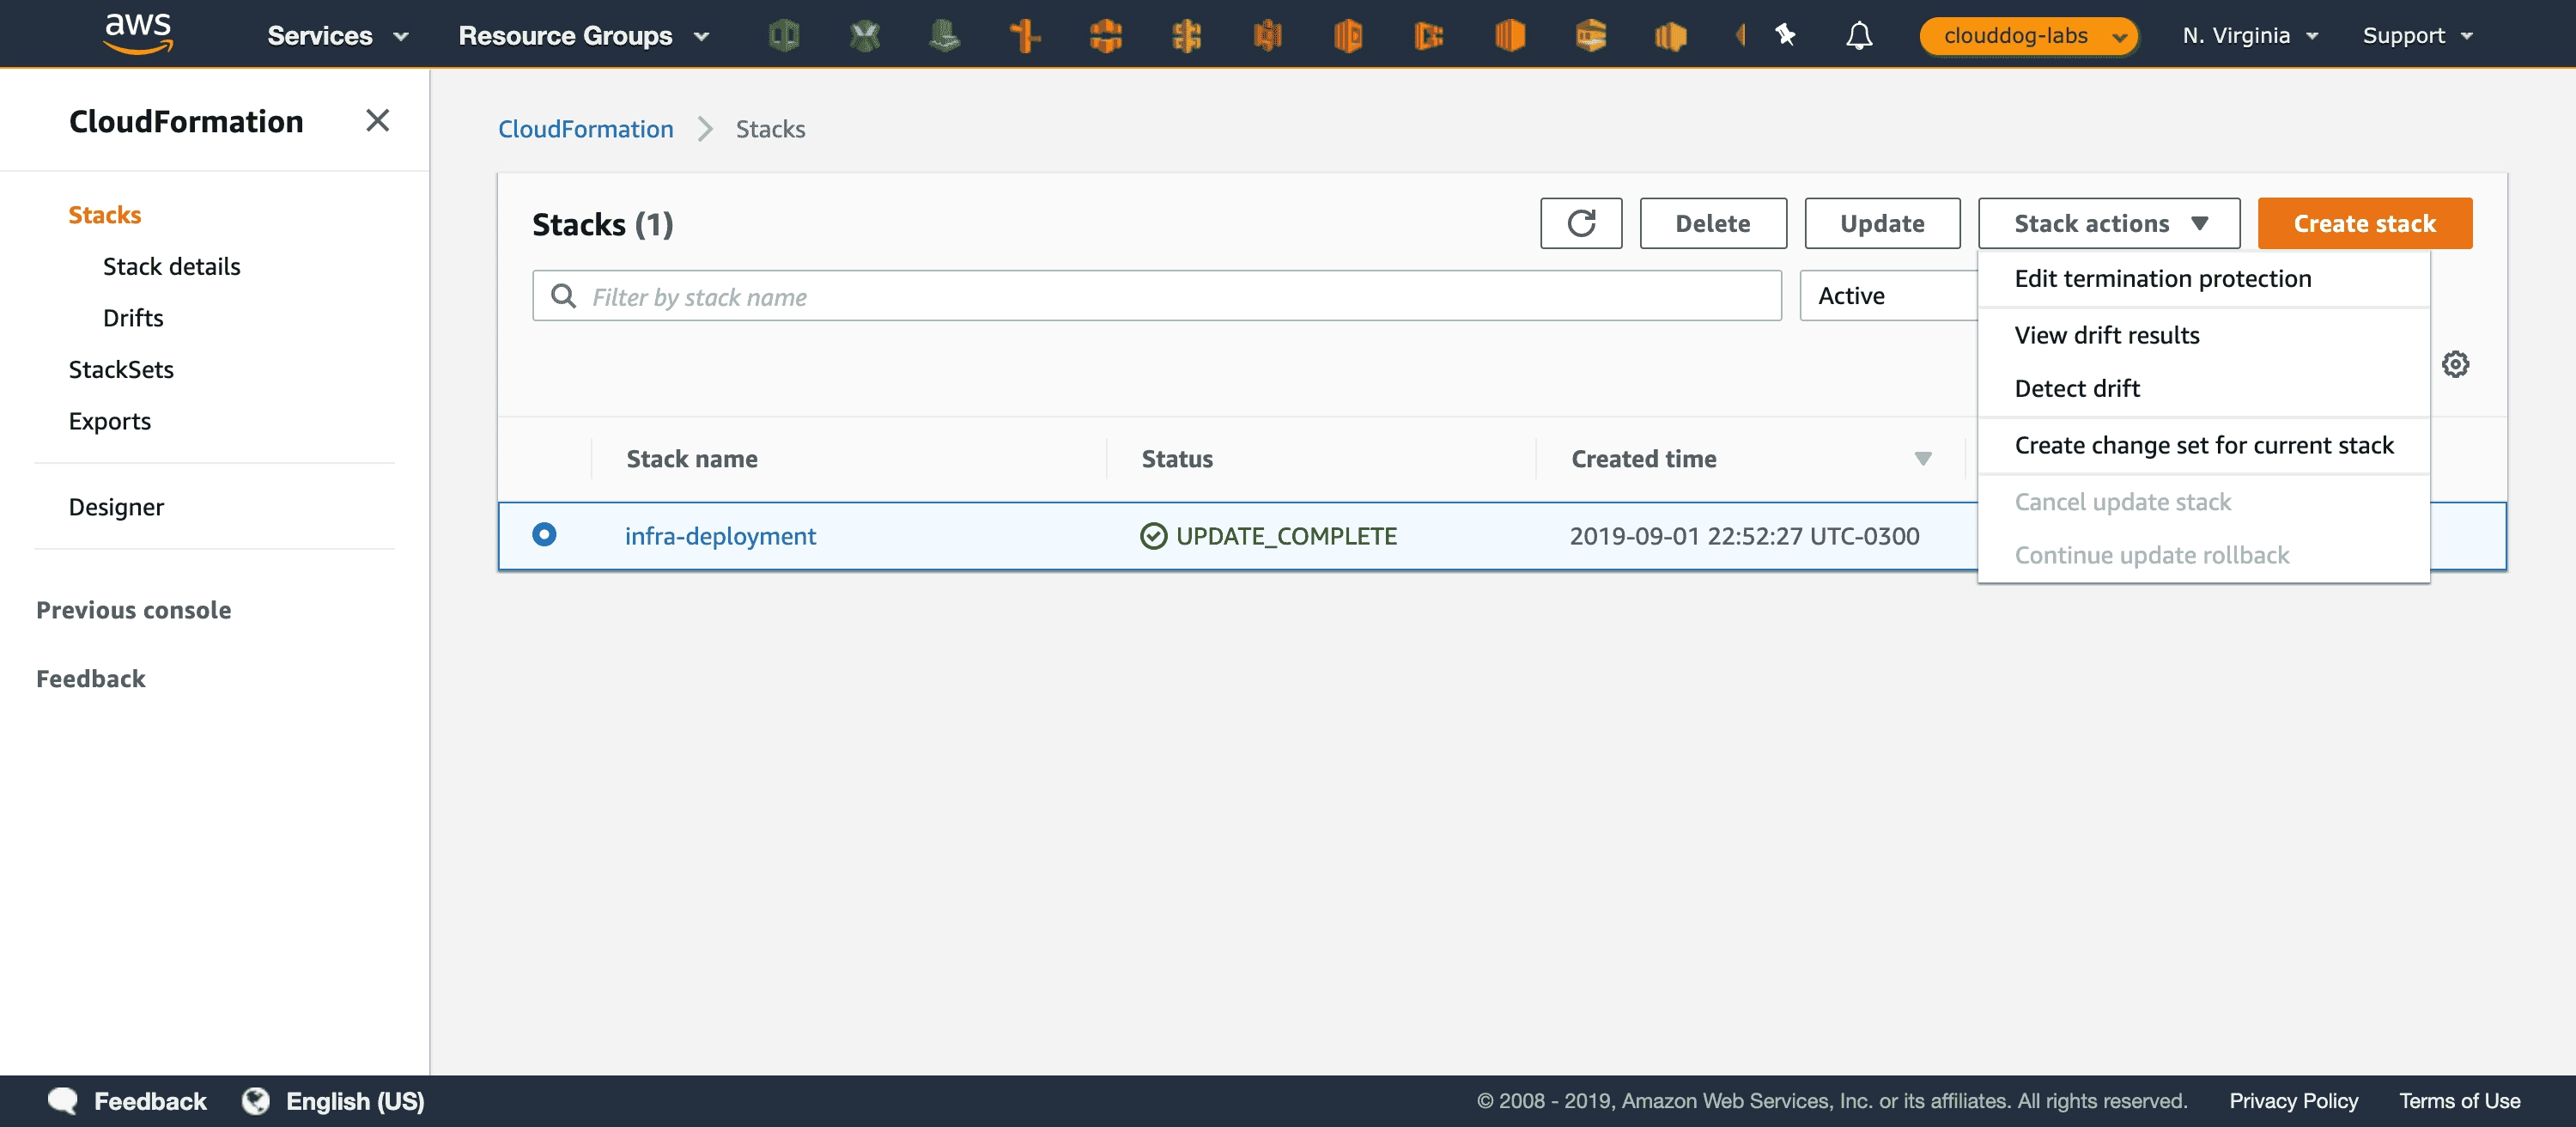
For this, it is necessary to configure it by selecting the stack and accessing the option ‘Edit termination protection’ in the ‘Stack Actions’ menu.
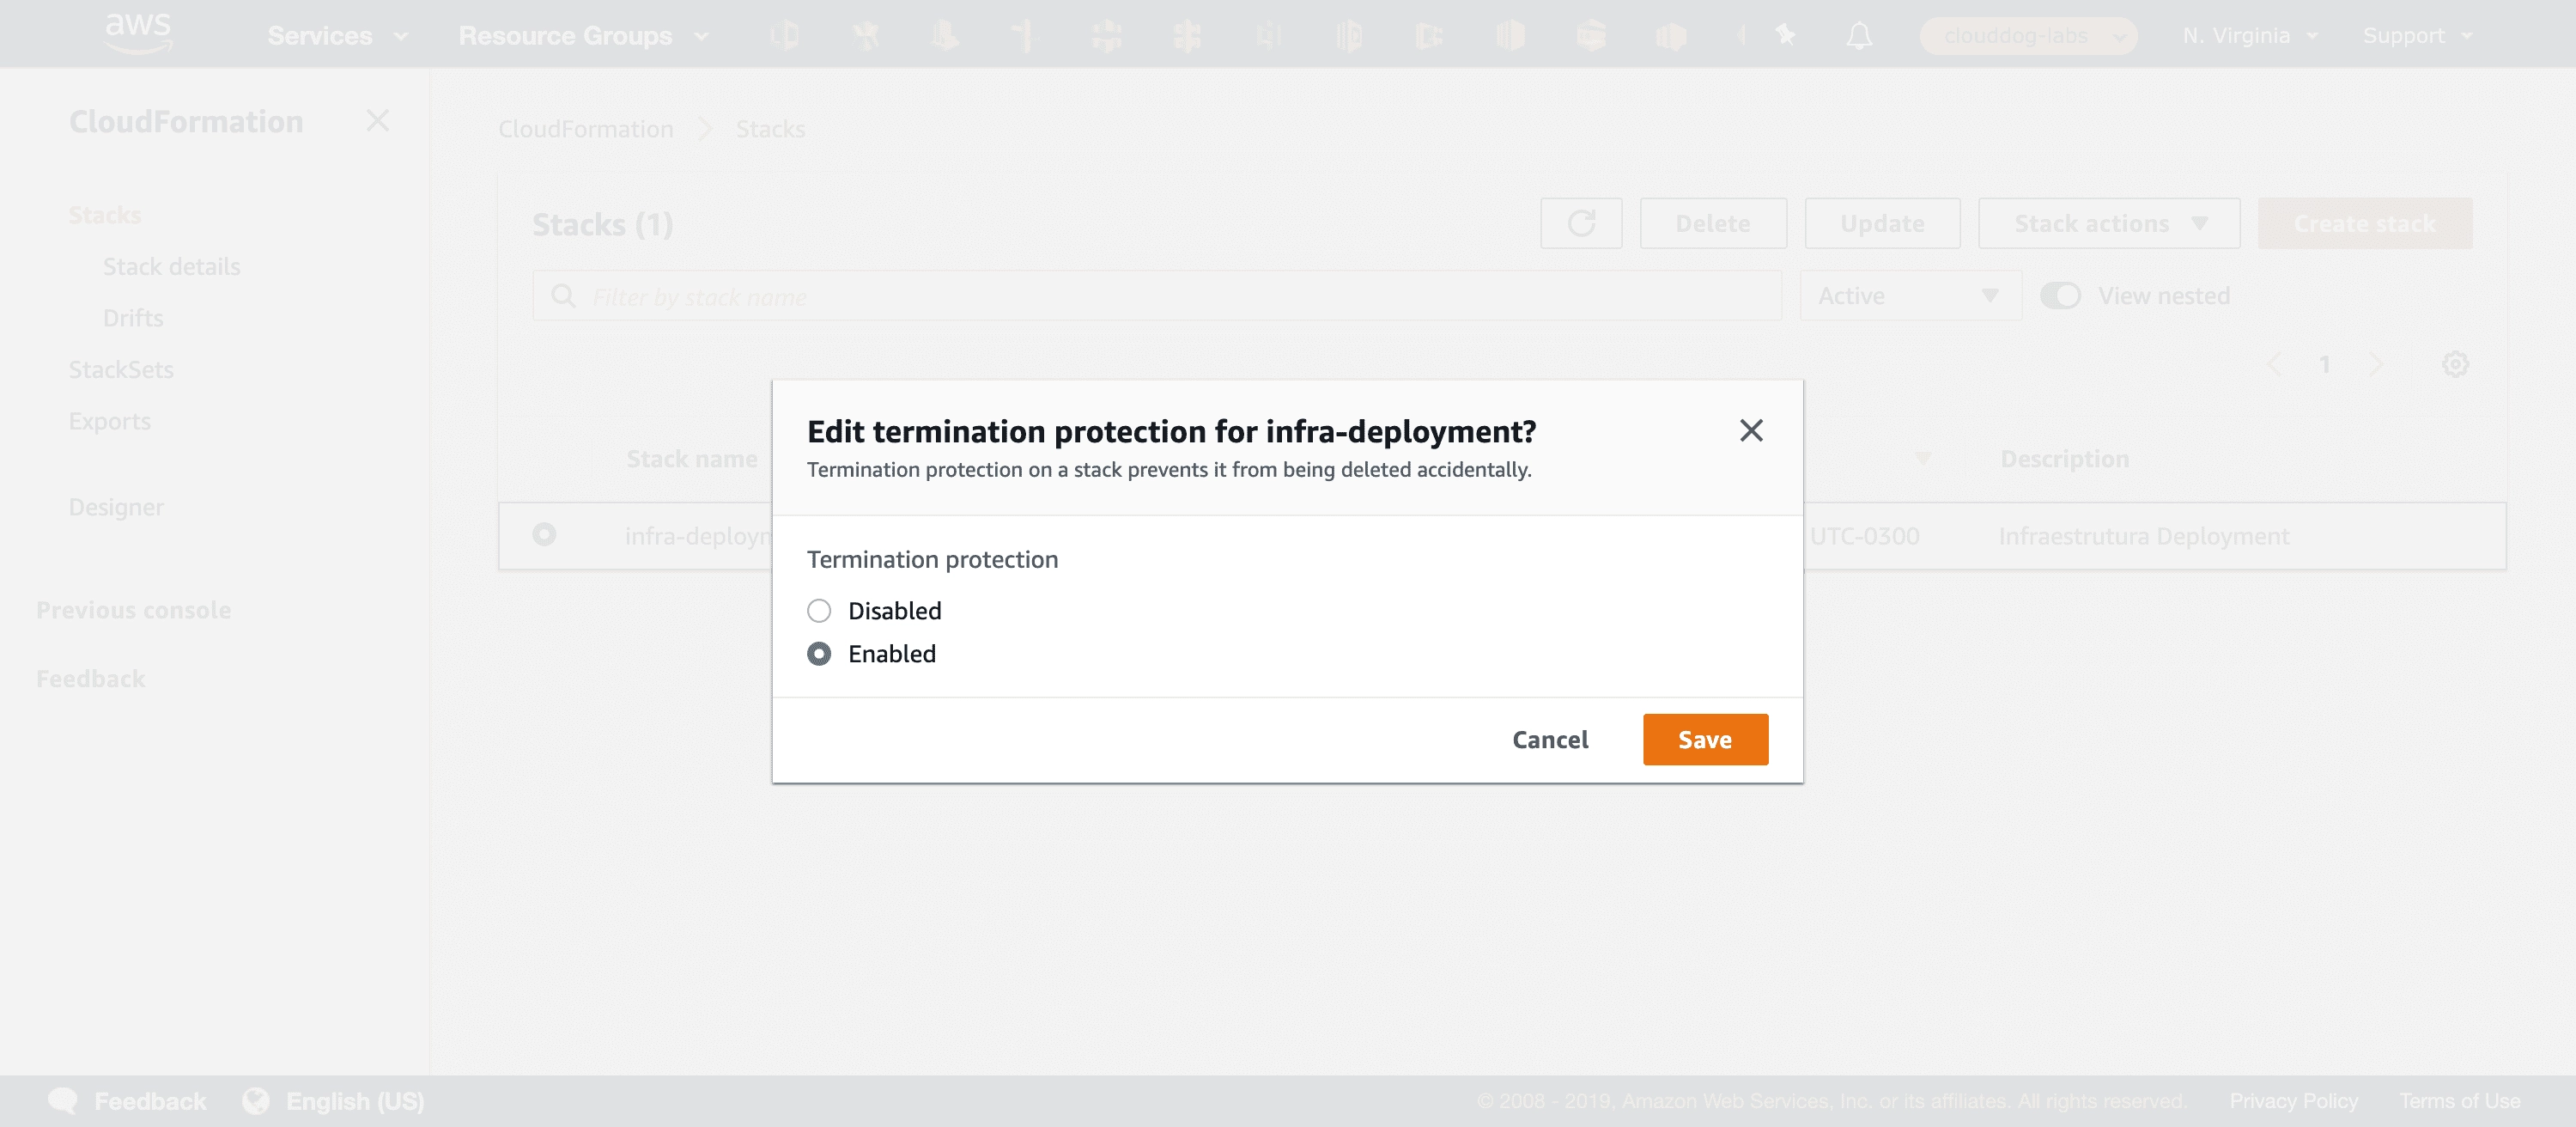
Select the ‘Enable’ option and confirm by clicking ‘Save’.
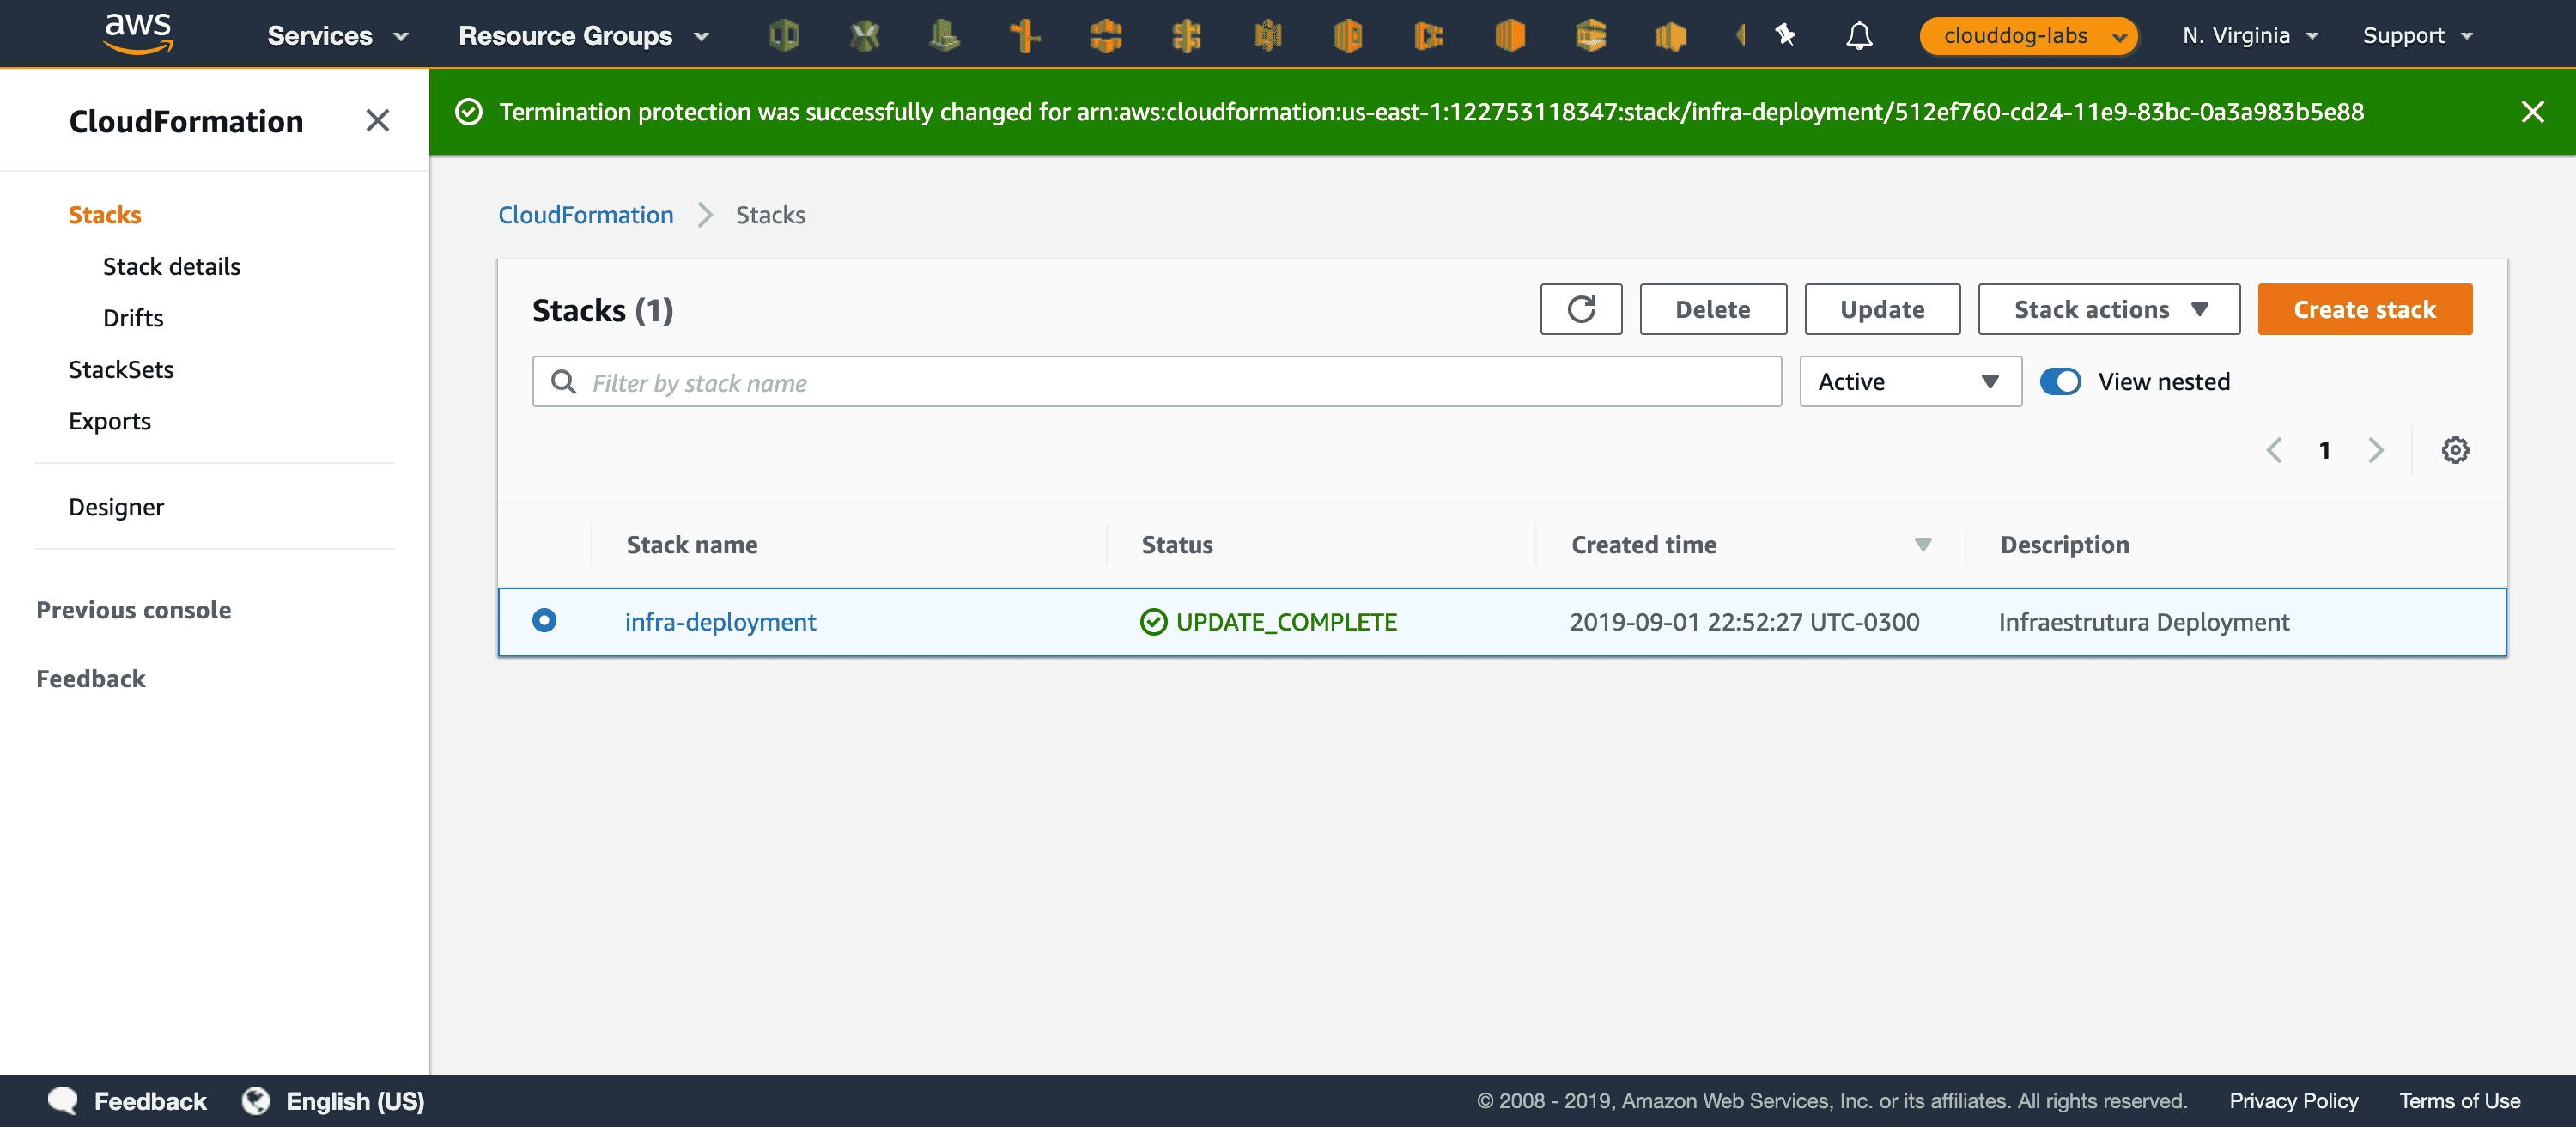
You will then see the green notification saying the change was made successfully. Since this change did not generate changes to the resources, there was no change in the stack status and no new event was triggered.
Summary
In this article we discovered the basics of an AWS CloudFormation template, created a Stack, and updated it using a Change Set, and finally protected the stack against deletion.