
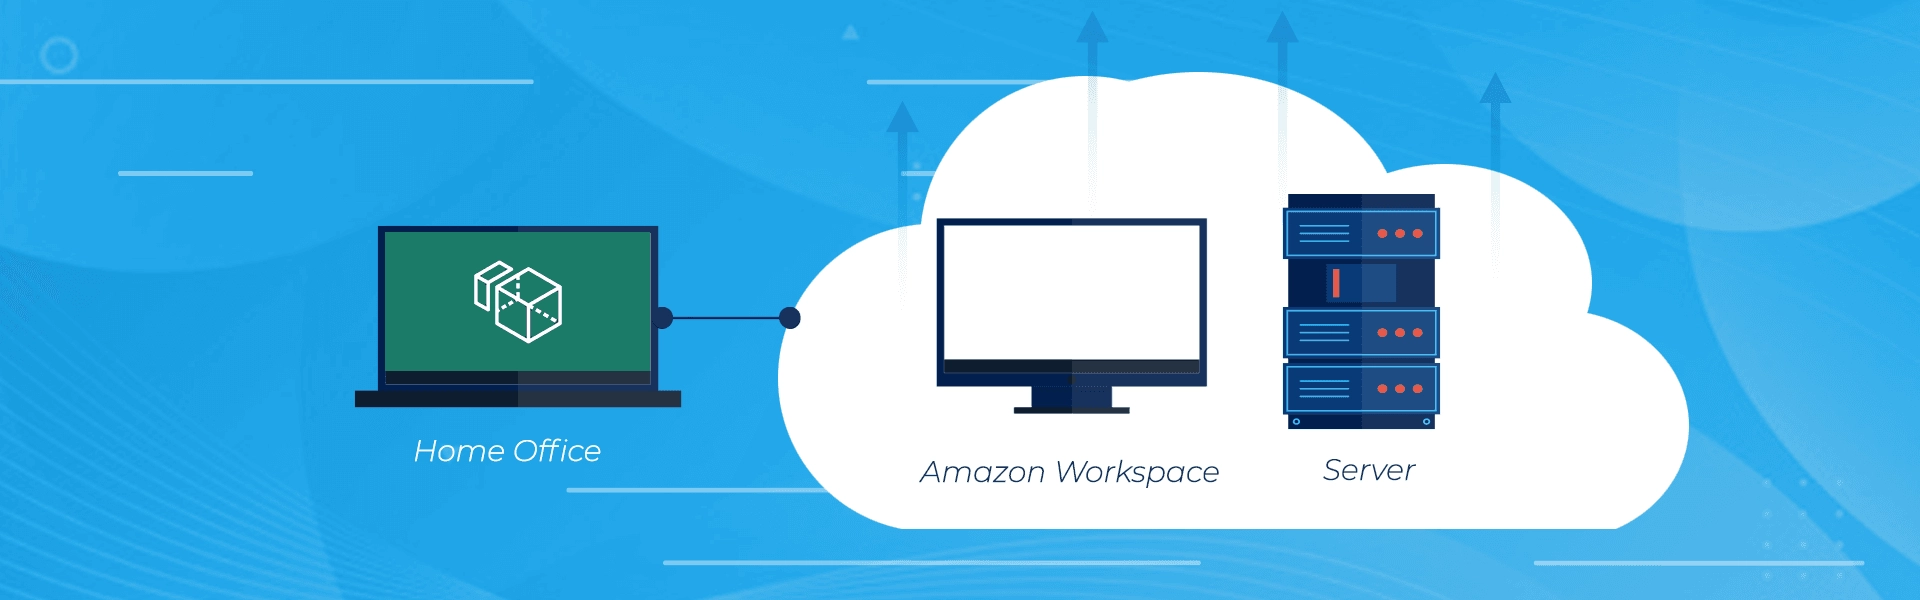
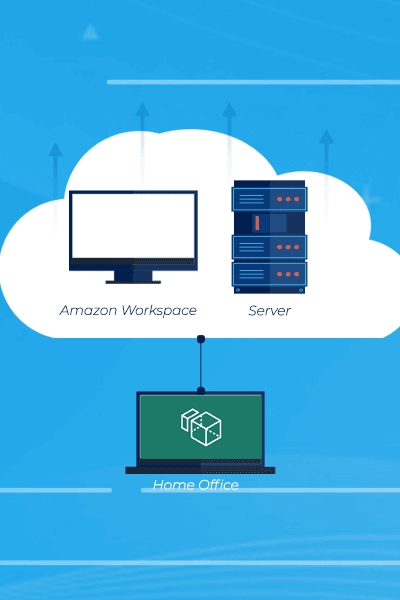
What is Amazon WorkSpaces?
Amazon WorkSpaces is a desktop virtualization solution as a service (Desktop as a Service, or DaaS). With it, we can provision Windows and Linux workstations for each employee in a department, each of which can contain software specific to each one. With payment that can be made monthly or per hour of runtime, along with the flexibility to use it on laptops, smartphones, and even in the browser, Amazon WorkSpaces is an option to consider for remote and/or temporary services.
Required knowledge
To configure an Amazon WorkSpaces environment, it is recommended to know the differences between the types of directories that AWS provides, which are: AWS Managed Microsoft AD, Simple AD, and AD Connector.
AWS Managed Microsoft AD: Enable Active Directory-aware workloads and AWS resources to use managed Microsoft Active Directory in the AWS cloud.
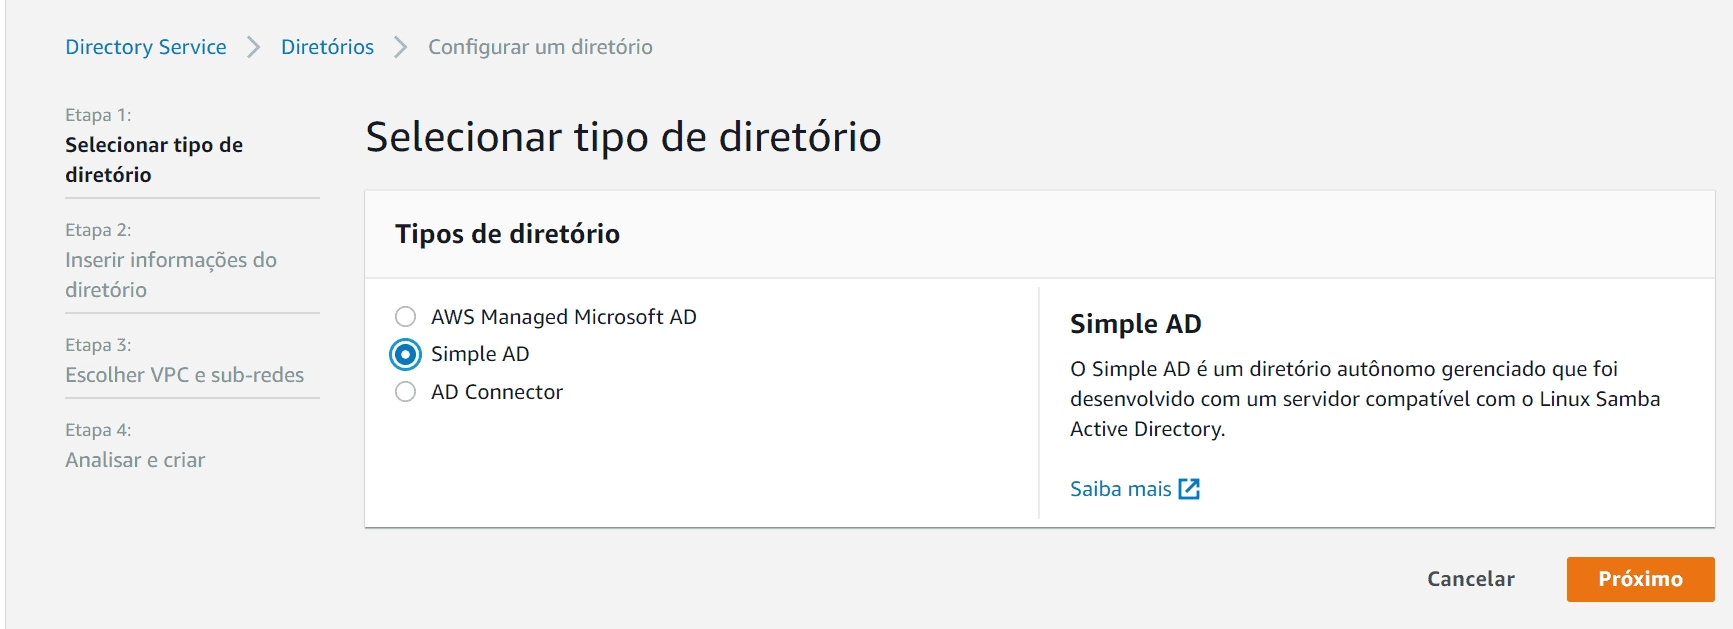
Simple AD: A standalone managed directory that was built on a Linux Samba Active Directory-compatible server.
AD Connector: A proxy that redirects directory requests to your current Microsoft Active Directory without caching any information in the cloud.
Prerequisites
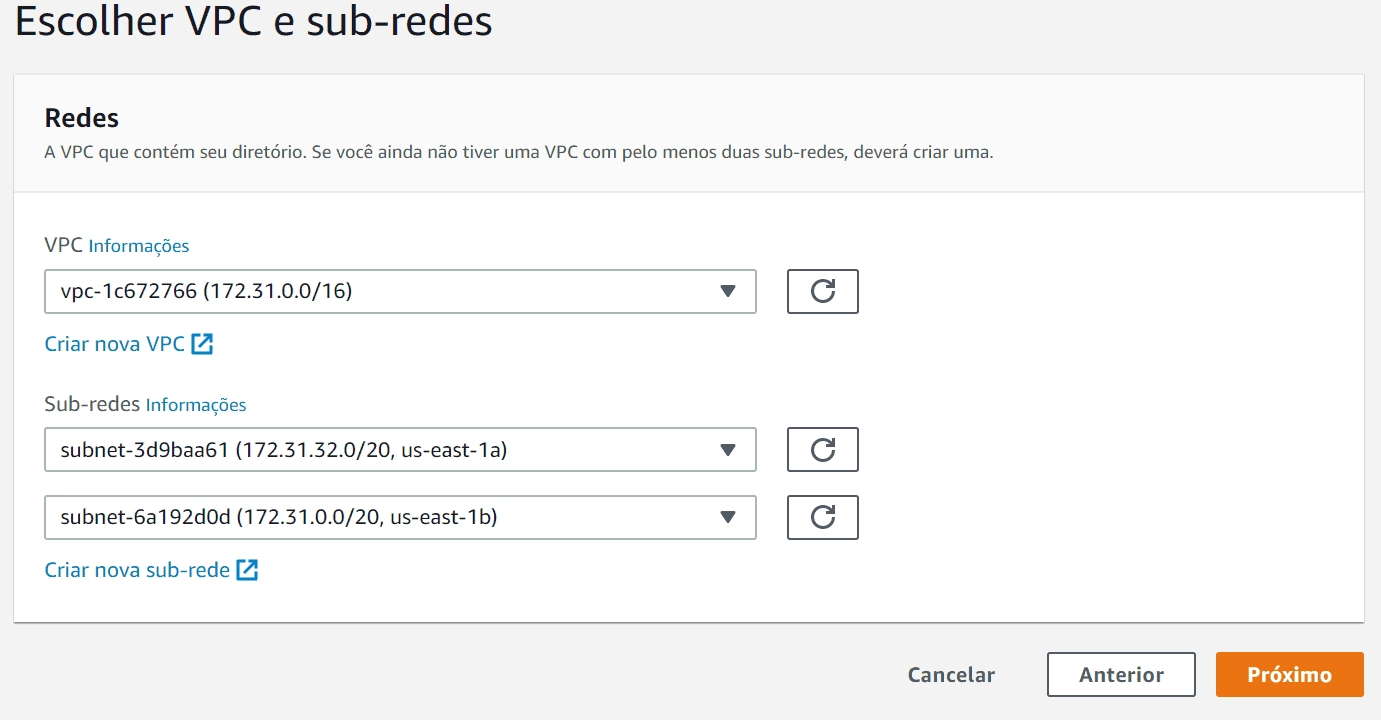
To take advantage of the benefits of Amazon WorkSpaces, you need a VPC with two subnets in different availability zones and an internet gateway.
Check whether Amazon WorkSpaces and its dependencies are available for your working region.
Step 1: Creating a Directory
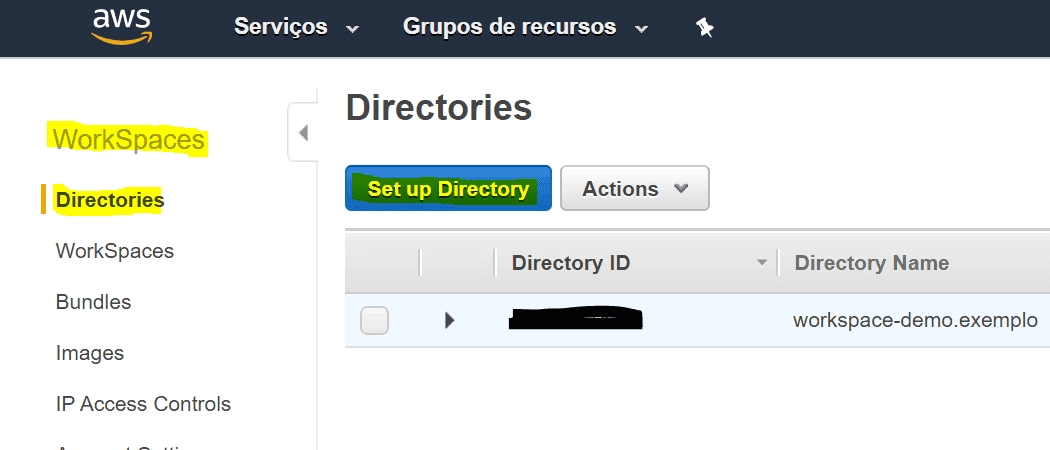
In the WorkSpaces tab of the AWS management console, select the “Set up Directory” button.
Select the type of directory that fits your needs; for this step-by-step guide we will use Simple AD.
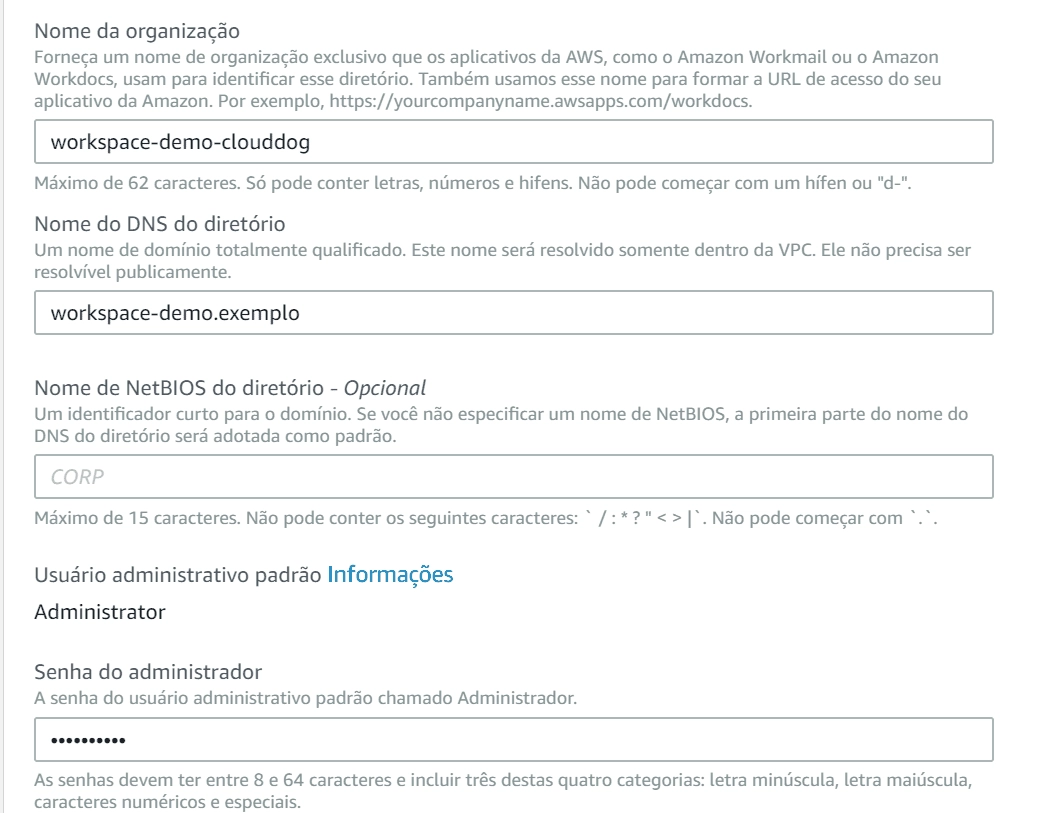
Fill in the form fields according to your information.
Fill in the Network information.
Review the information and create the directory.
Step 2: Registering the Directory
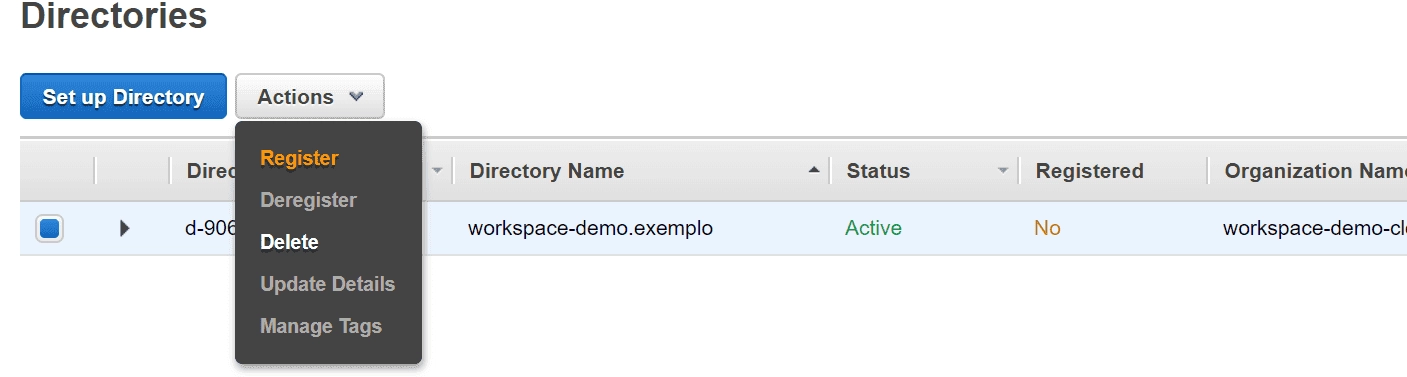
Select the directory and then “Actions” and “Register”.
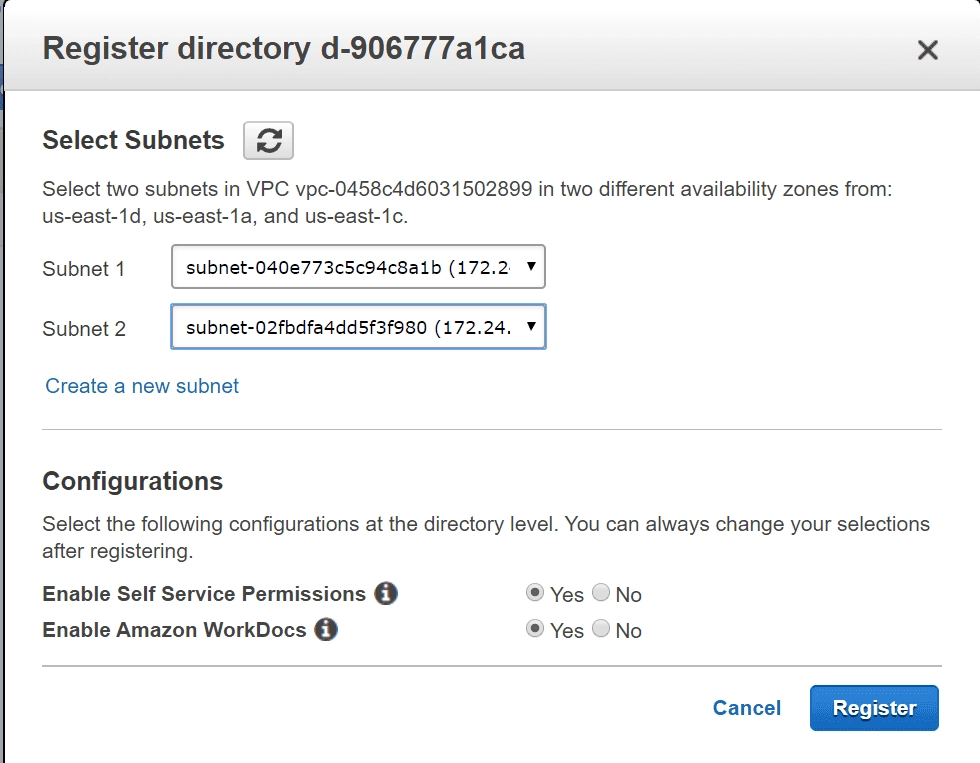
Configure the two subnets that are in different availability zones.
Wait for the “Registered” field to show “Yes”.
Select the directory and then “Actions” and “Update Details”.
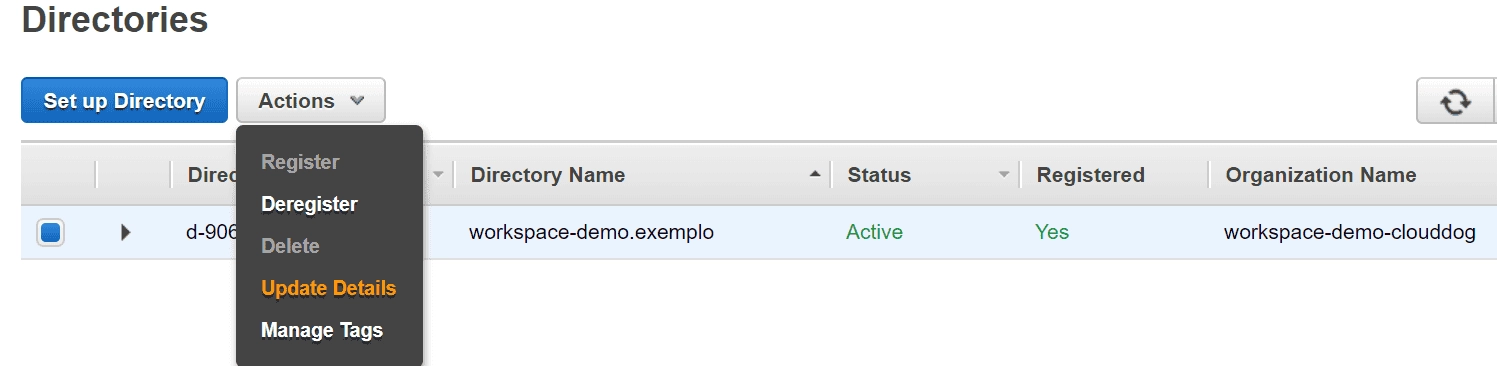
Review all the access and security settings for your work scope. Step 4 will go deeper into each of the available settings.
Step 3: Creating a WorkSpace
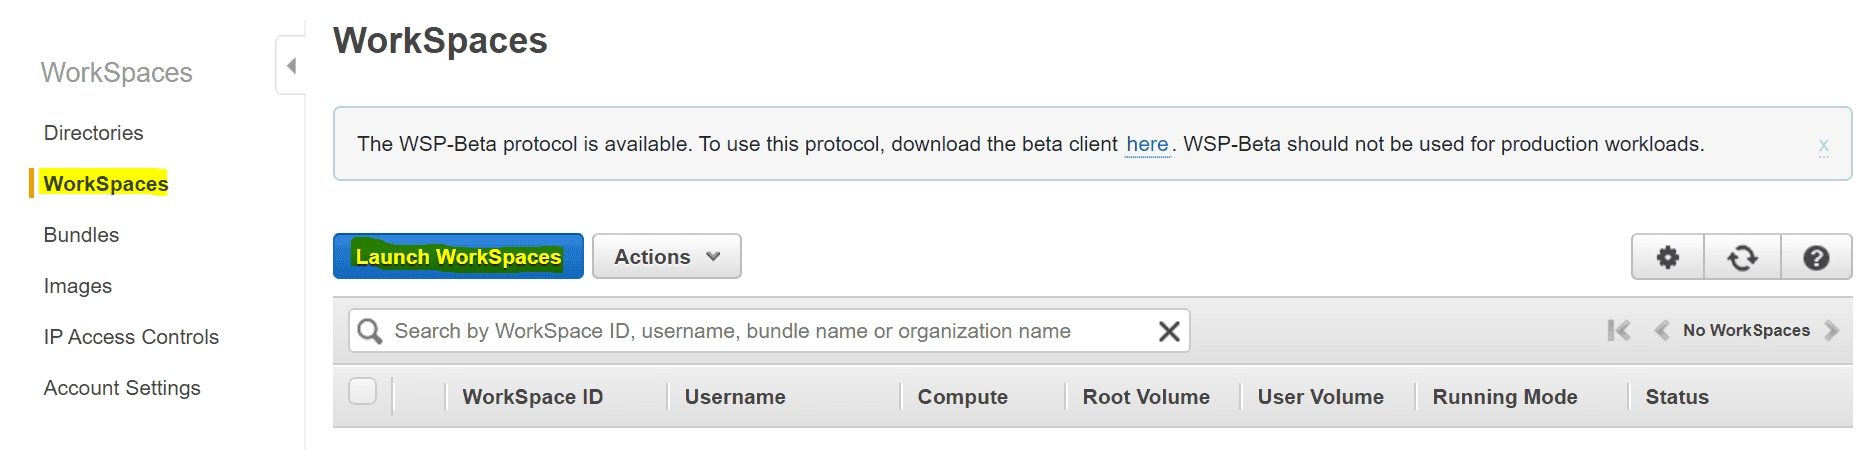
In the WorkSpaces tab, select the “Launch WorkSpaces” button.
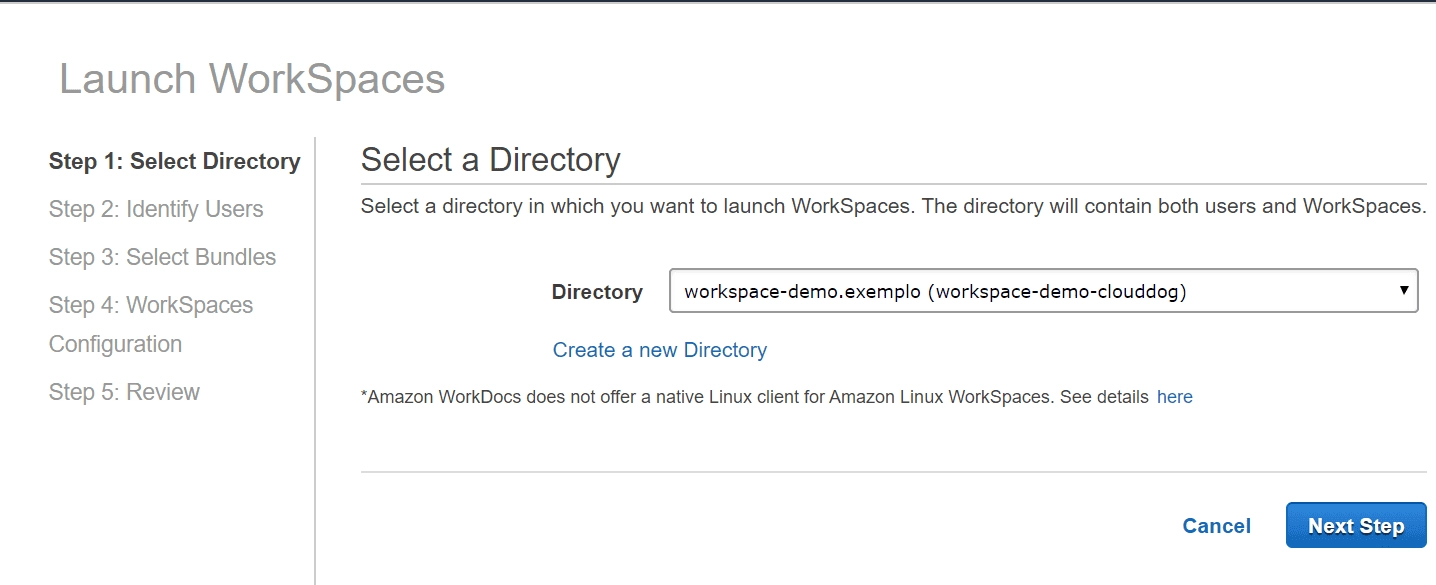
Select the directory you created.
In this next step we will choose which user(s) we will assign the WorkSpace(s) to.
At the top of the form we can create a user within the Directory (if you created a directory and did not import one).
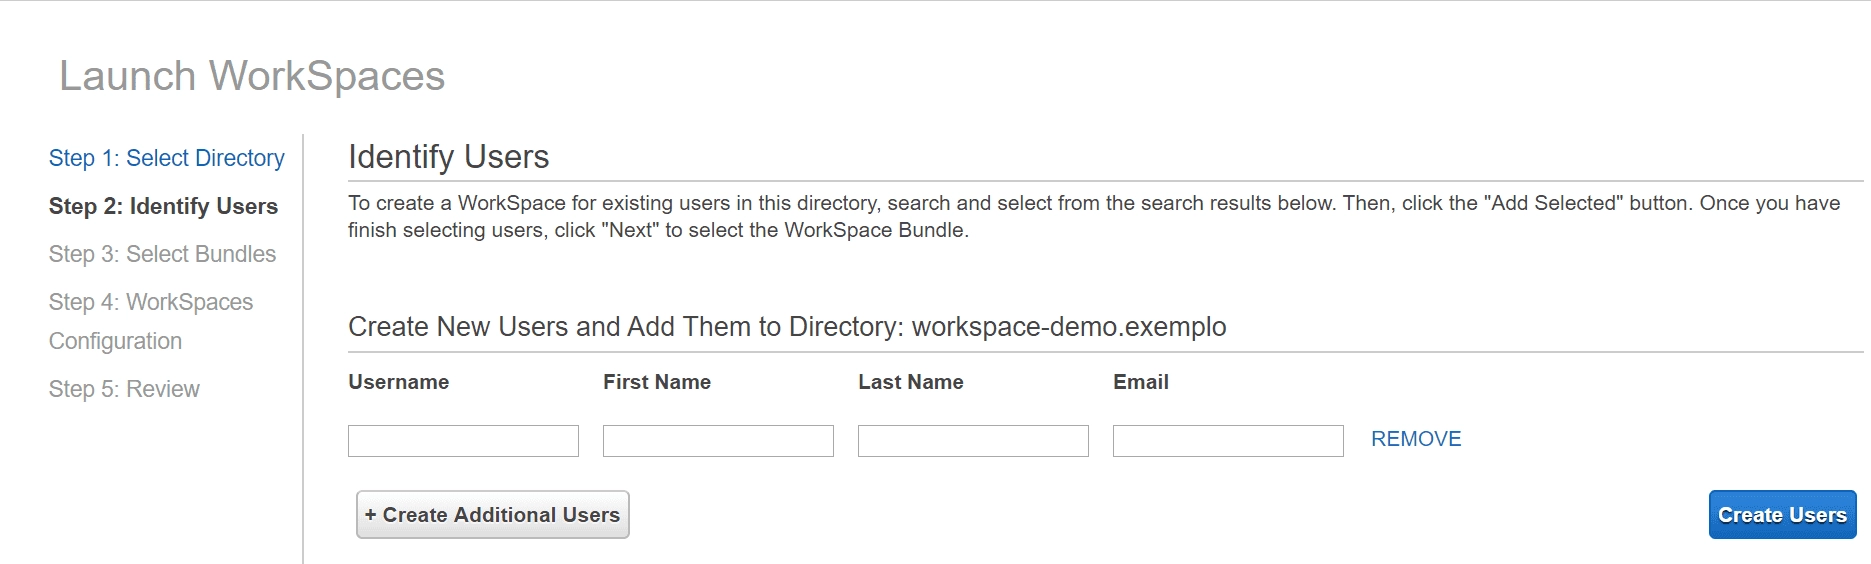
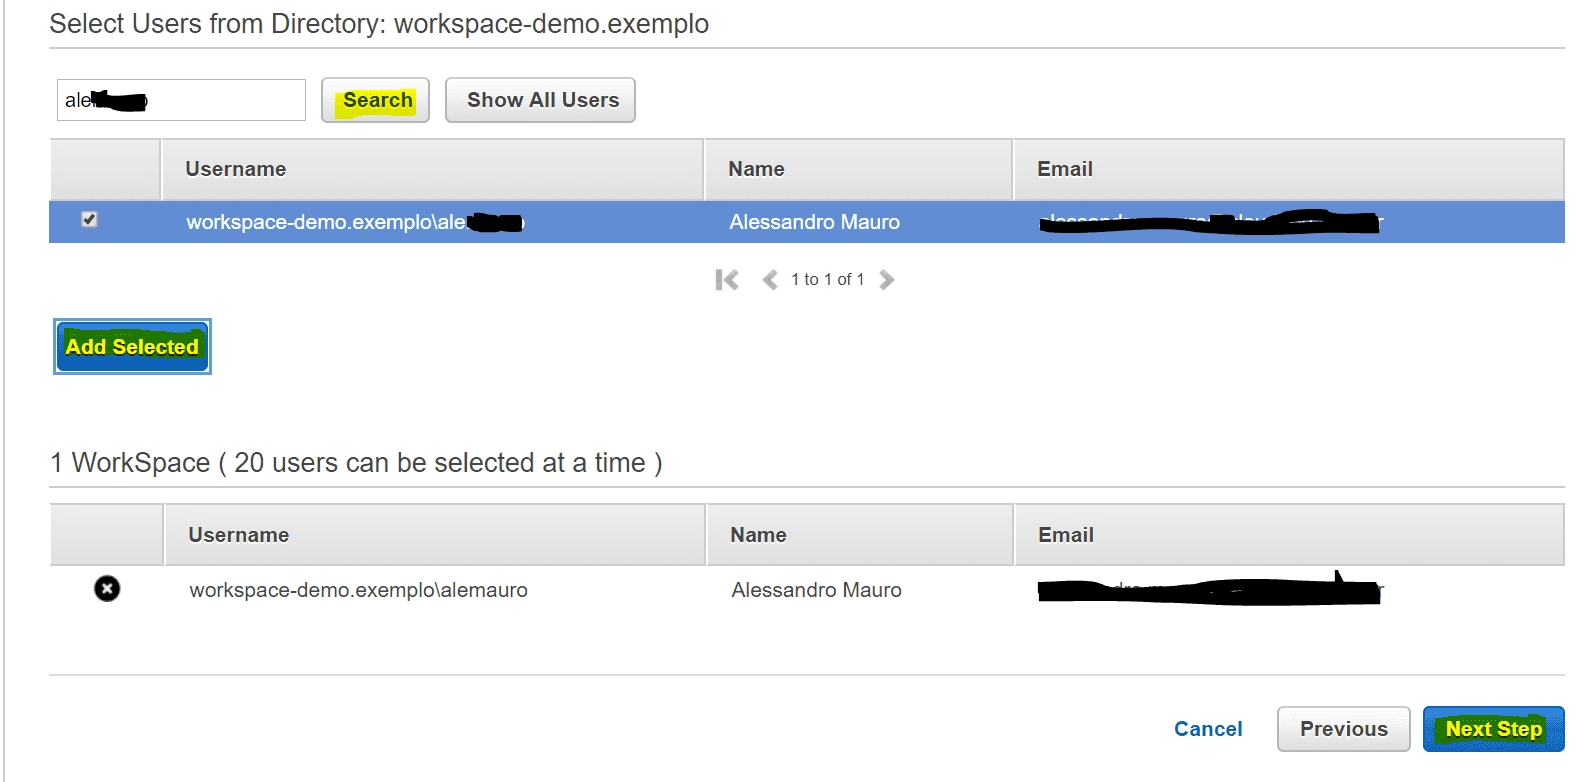
After creating the user(s), just use the box located below to search for the user(s) and click the “Add Selected” button.
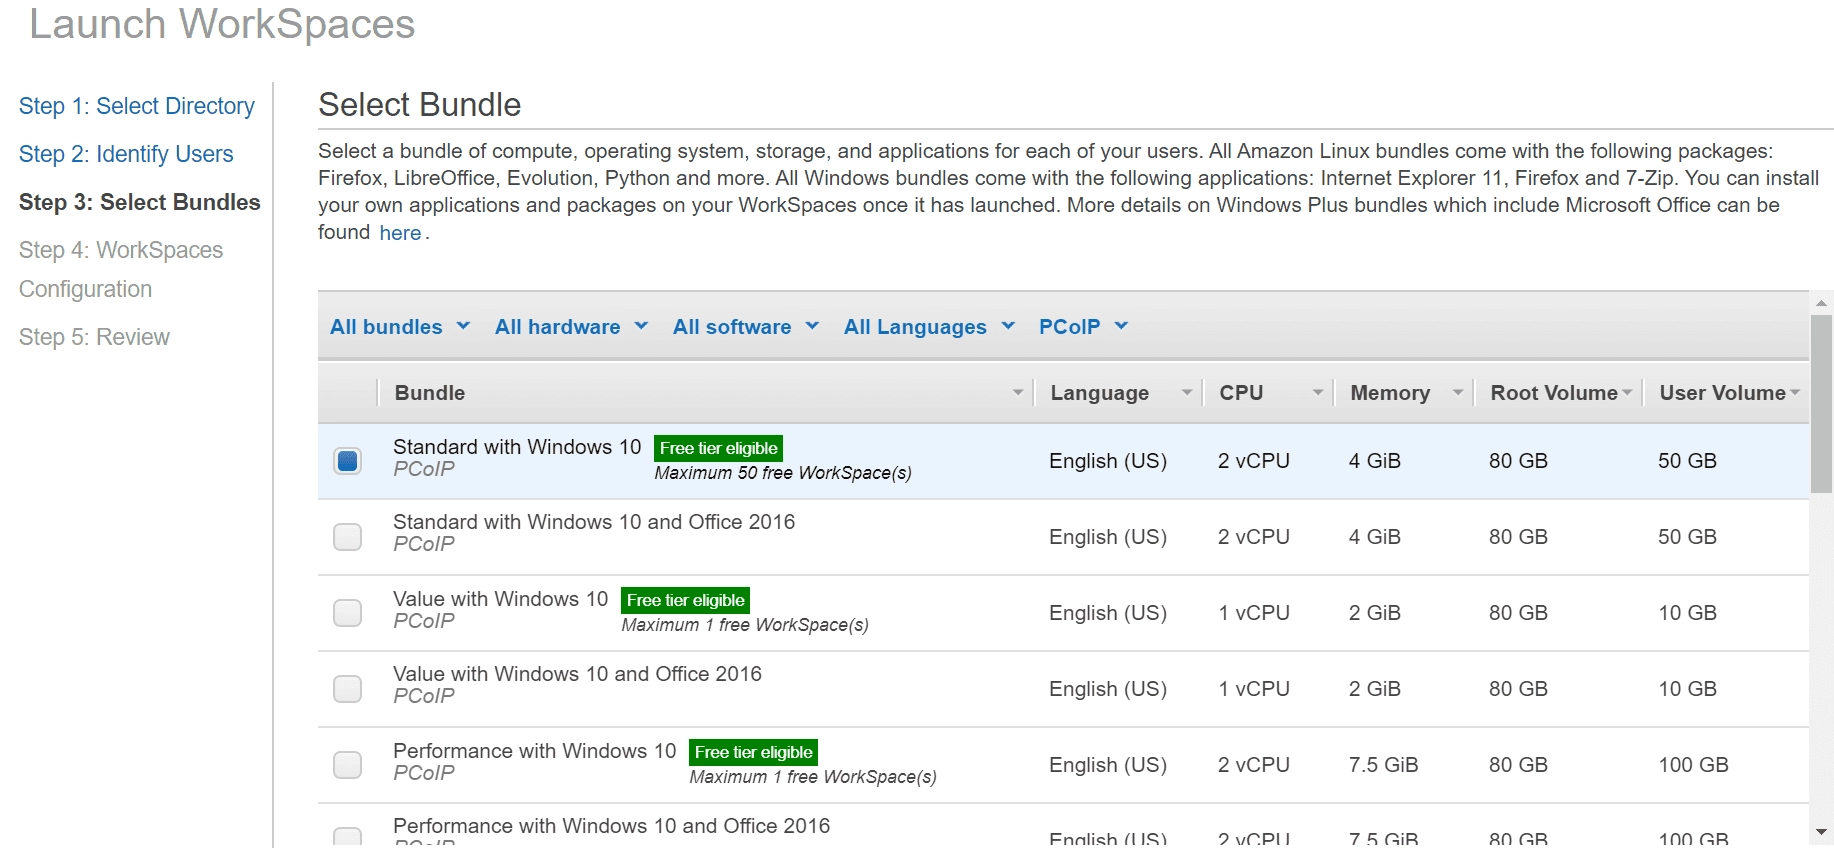
In the next form you will be asked to select the bundle that will be created. This is a very important step, because based on your choice the value, hardware, and base applications that will be made available for use will be assigned.
The last group of information allows you to fill in the disk values, in case you need more than the default.

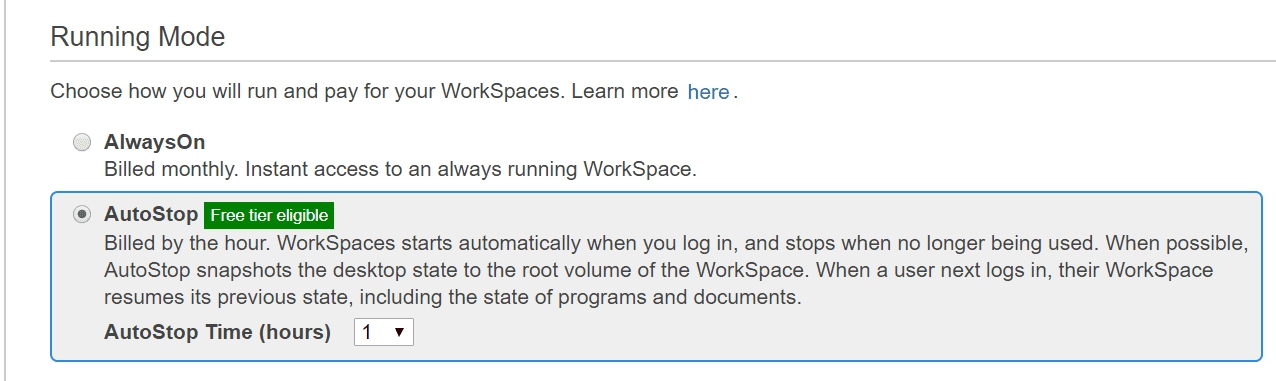
On the next screen we can choose which payment model we would like to use (Monthly, or per hour).
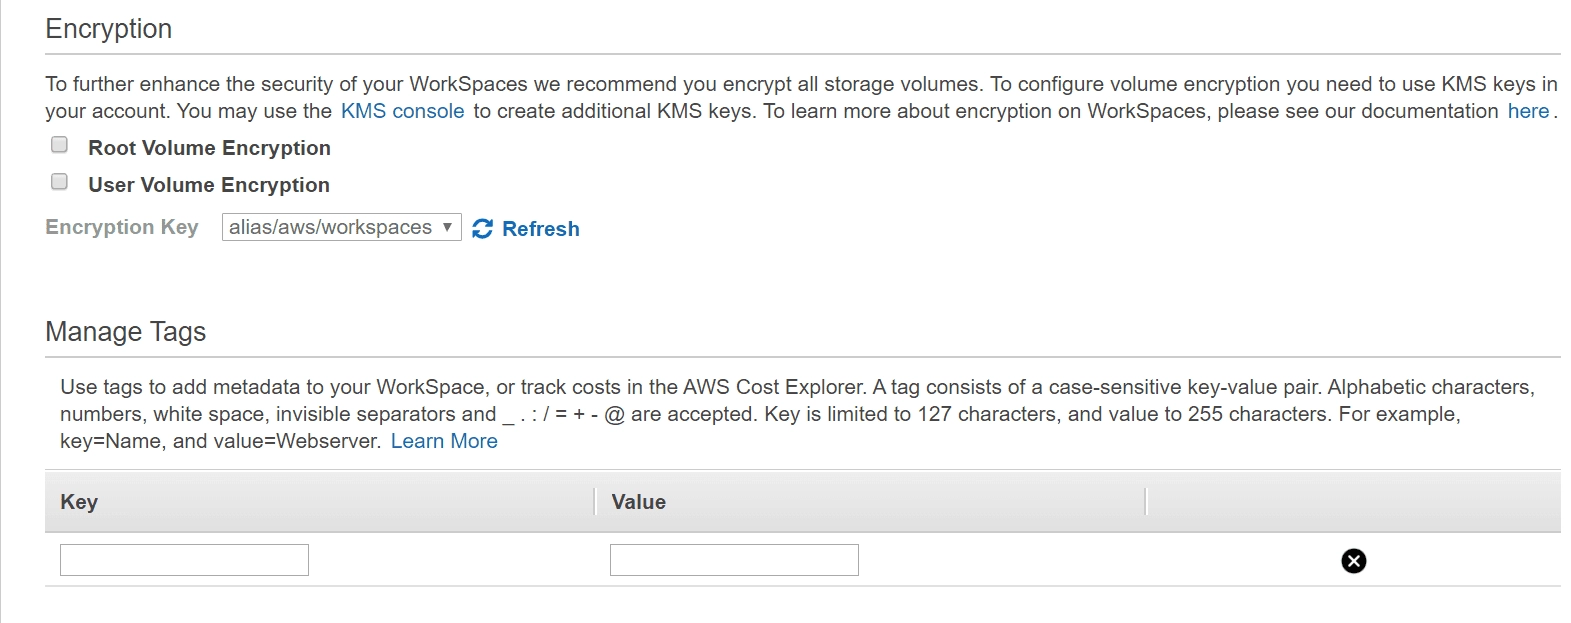
Finally, you can decide whether or not to enable encryption for one, all, or none of the disks, if you want greater security for your environment.
Validate the information and select “Launch WorkSpaces”.
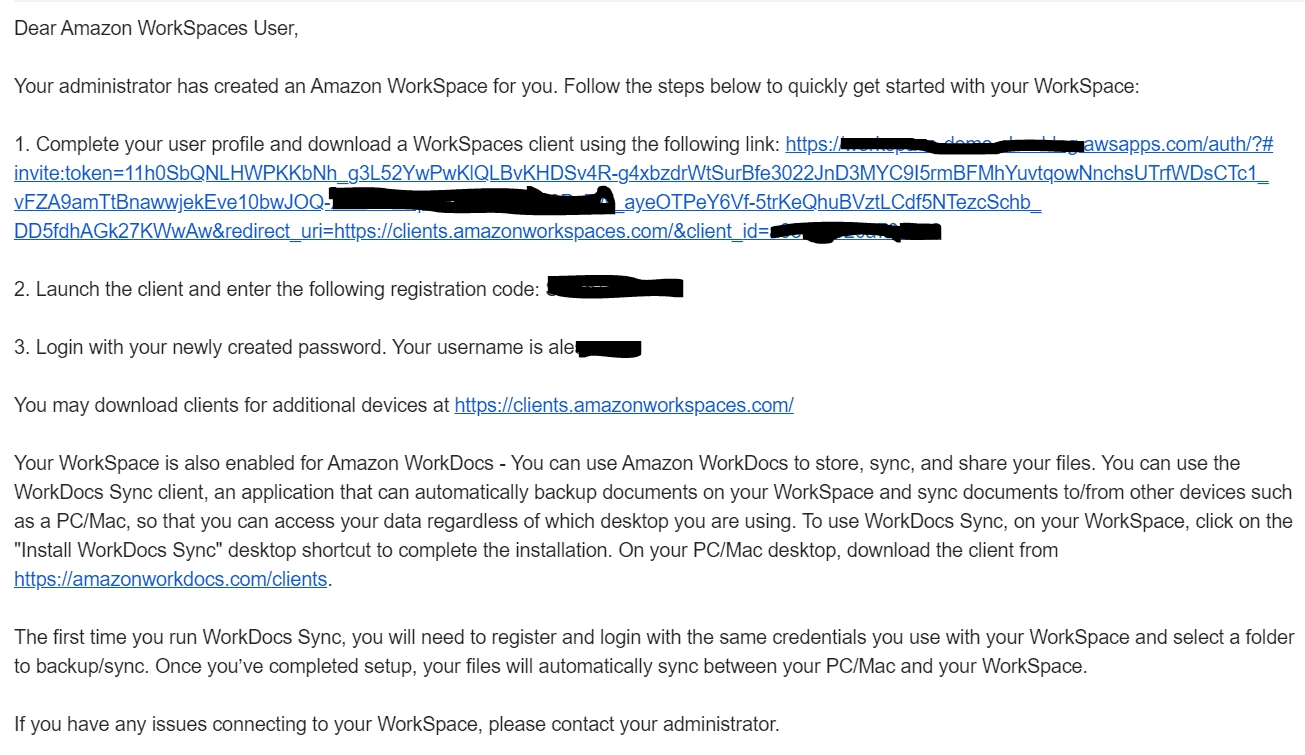
After the WorkSpaces is provisioned, the user will receive an email with the information needed to connect.
Step 4: Directory Settings
Once we have a WorkSpaces environment ready, we can revisit the Directory settings. In this step we will review some of these settings.
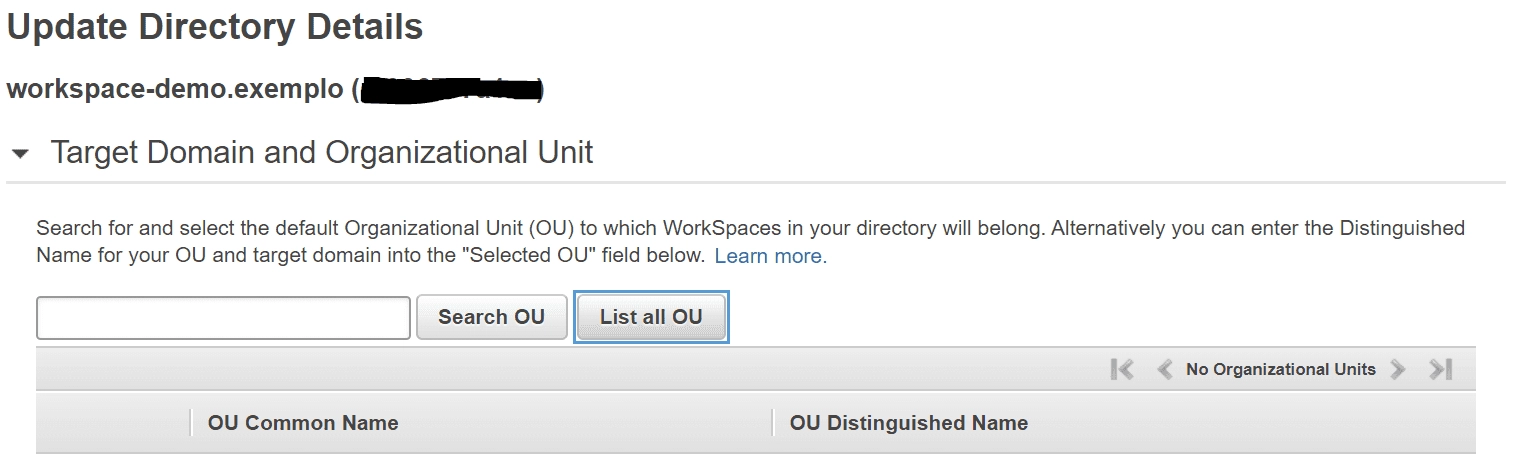
The first setting we find refers to the Target Domains and Organizational Unit. In this field we can associate which OU our WorkSpaces directory will be related to.
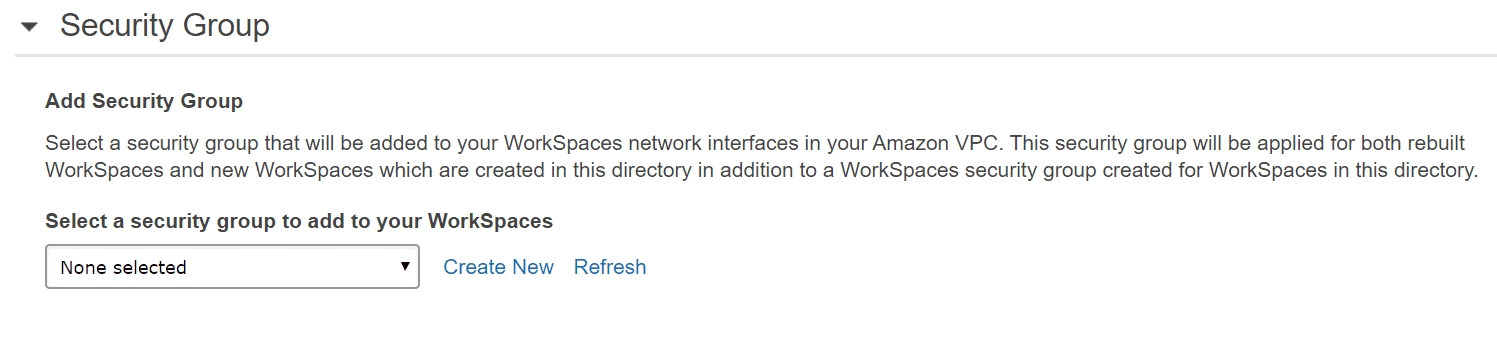
In the next field we have the Security Group configuration, where we can associate our WorkSpaces environment with an existing Security Group.
Next, we can enable or disable whether users can access the internet through the WorkSpaces.

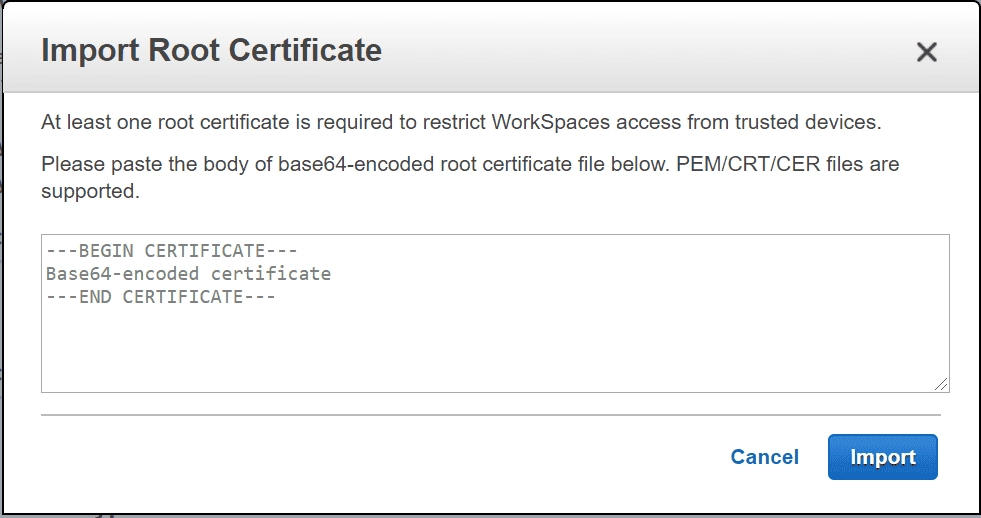
In the “Access Control Options” field, we can configure an authentication certificate for logging in to a WorkSpaces. Once access control is configured, the end user will need to install the certificate on their machine; if the certificate is not installed, the connection will not be possible.
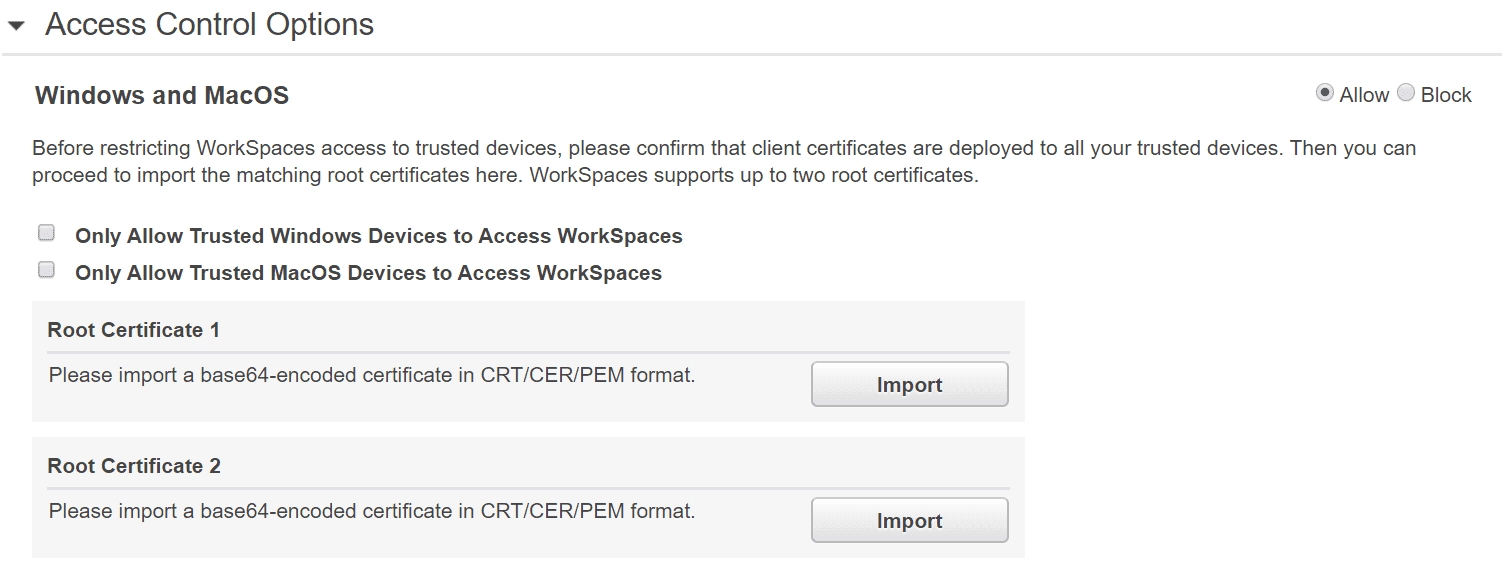
If you want to enable this setting, you will need to perform the import by entering the certificate content as shown in the image below.
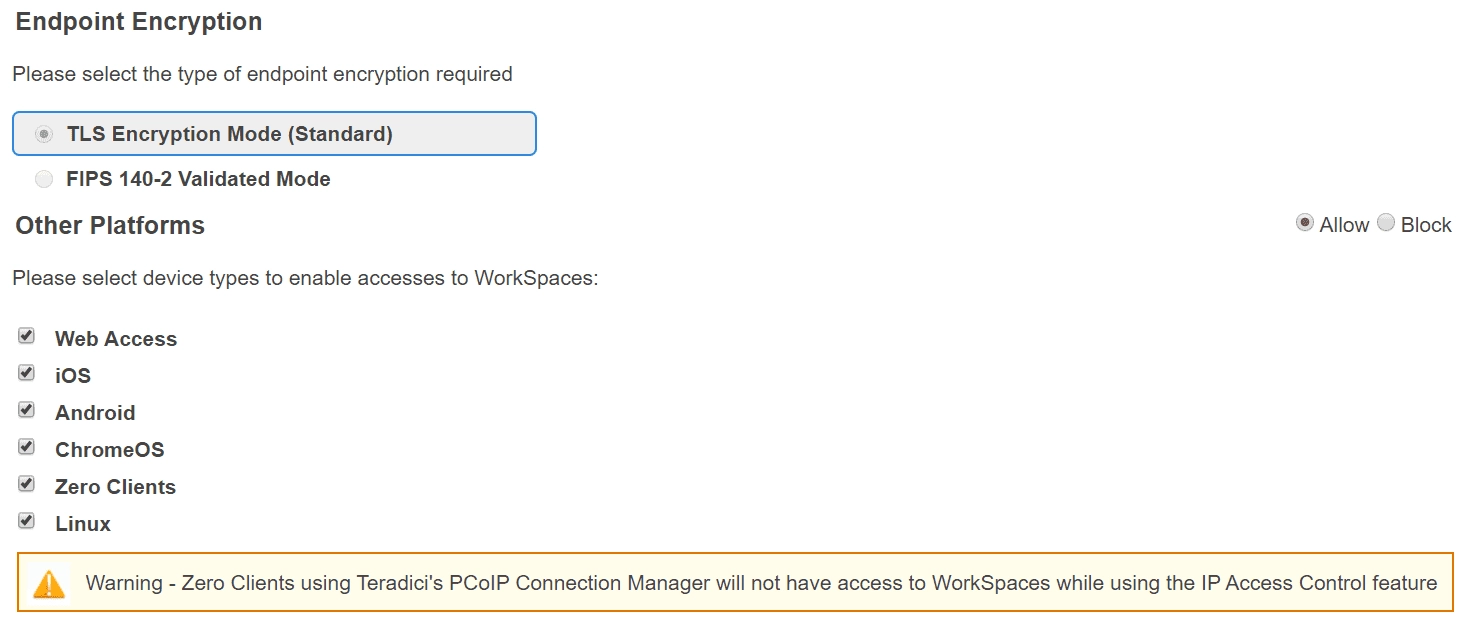
In the next block we can choose which type of encryption to use and which platforms will be compatible for accessing the WorkSpaces.
In the “Local Administrator Setting” block we can grant administrator permission to the user within the WorkSpaces; if this option is disabled, the user may face difficulties installing or making any kind of modification to the applications.

NOTE: If the user has permission to install applications, we can enable the display of Disk C. To do this, you need to access the registry:
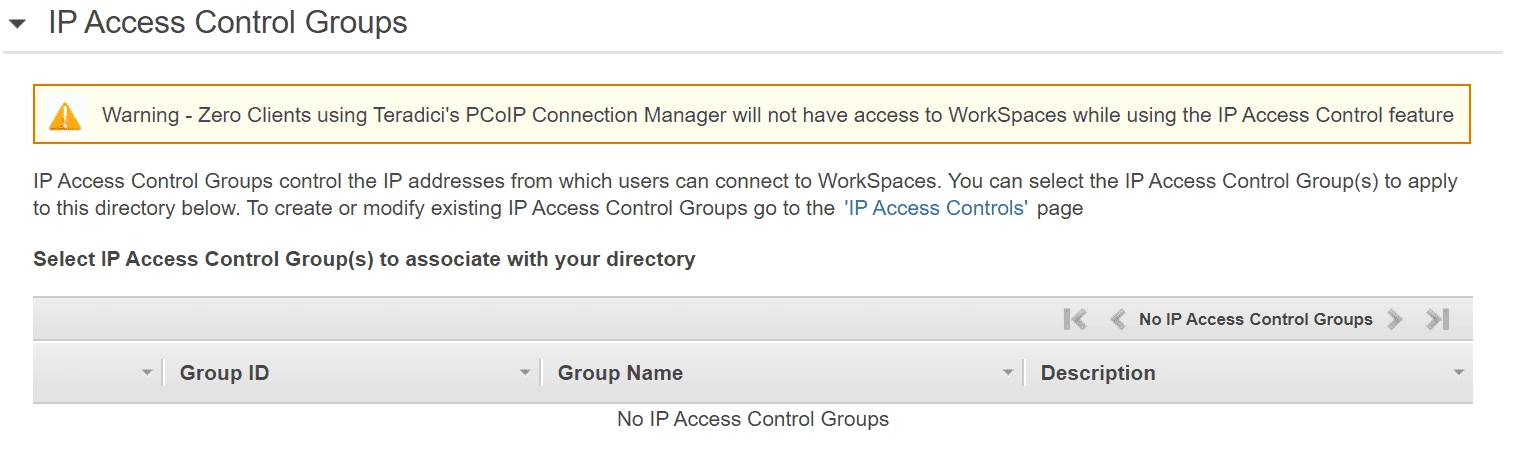
In the Start menu of the WorkSpace, type “Regedit”; The machine’s registry will be displayed; follow the path: “HKEY_LOCAL_MACHINE\Software\Microsoft\Windows\CurrentVersion\Policies\ Explorer Dword Value - NoDrives”; By default the value will be 4; to enable the display, change it to 0; Restart the WorkSpace. We can also perform access control for specific IP groups. Keep in mind that Zero Client devices that use PCoIP (PC over IP) will not be able to connect to the environment with this setting enabled.
We also have the option to enable maintenance mode for our environment. This consists of a monthly routine so that the environment applies Windows updates automatically (once a month the WorkSpaces will turn on and update the machine).

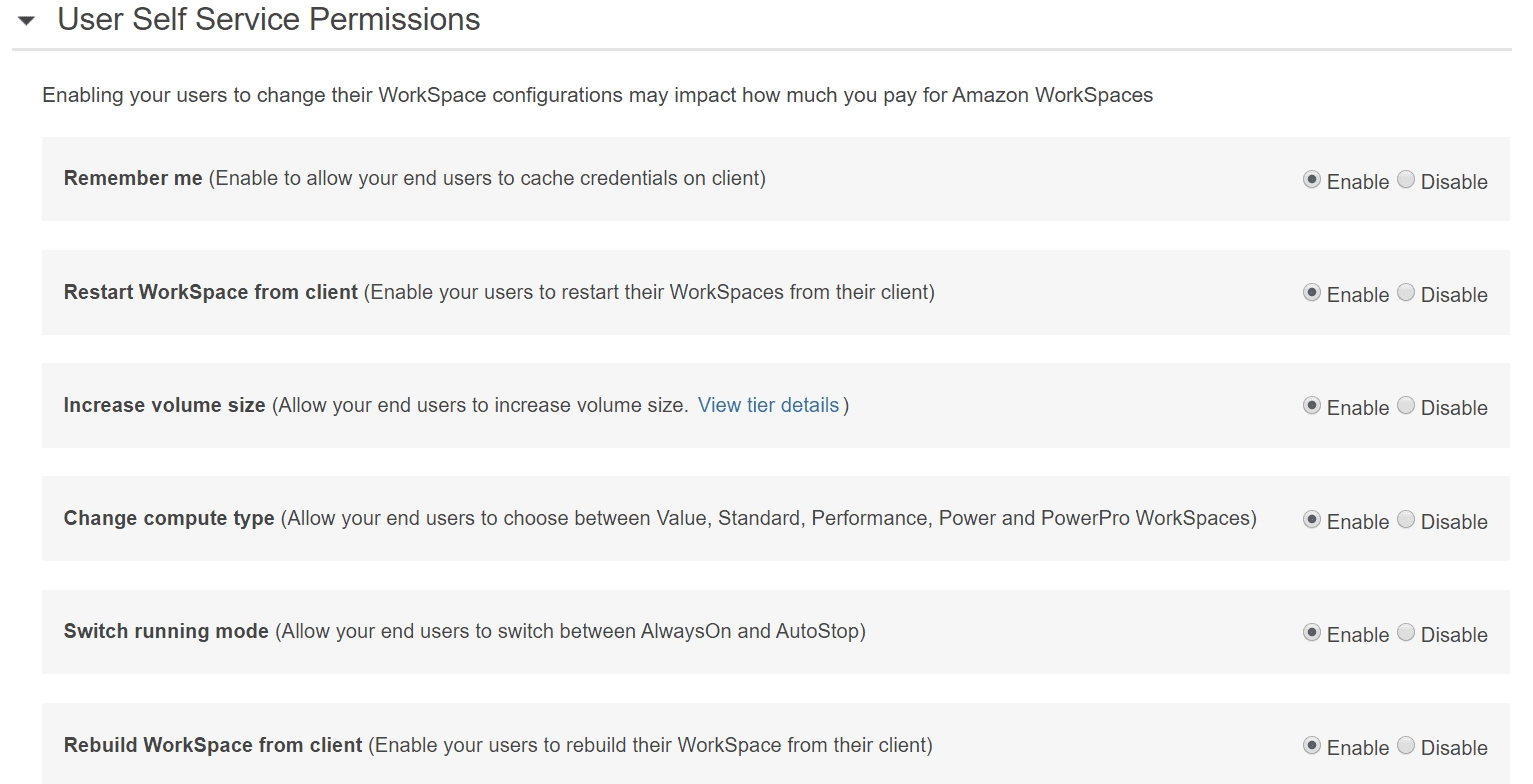
Finally, we can configure user permissions to perform Self-Service. In this block we can allow the user to perform operations such as: Increasing the disk, Restarting the WorkSpace, Changing the computer type (Value, Performance, Power, Standard), Changing the running mode (AlwaysOn and AutoStop), and performing the “rebuild” (reverting to the last Snapshot taken).
Availability and Pricing
The values to be charged related to the WorkSpaces service will vary according to the region you are in, the type, and the number of machines that will be used. For a better cost estimate, check here all the options that can influence this value.
Summary
In this article we saw how to configure the AWS directory services to represent our domain, and we created a WorkSpace for one or more users, with which we can assign specific applications to be used. This solution not only enables remote work but also allows the user to use it directly from their personal device in a secure and easy way.
