
What is Amazon WorkSpaces Application Manager?
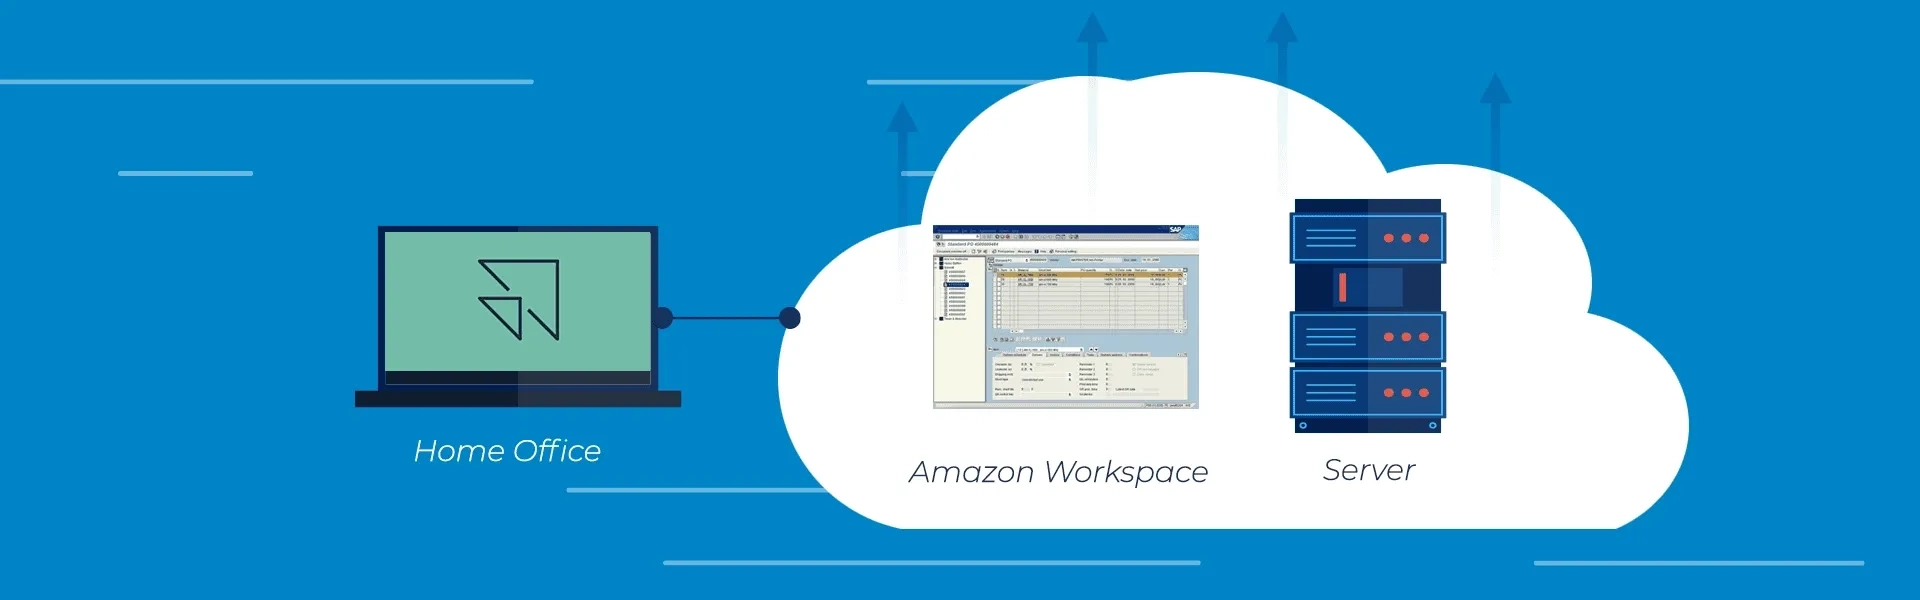
Amazon WorkSpaces Application Manager (WAM) makes it easier to manage and deploy applications for Amazon WorkSpaces by grouping the desired applications into virtualized application containers, which can run as if they were installed natively.
Required knowledge
It is important to know how to manage applications in the Application Manager; To manage applications for WorkSpaces, it is recommended to know how to configure a WorkSpace.
Prerequisites
To configure Amazon WorkSpaces Application Manager, you will need:
To have a Directory configured for WorkSpaces; At least one user created in the Directory; To have an IAM role for the Amazon WAM App Packaging; To subscribe to the WAM Standard plan.
Step 1: Creating an EC2 with Amazon WAM Studio
In the EC2 tab, go to “IMAGES” and then “AMIs”, select the Amazon WAM Studio image and then “Launch”.

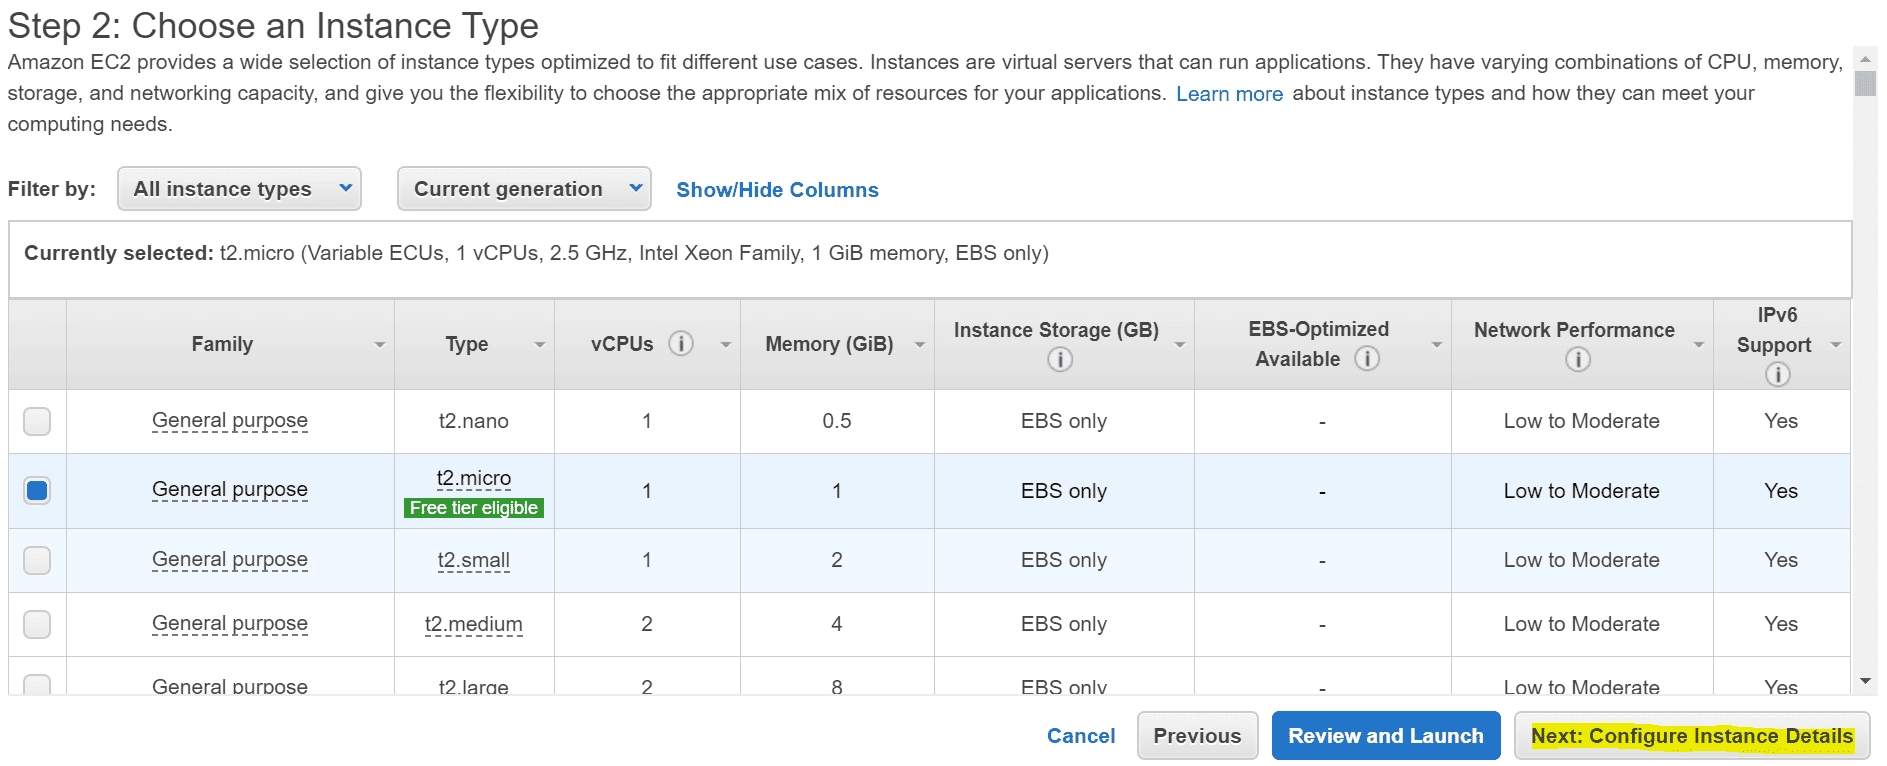
Choose the type of machine that will be used.
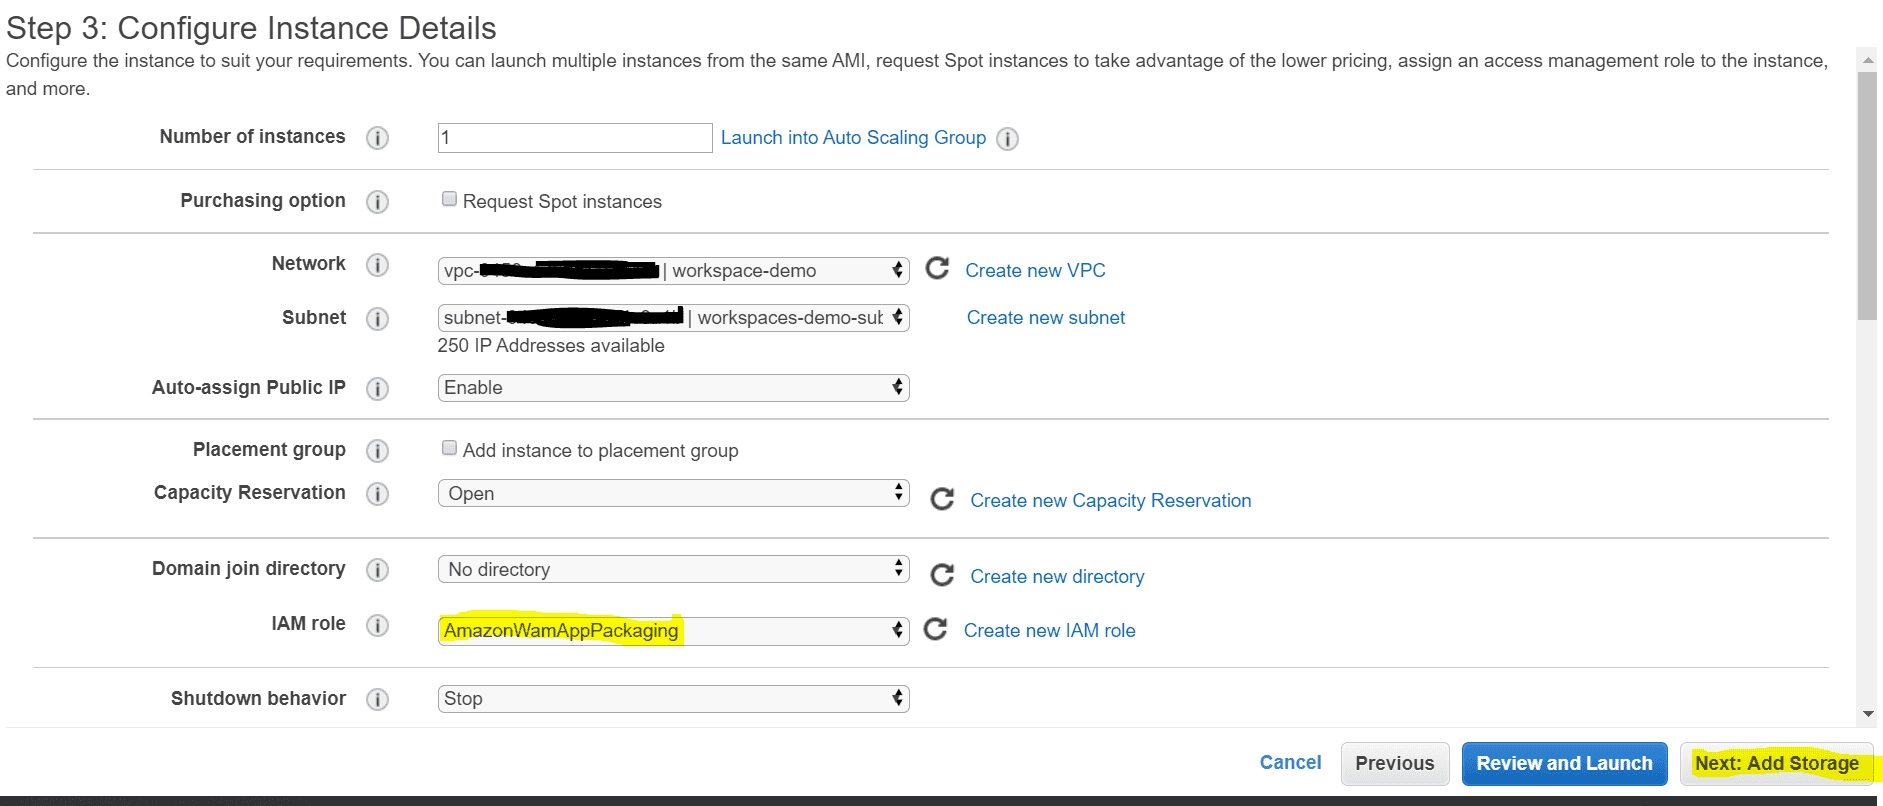
Configure the “IAM role” for the Amazon WAM App Packaging role.
Configure the disk volume.
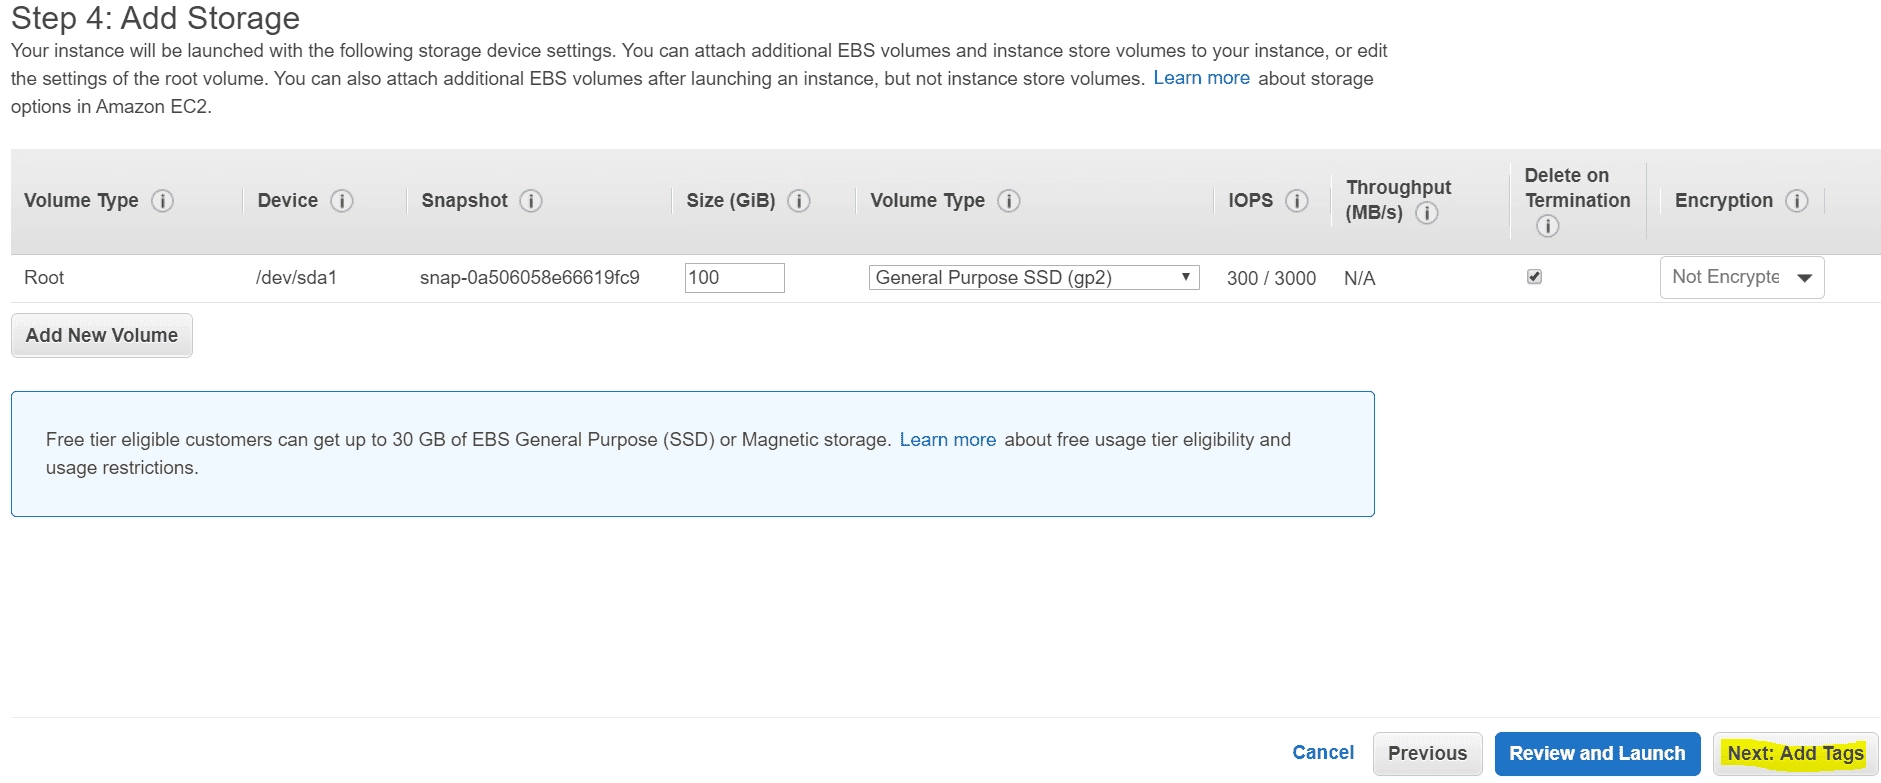
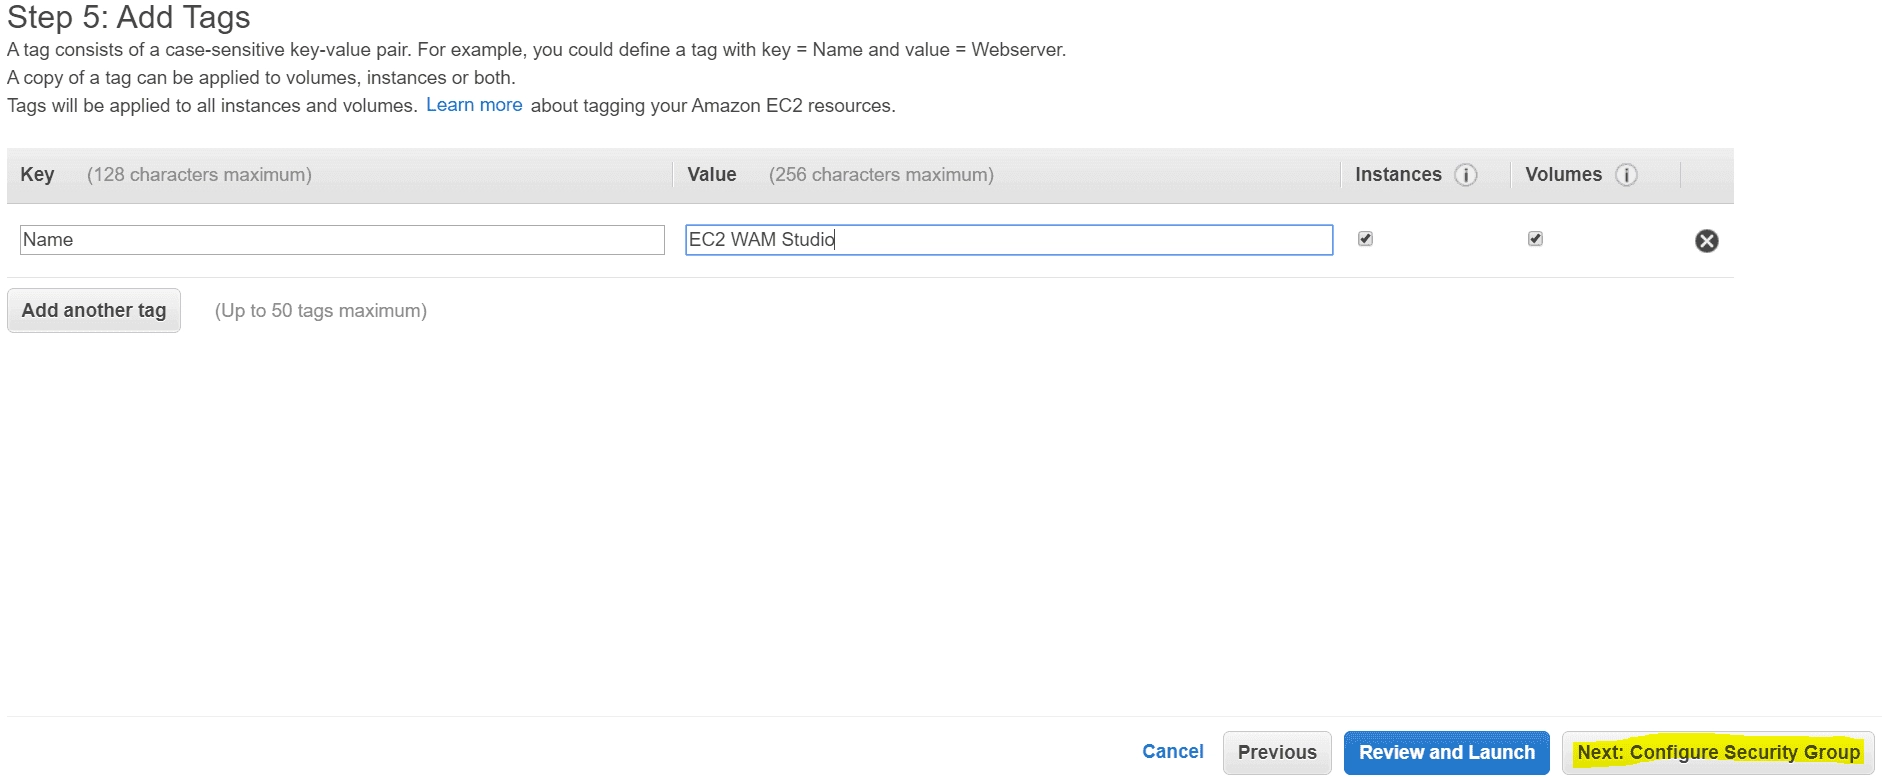
Add a TAG to make identification easier.
Step 2: Creating an EC2 with Amazon WAM Player
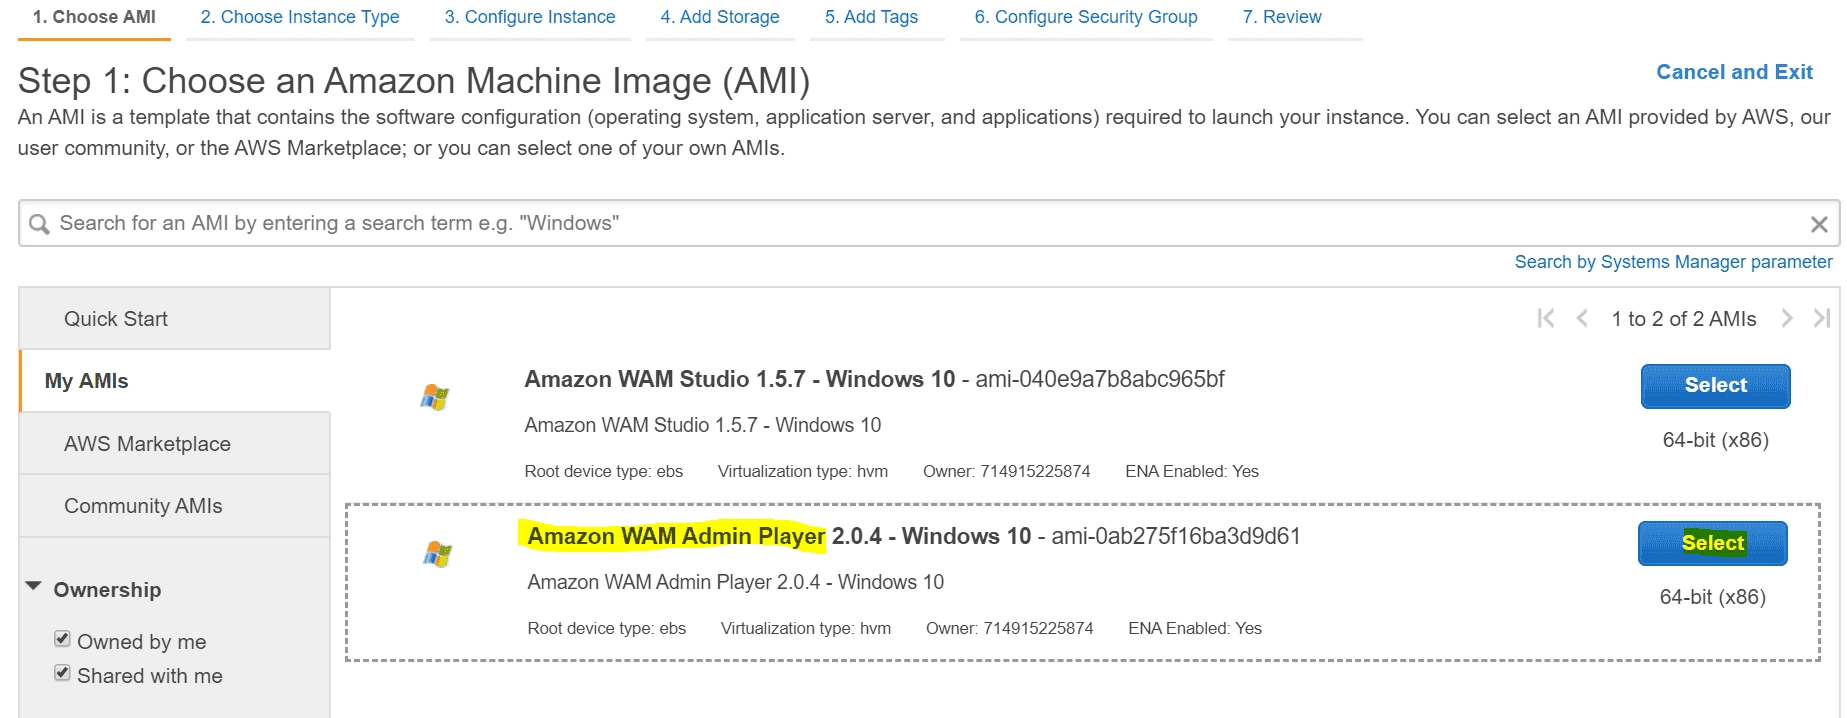
In the EC2 tab, go to “IMAGES” and then “AMIs”, select the Amazon WAM Player image and then “Launch” and follow the same configuration process as before.
Step 3: Creating a Package in Amazon WAM Studio
Log in to the EC2 with Amazon WAM Studio and start the application.
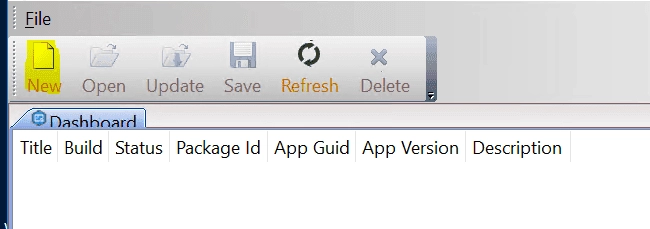
In the top left corner, select “New”.
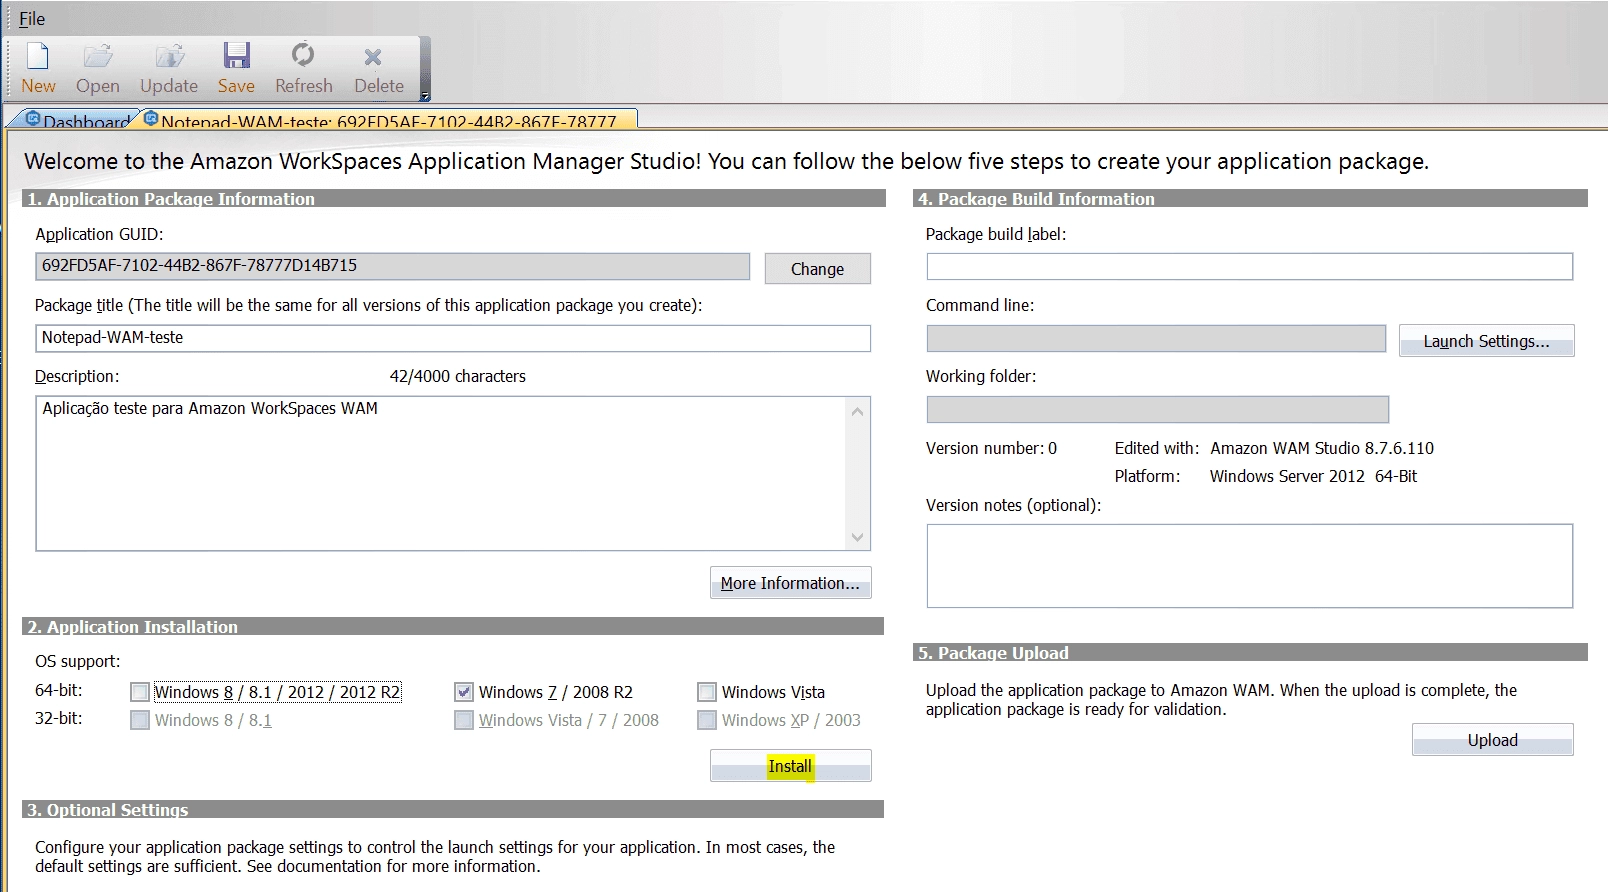
A form will be provided to fill in information such as “Package title” for better identification of the package and “Description” so we know the content; after this information, select the Operating Systems (OS) that will be supported and click “Install”.
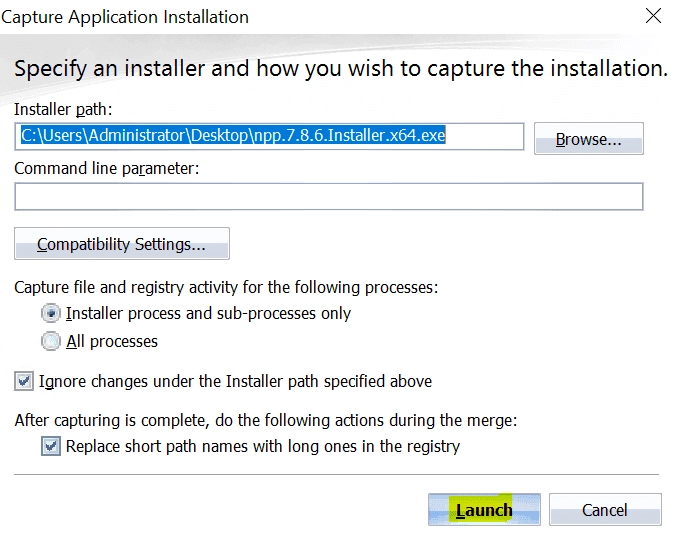
In the “Installer path” field, enter the path to the installer of the application you want to make available and then click “Launch”.
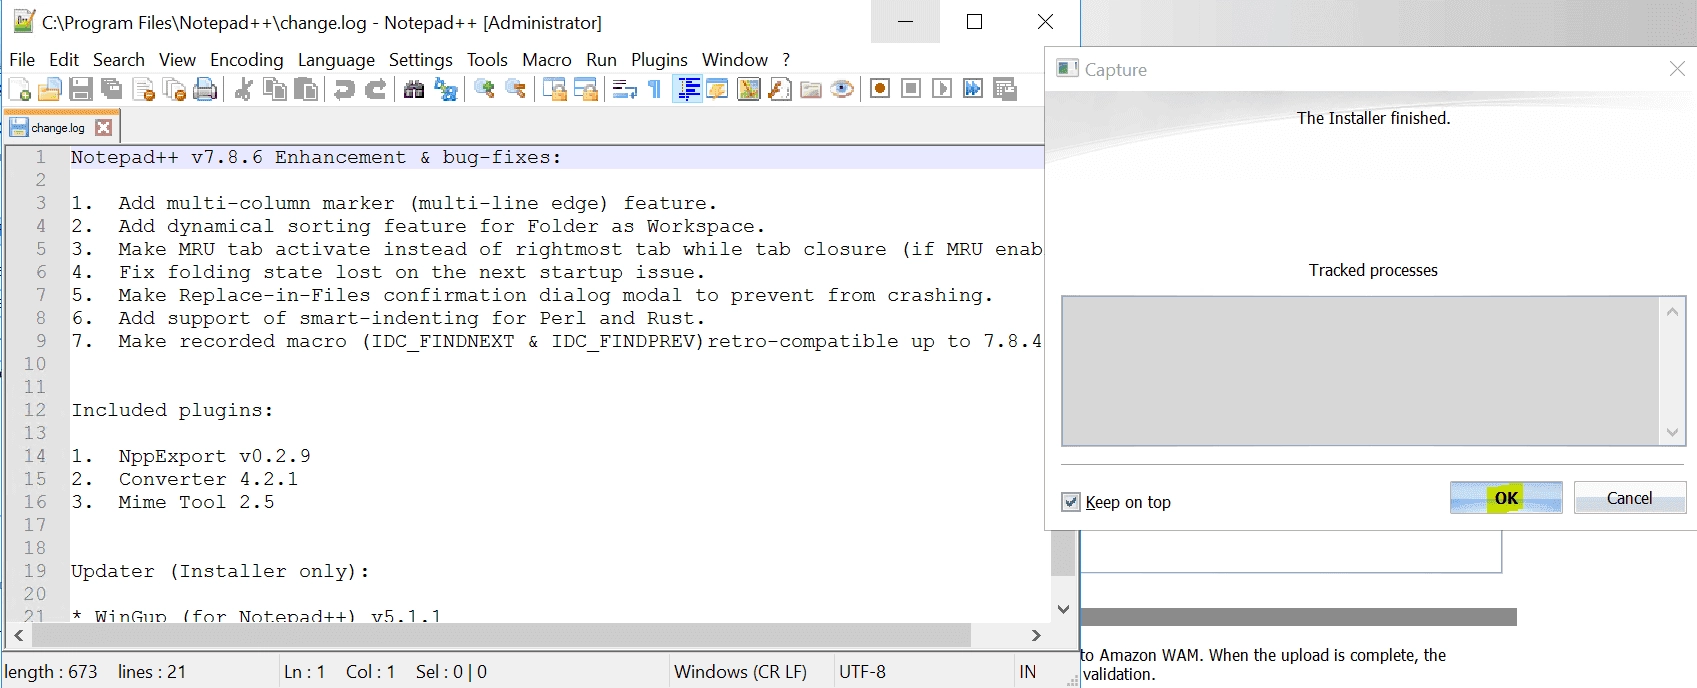
Two screens will open: the screen with the application installer and the screen with the system change reader. This reader will identify which options are selected during the installation and which modifications it generates, so that whenever the application is installed this information happens automatically.
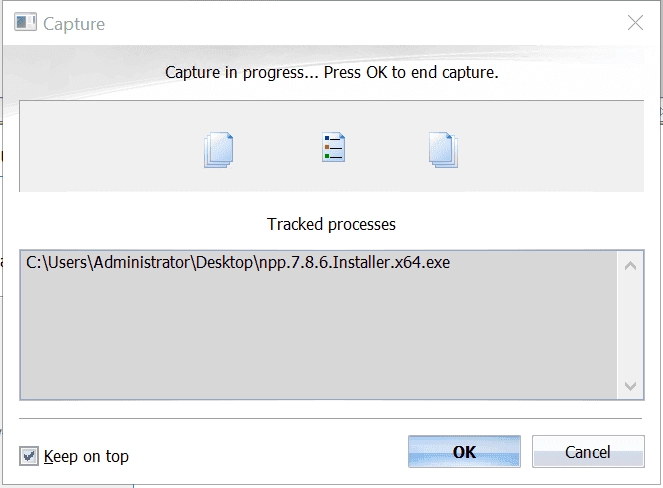
At the end of this process, you will be informed that the installer has finished the installation; just click “Ok”.
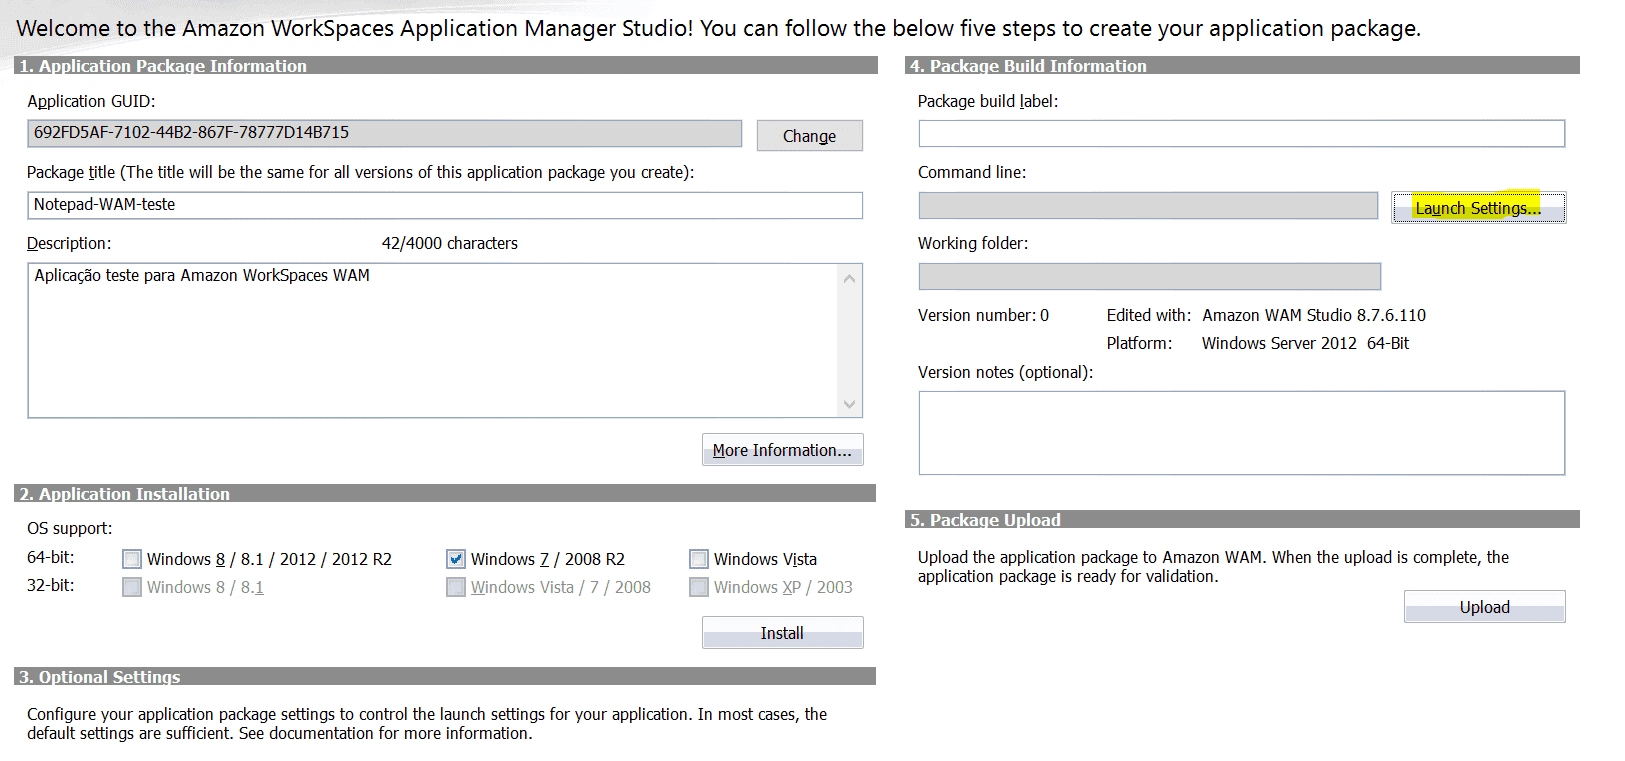
Now we have to select the executable of our application.
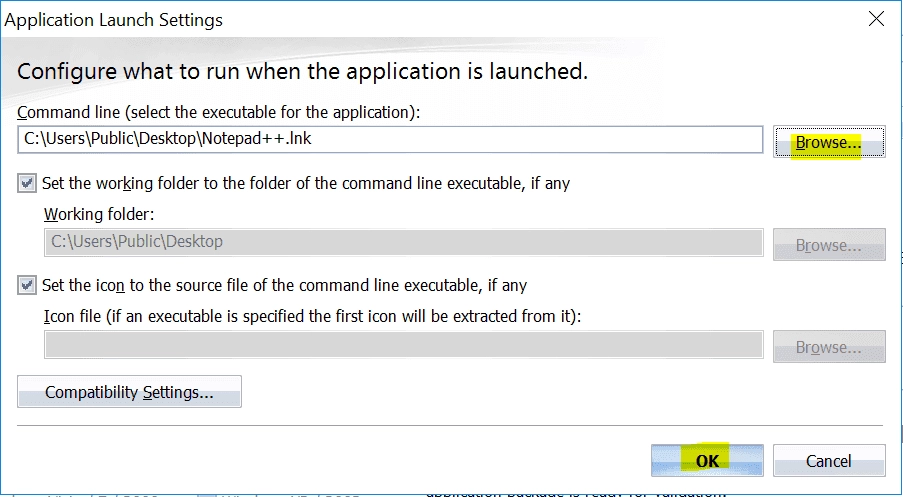
Choose the path to the executable.
If there is a need to make any additional configuration for the application, you can navigate through the options bar.

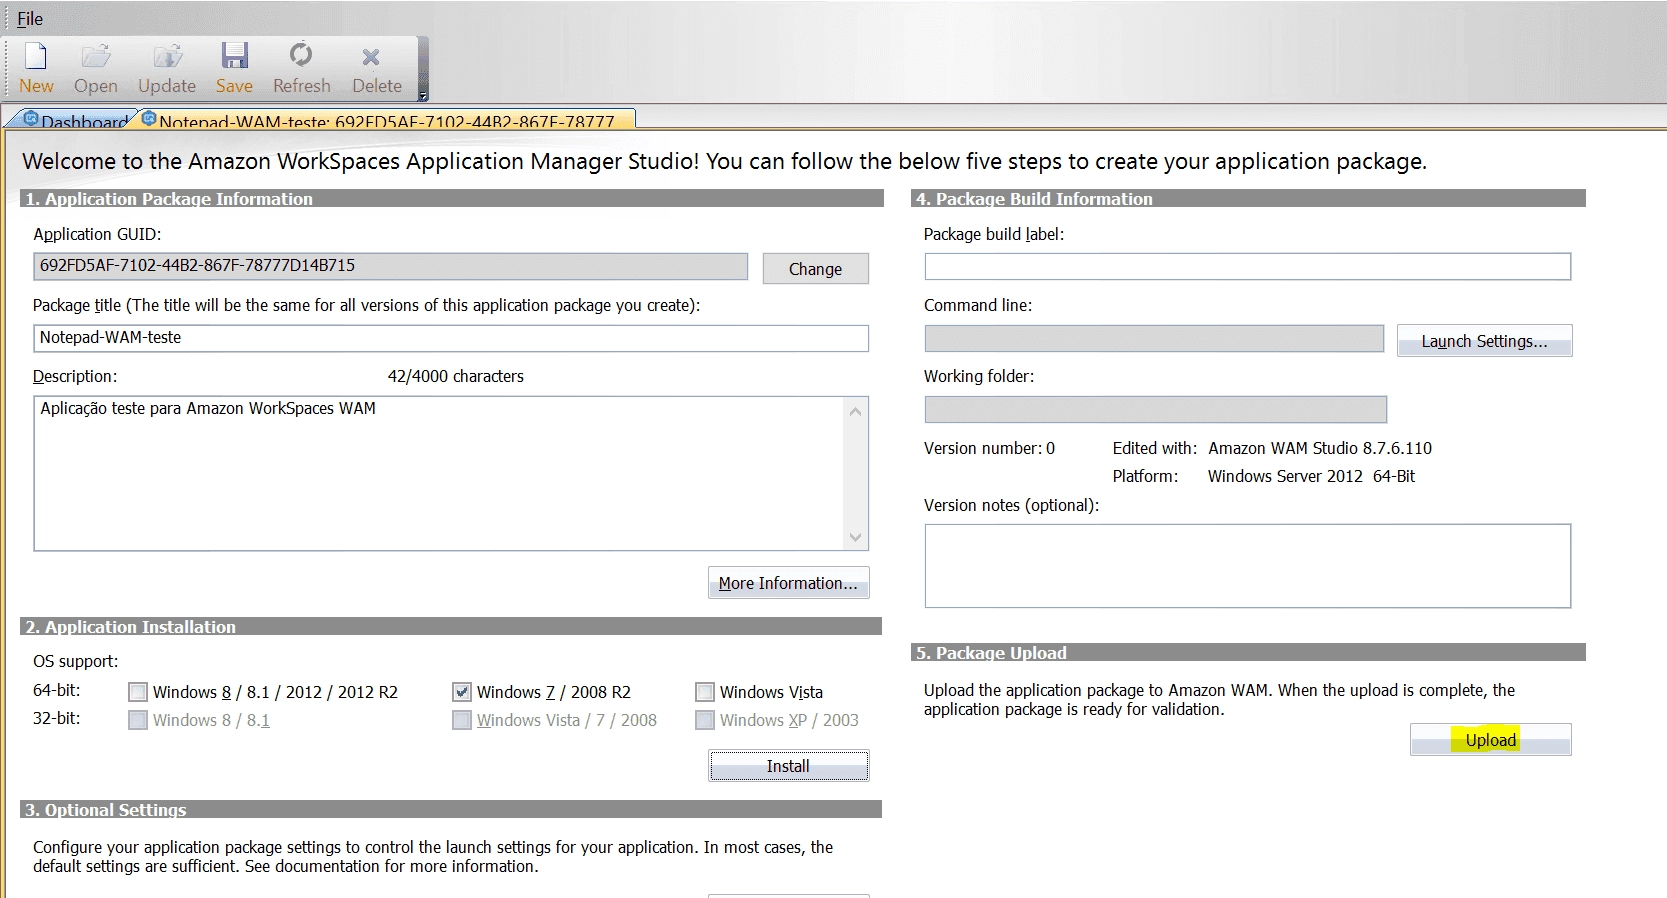
Finally, just Upload the settings.
Step 4: Approving the Application
Once the Application is sent for review and approval, just log in to the other EC2 Instance we created with the Amazon WAM Player image and start the application.
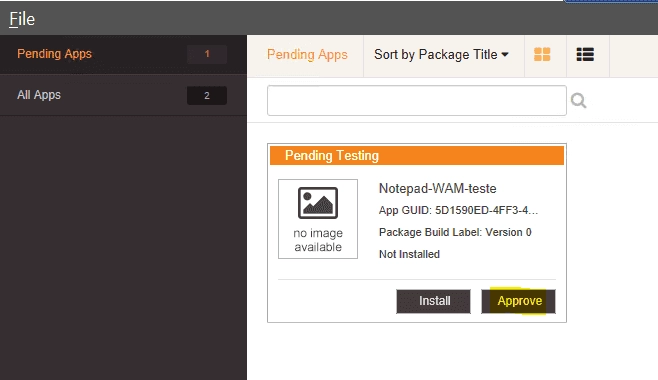
When you open the Player, it will show that we have applications to be approved. Click “Approve”.
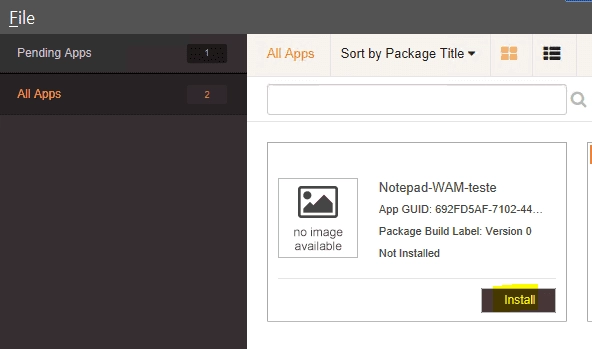
To validate that it is working correctly, you can also click “Install”.
Step 5: Registering the Application
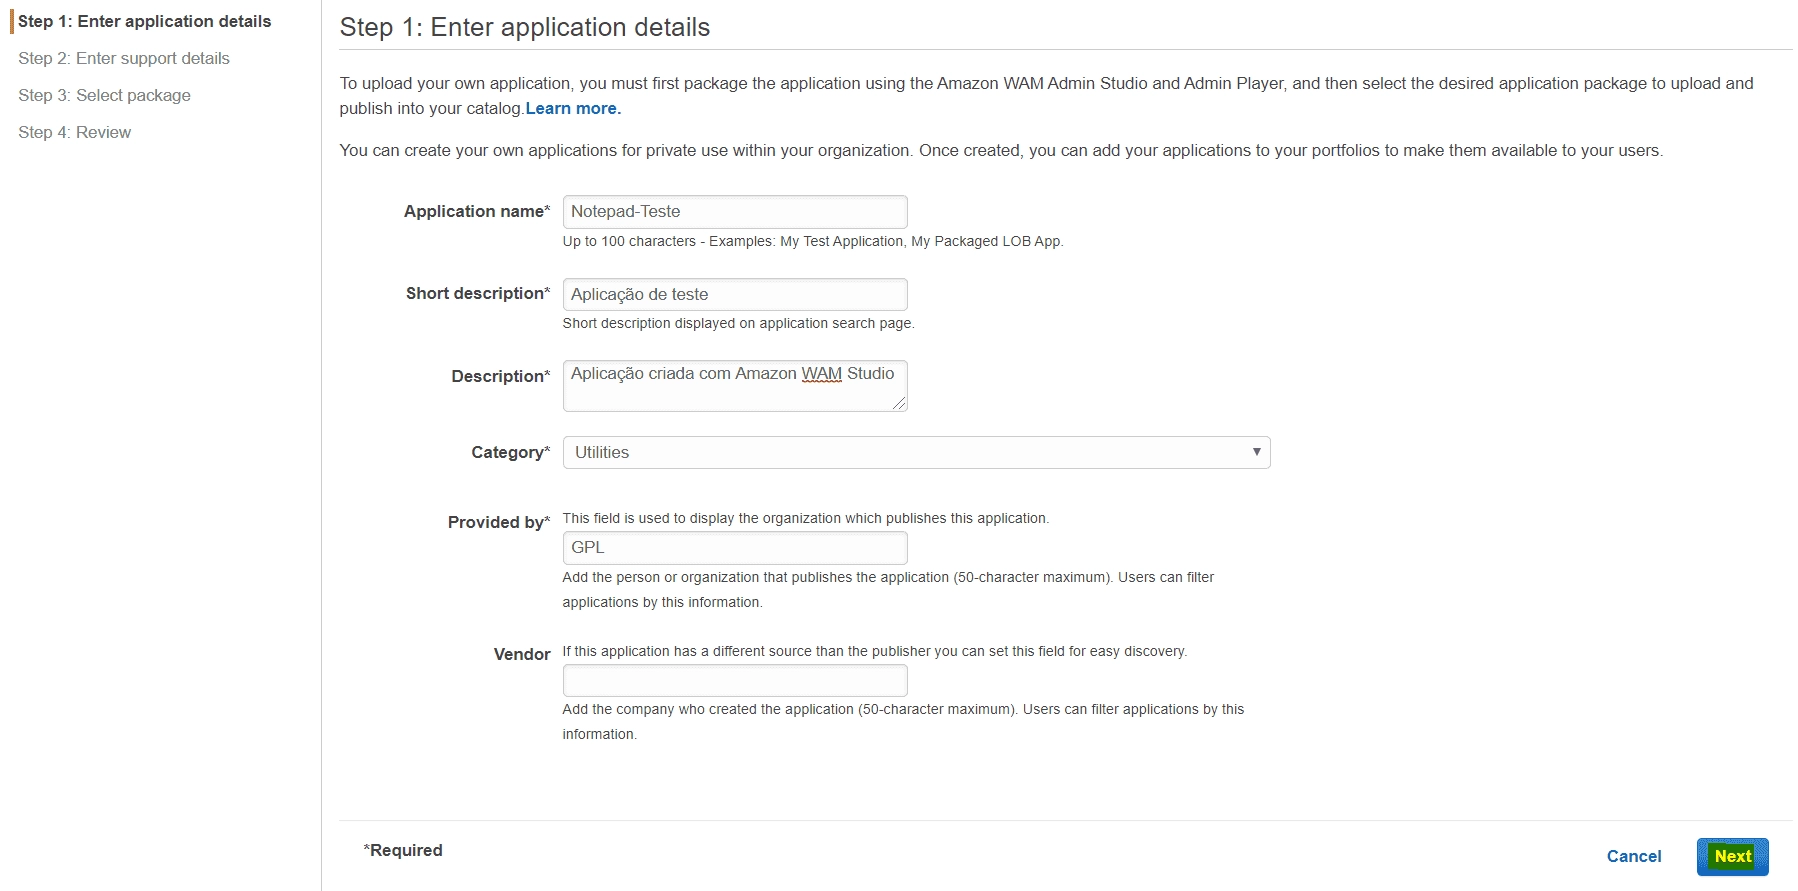
Once the application is approved, go to the “Application Manager” tab in the management console and click “Create new application”.
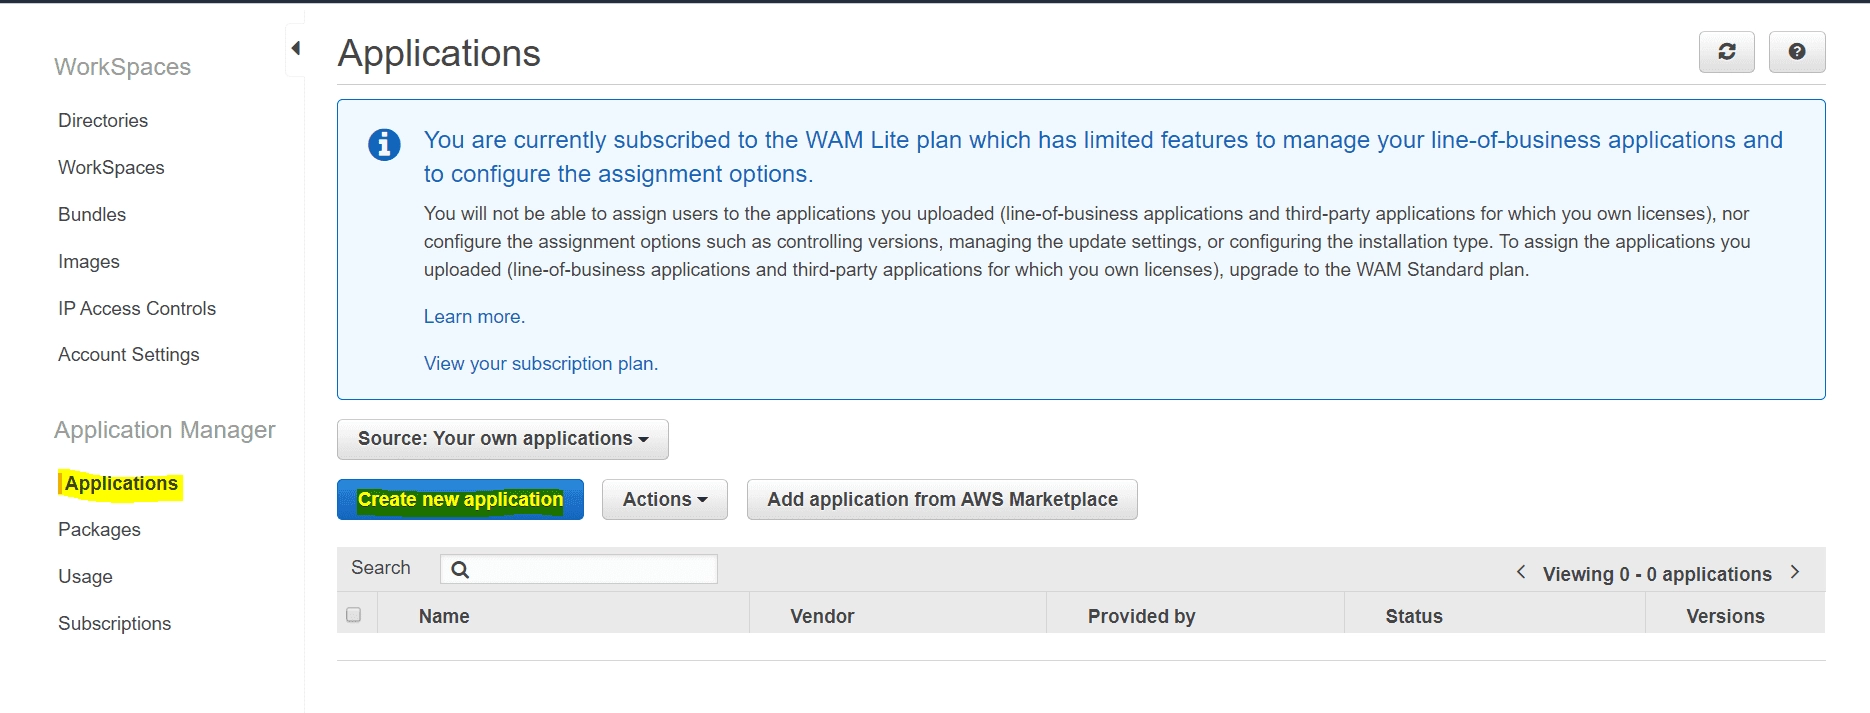
Enter the information in the form.
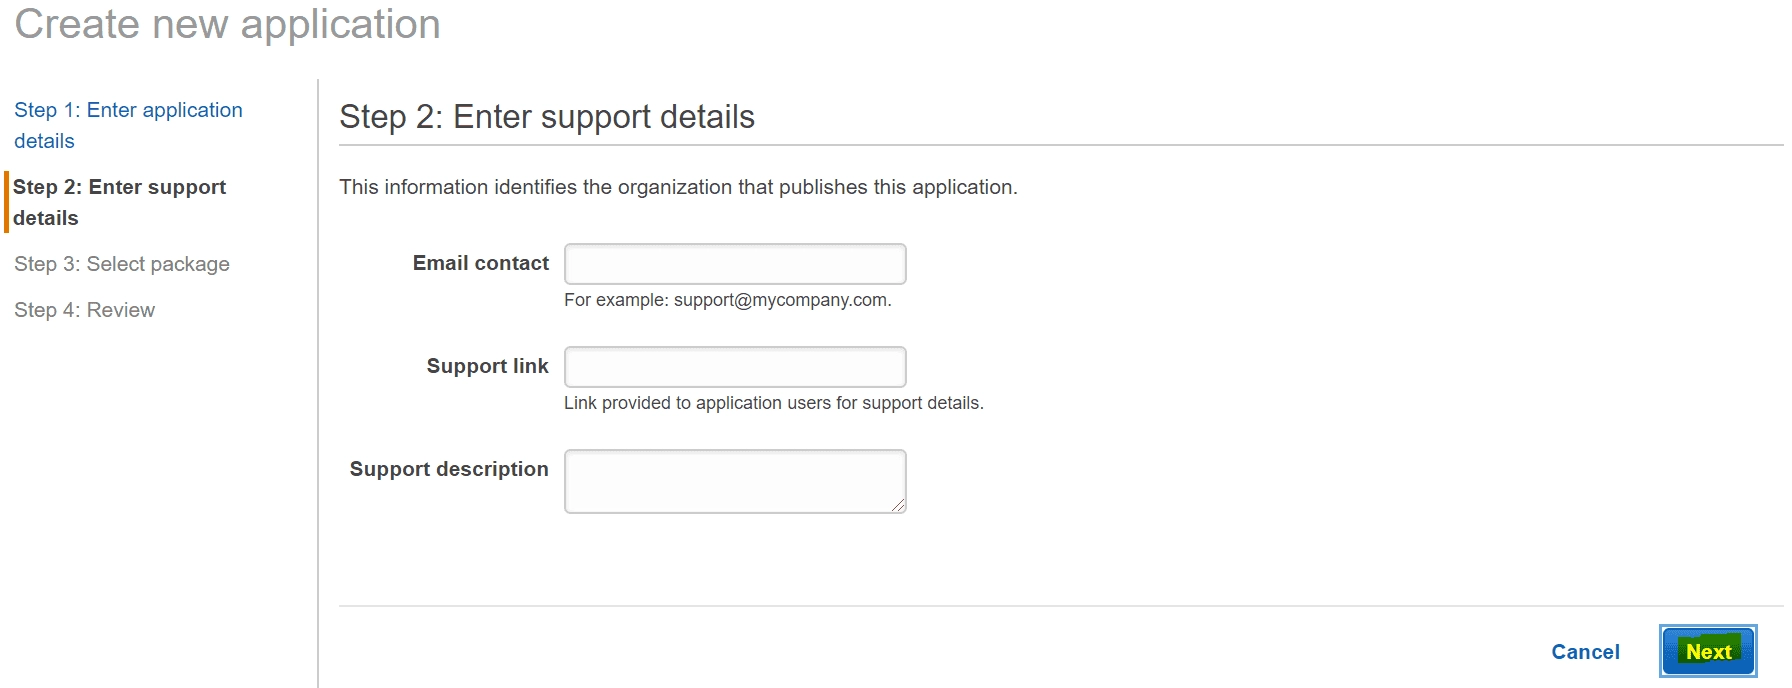
Enter the information for contacting support.
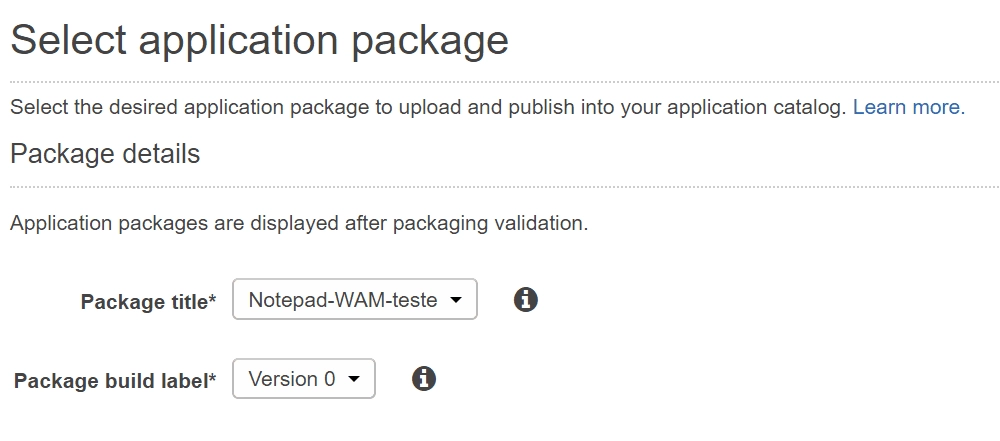
On the next screen, select the package.
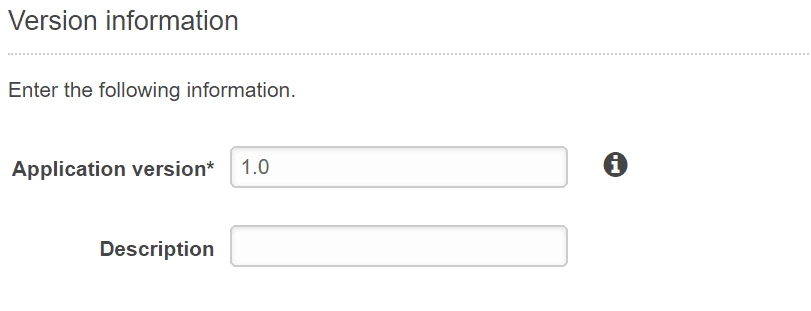
Fill in the information about the application versioning.
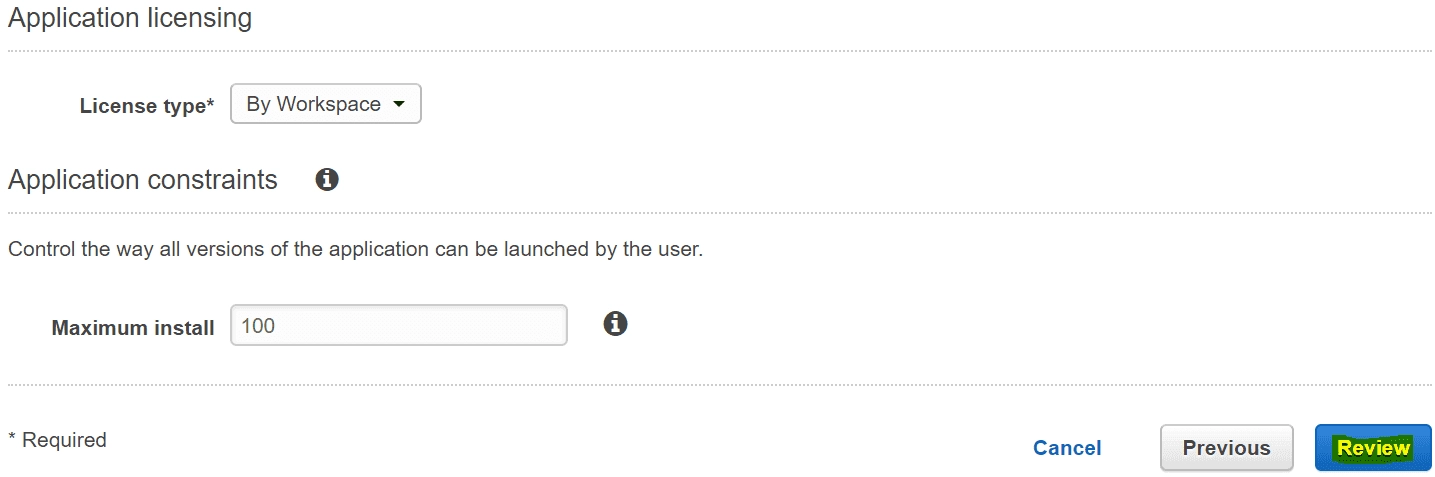
Configure the options about application distribution and licensing.
Step 6: Associating an application with the user
NOTE: This step can only be performed if there is a subscription to the WAM Standard plan, since its charge is made monthly by the number of associated users.
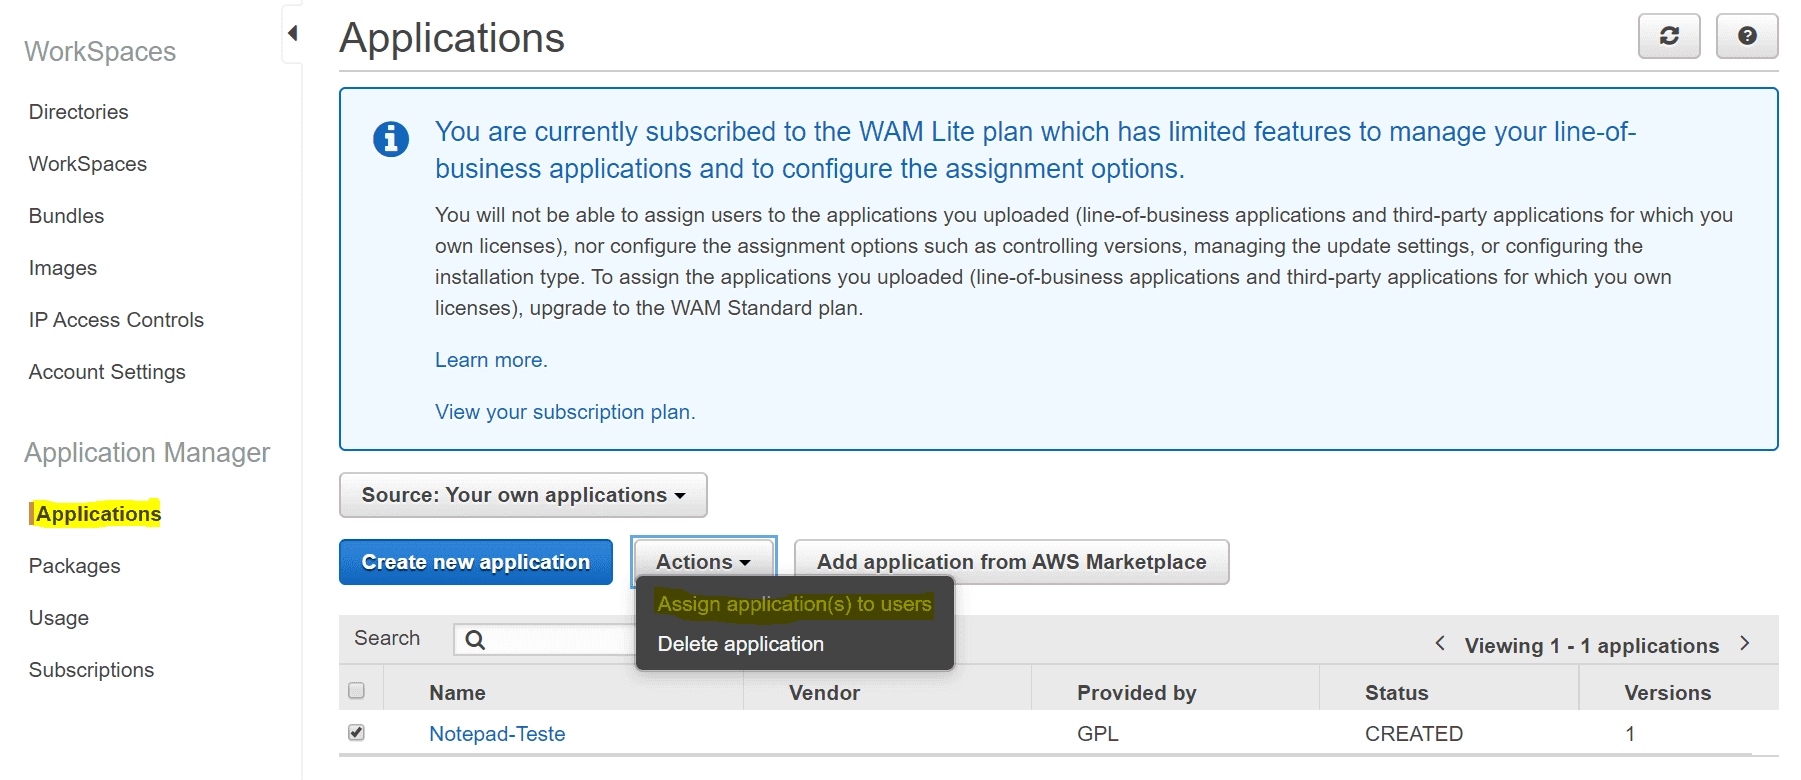
In the “Applications” tab, select the application we configured in the previous steps and then click “Actions” and then “Assign application(s) to users”. Then just follow the “Step 2: Associating an application with the user” from the Post How to Create an Amazon WorkSpaces Application Manager.
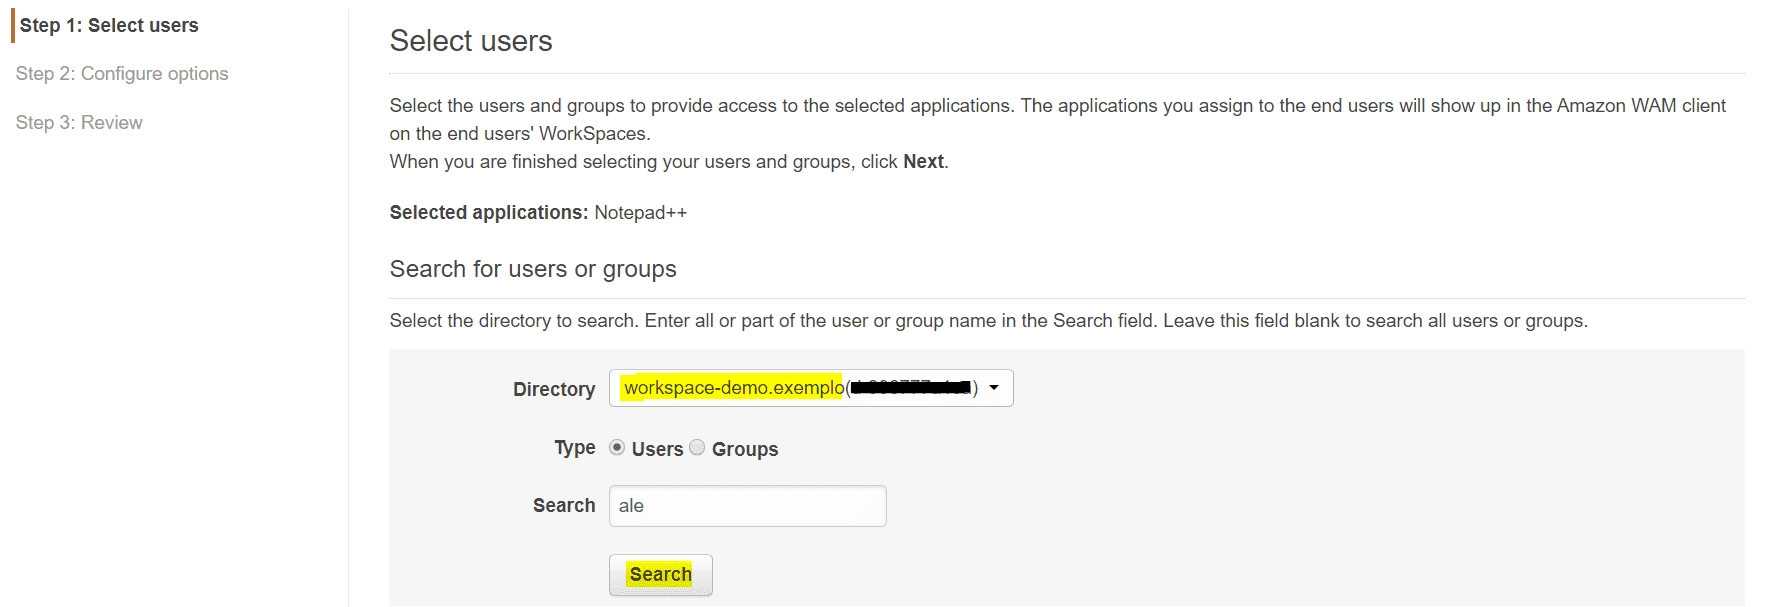
On the user selection screen, choose the domain where the user(s)/group(s) to be associated with the application are located, and then search for the desired object.
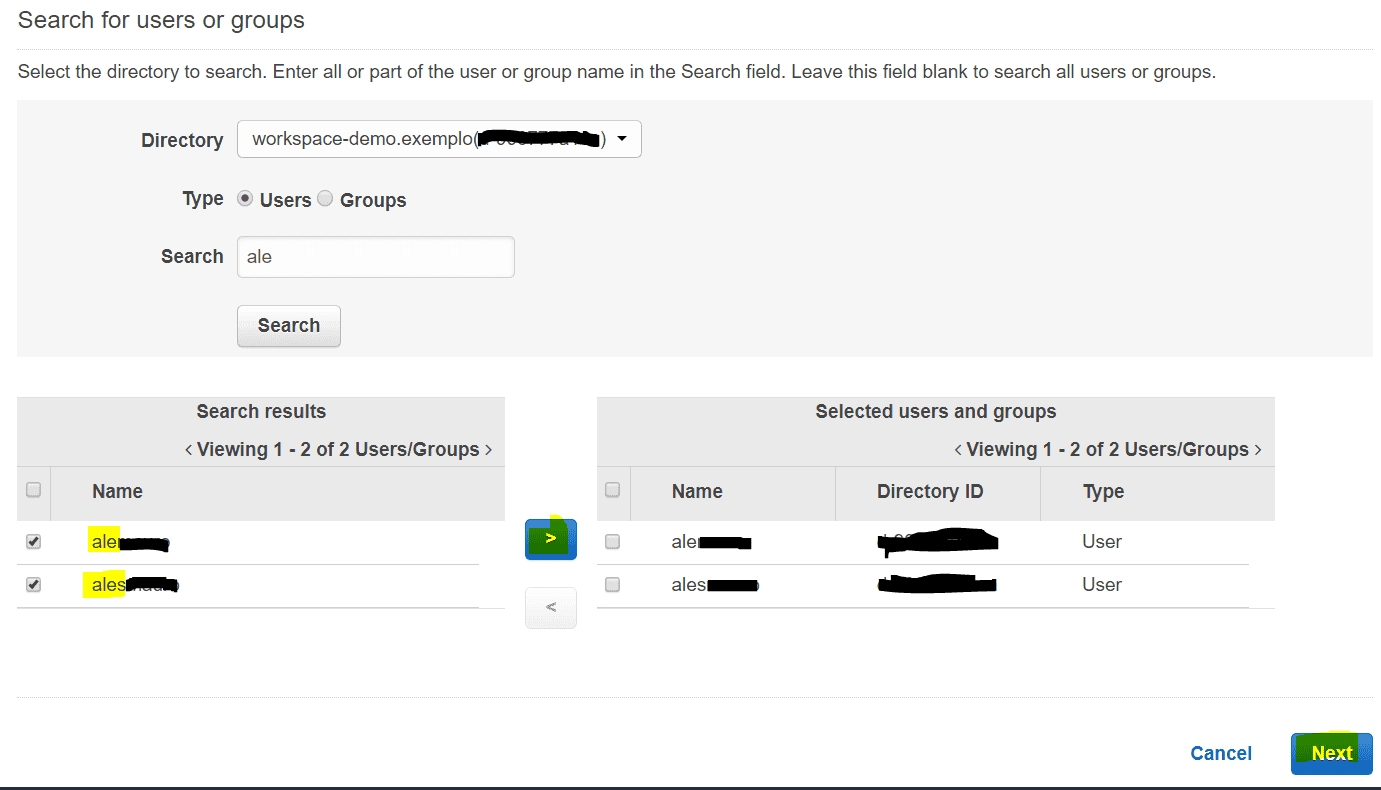
Select the user(s)/group(s) and advance to the next screen.
Step 7: Installing the application on the WorkSpaces
Within the WorkSpace, start the “WorkSpaces Application Manager” application. If it is not installed, it is located in C:\Program Files\Amazon.
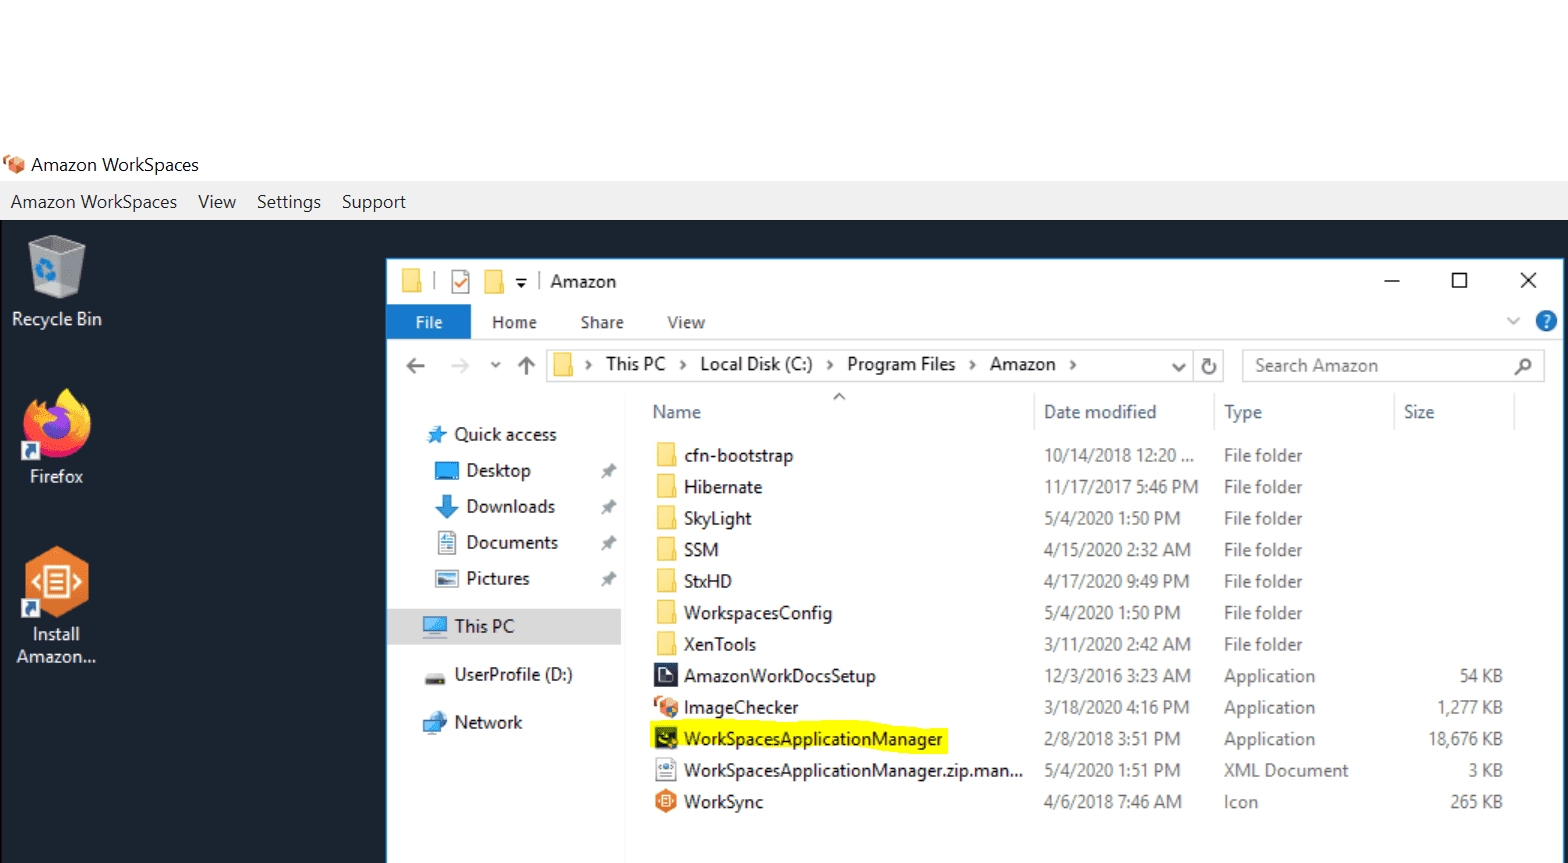
Once the application starts, select “Discover” and then “Install”. As soon as the installation finishes, the application will be ready to use.
Availability and Pricing
Regarding availability, as long as WorkSpaces is available in the desired region, it will be possible to use WAM. For more information about it, just go here. Pricing is tied to the WorkSpaces value, check here, along with the subscription to the Amazon WAM Standard plan, where a charge of USD 5 per user who uses it per month will apply.
Summary
In this article we saw how to create a package with an application of our choice, approve it, and assign it to the users and groups of our domain. However, this is just one of the ways to make them available. In this article, see how to assign applications available in the AWS Marketplace to our users.
